Creating an Article and Edit Images - CMCC 11
Whether you are a Newbie working with CoreMedia Studio, or have already created numerous articles: this guide is intended to provide you with all the basics around creating articles plus a few helpful hints.
 What you'll learn
- Learn how to create a new page
- Learn how new pages are added to the navigation
- Learn how to create a new page from a predefined template
 Prerequisites
- A working Login to CoreMedia Studio
 Time matters
 Should I read this?
Introduction
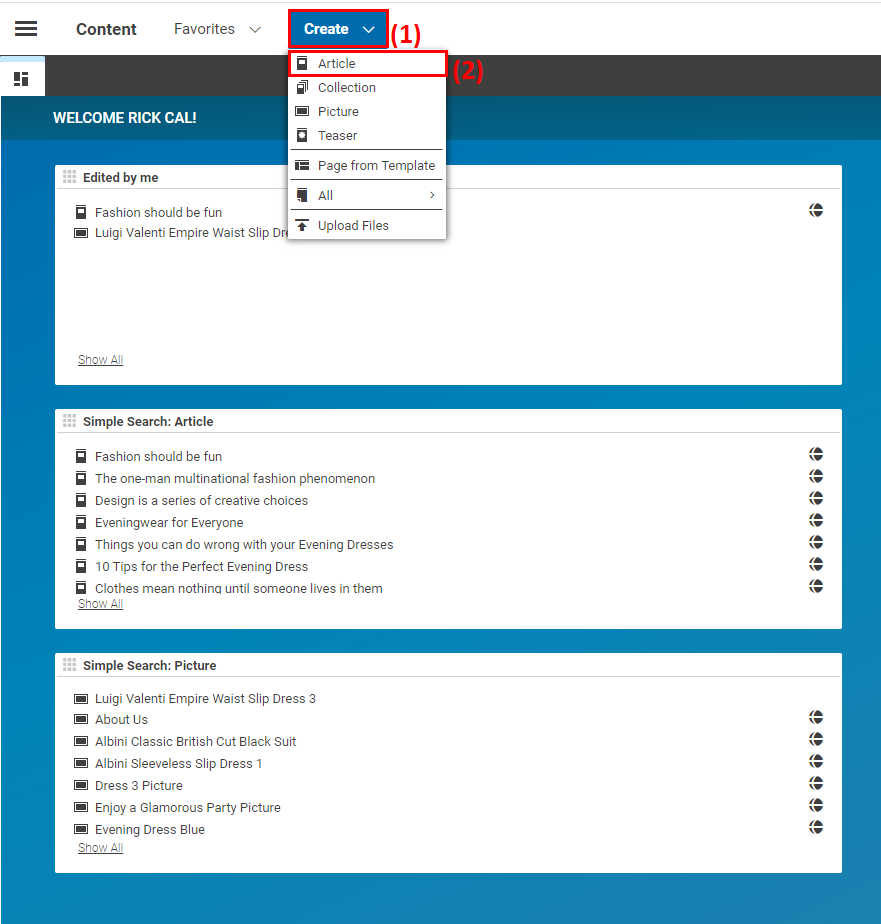
In CoreMedia Studio, an Article is one of many content items. Other examples of content items include pictures, videos, and more. To create a new article from scratch, click on Create (1) and choose Article (2) from the list in the drop-down-menu.
Next Steps
-
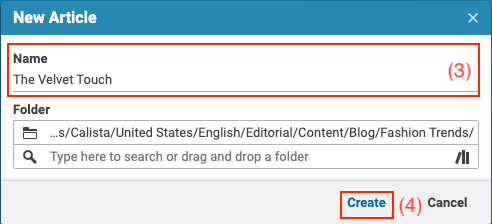
In the New Article dialog box, provide a title for your article in the Name field (3), then click on Create (4).
-
Next, edit the basic elements required for most articles:
-
Article Title: Simple text for short text segments, such as headers or subtitles. This field is mandatory.
-
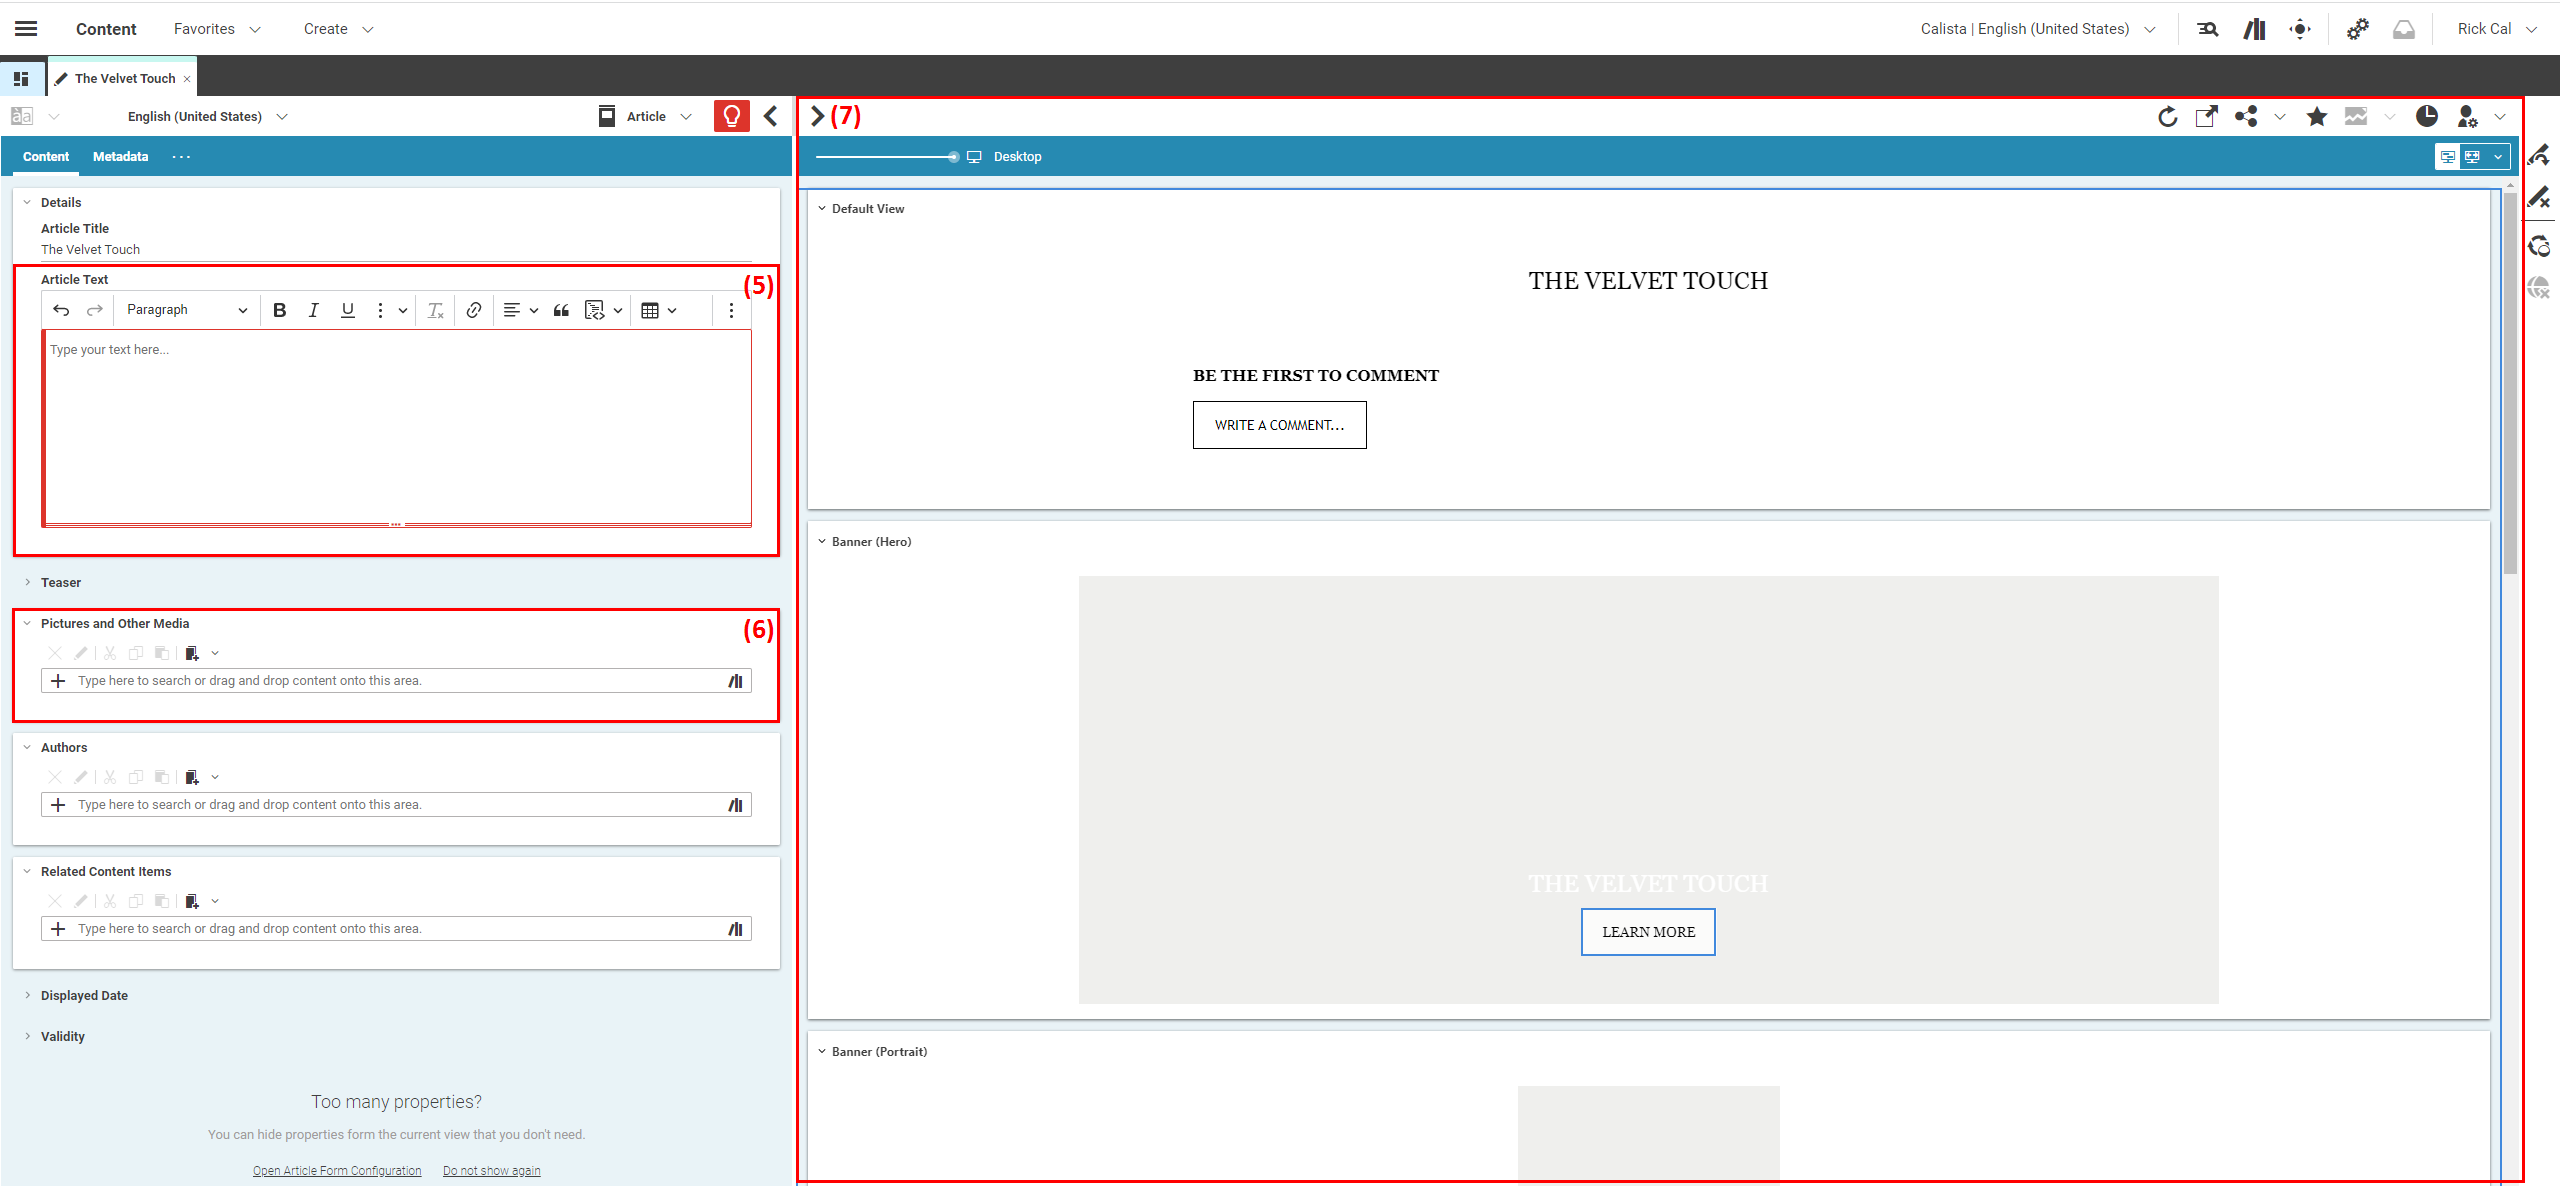
Article Text: Rich text field for longer sections containing, for example, formatting, links, or pictures (5). This field is mandatory, too.
-
Pictures and Other Media: This is where you have different options to add your Pictures and videos (6).
Once you have added content, you will see it in the Preview (7) on the right-hand side.
To learn more about editing content in Studio, especially the options you have for your article text, have a look at the Rich Text Editing chapter in the Studio User Manual.
-
-
To continue, there are multiple options.
-
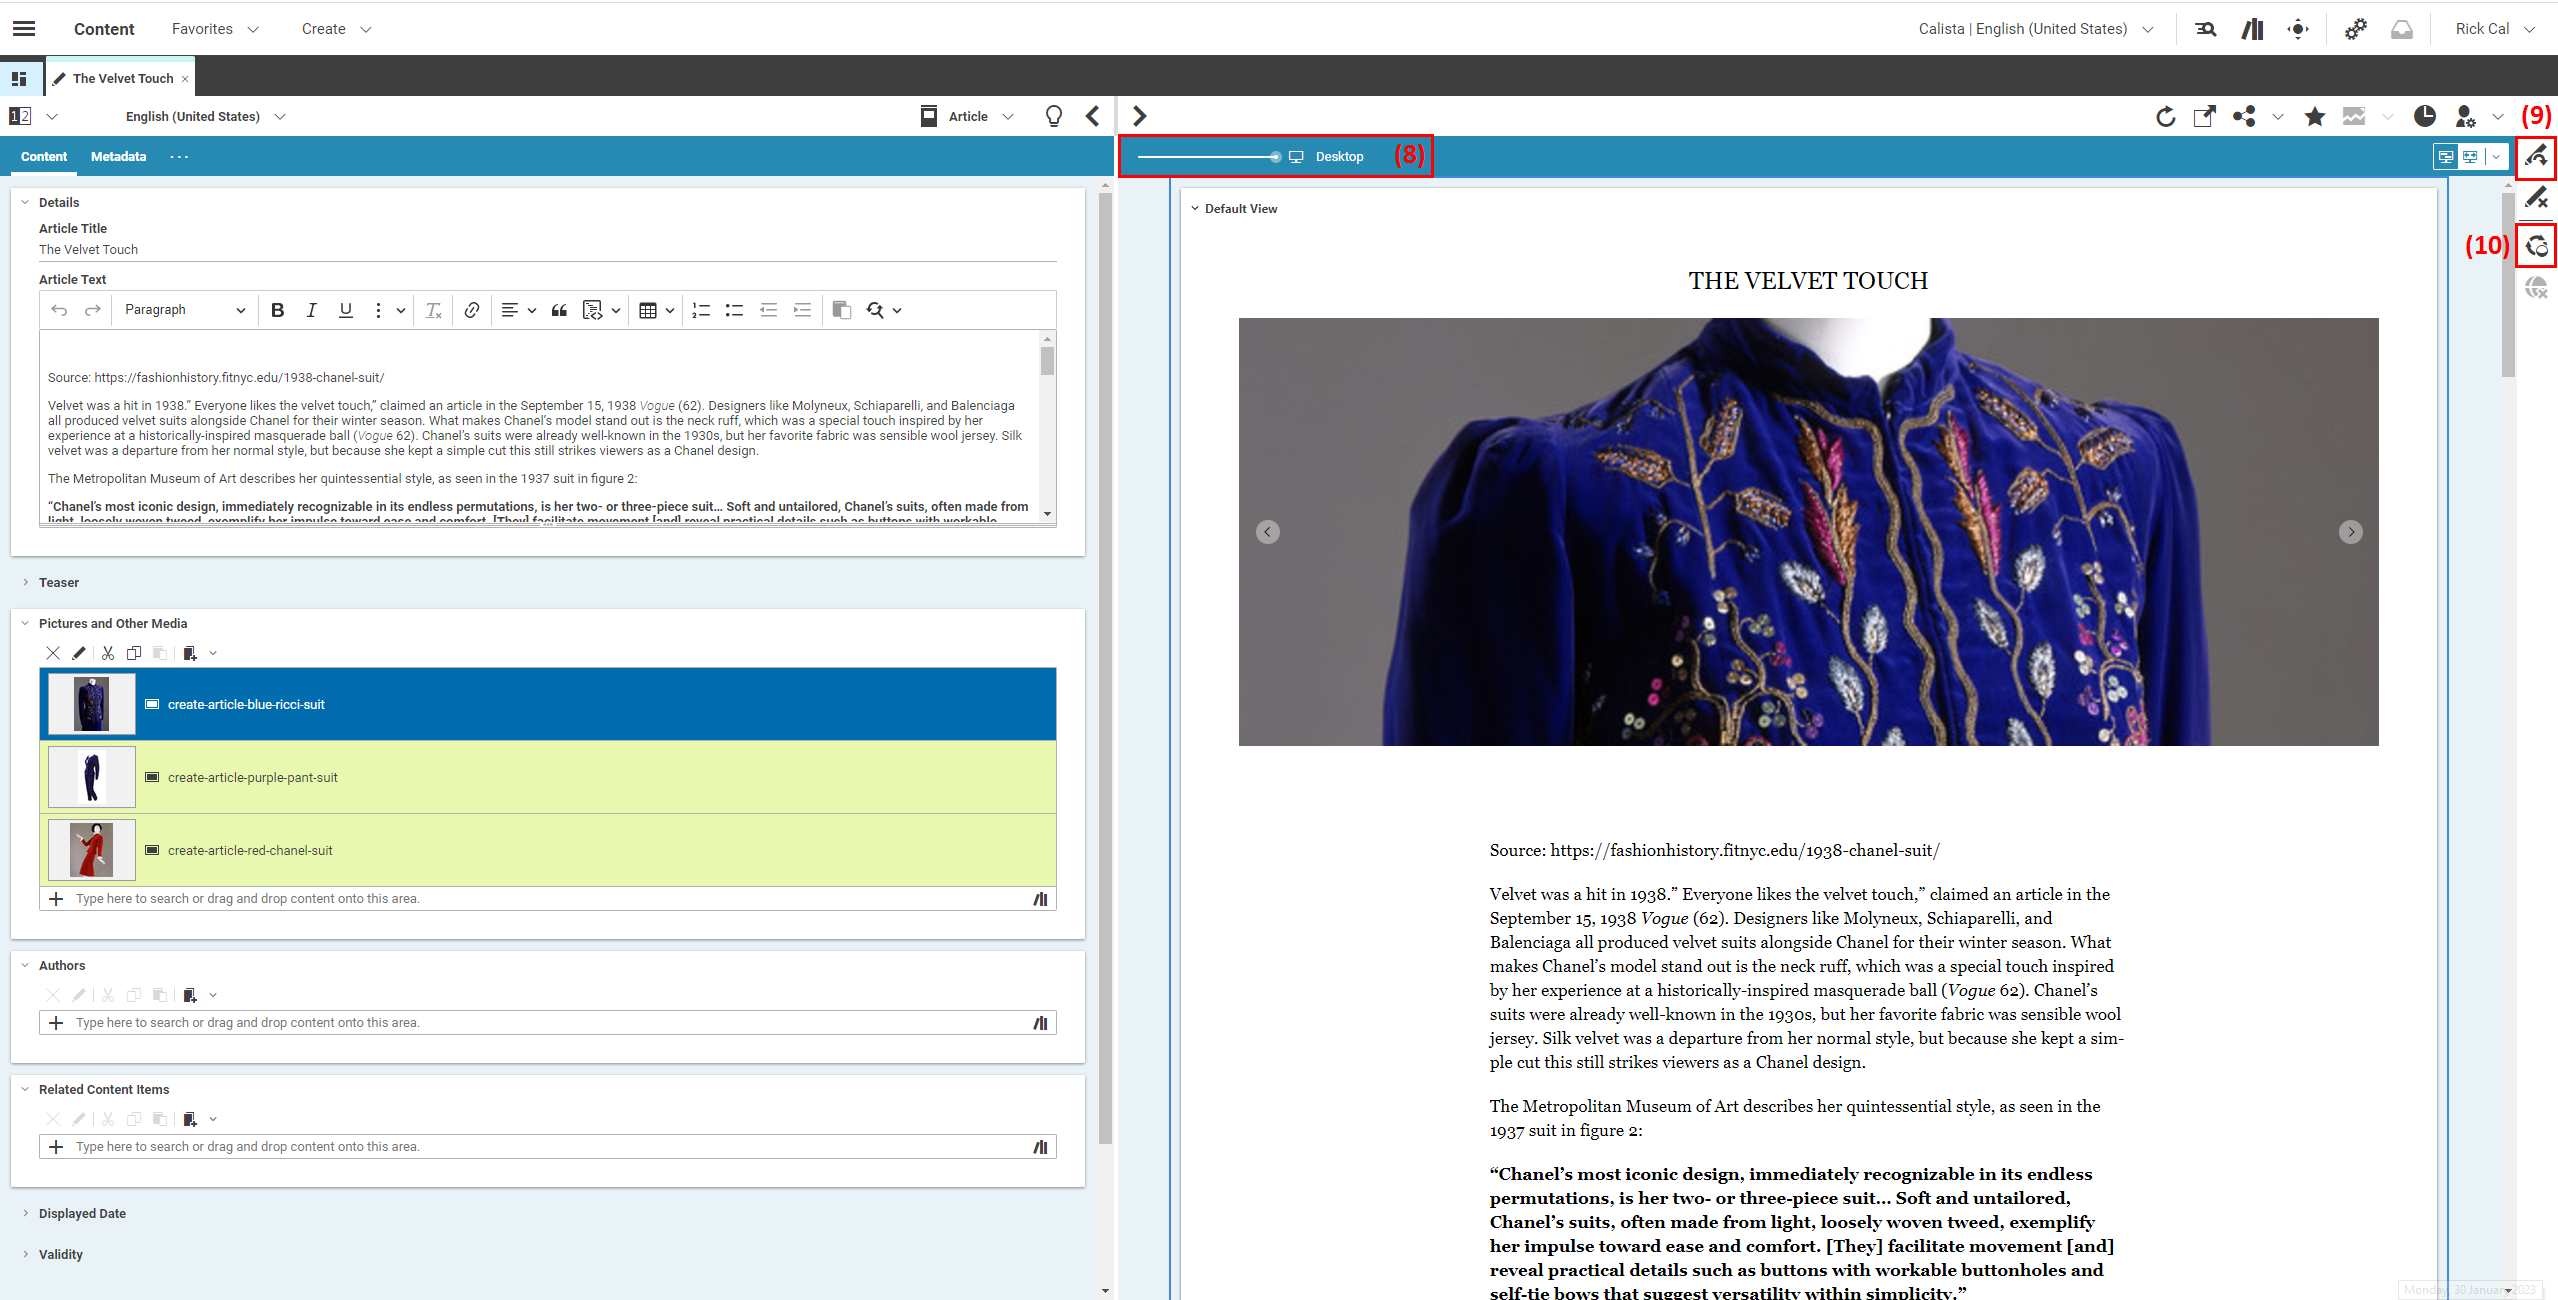
Finish editing and apply all changes: Click the icon with the pen and arrow (9) in the Action toolbar on the right.
-
To undo your changes, there is the button Revert Changes underneath.
-
Publish: click the button that indicates a process cycle (10).
CoreMedia Studio’s preview features a slider tool (8). Your end users can switch between devices with different resolutions. The preview will show the page as if it was to be viewed on a device with a different resolution than a "conventional" desktop display (a mobile device for instance).
-
Inserting and Editing Images
You can drag and drop images from the library or other locations into a rich text field and edit the images.
Inserting an image
-
Simply drag the image (for example, from the Library) with pressed left mouse button to the position in the rich text field where you want to insert the image.
-
Release the mouse button.
The image appears in the text field.
Deleting an image
-
Click the image to select it.
-
Press Del on your keyboard.
The image has been deleted from the rich text field.
Editing an image
When you select an image, the contextual toolbar opens up from which you can edit the behavior of your image.
Positioning the image
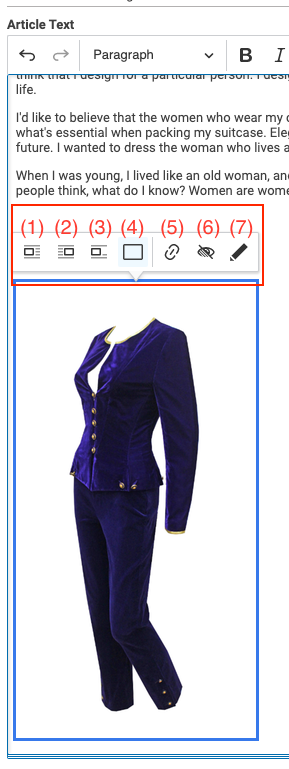
You can edit the position of the image in a rich text field. Select the image, so that the contextual toolbar opens. Select one of the options (1) to (4) to position your image.
Linking the image
You can add a link target to an image which will be called when you click the image. Select the image and click the icon (5). You can now add a link as described in the Studio User Manual.
When you want to edit the link, you have to select the image and again click on the Link (5) icon. Then, the contextual toolbar of the link opens up.
Adding Alt Text
By default, images have the image title as alternative text. You can overwrite this by clicking the icon Change image text alternative (6). Simply add the text in the opening dialog and click the save icon.
Edit and open an image in a new tab
Clicking the icon Open in tab (7) opens your content item in a new tab. To learn more about all the options you have here, read the Editing Images chapter in the Studio User Manual.
