
Creating and Editing a Shoppable Video - CMCC 13
Last updated 16 minutes ago
The Shoppable Video function lets you feature your products by linking them directly from a video. You just need to follow a few simple steps and you will be ready to go and add this brilliant, yet simple function to your site.
 What you will learn
- Add content items to a video
- Edit the Timeline link list
- Ensure that your Shoppable Video works as intended
 Prerequisites
- A working Commerce integration into Studio
- Studio works best in Chrome
 Target Audience
This guide is for Marketeers, Project or Team Managers.
Table of Contents
Getting Started
This feature is intended to boost your sales by showing buyable products that match the content of the video. To put it in a nutshell: what the Shoppable Video function does, is that you just need to link the respective products to a video and define the time slots when the products should appear.
Do you have your video and content items already in place? Excellent, you can now begin with the first step.
Steps
-
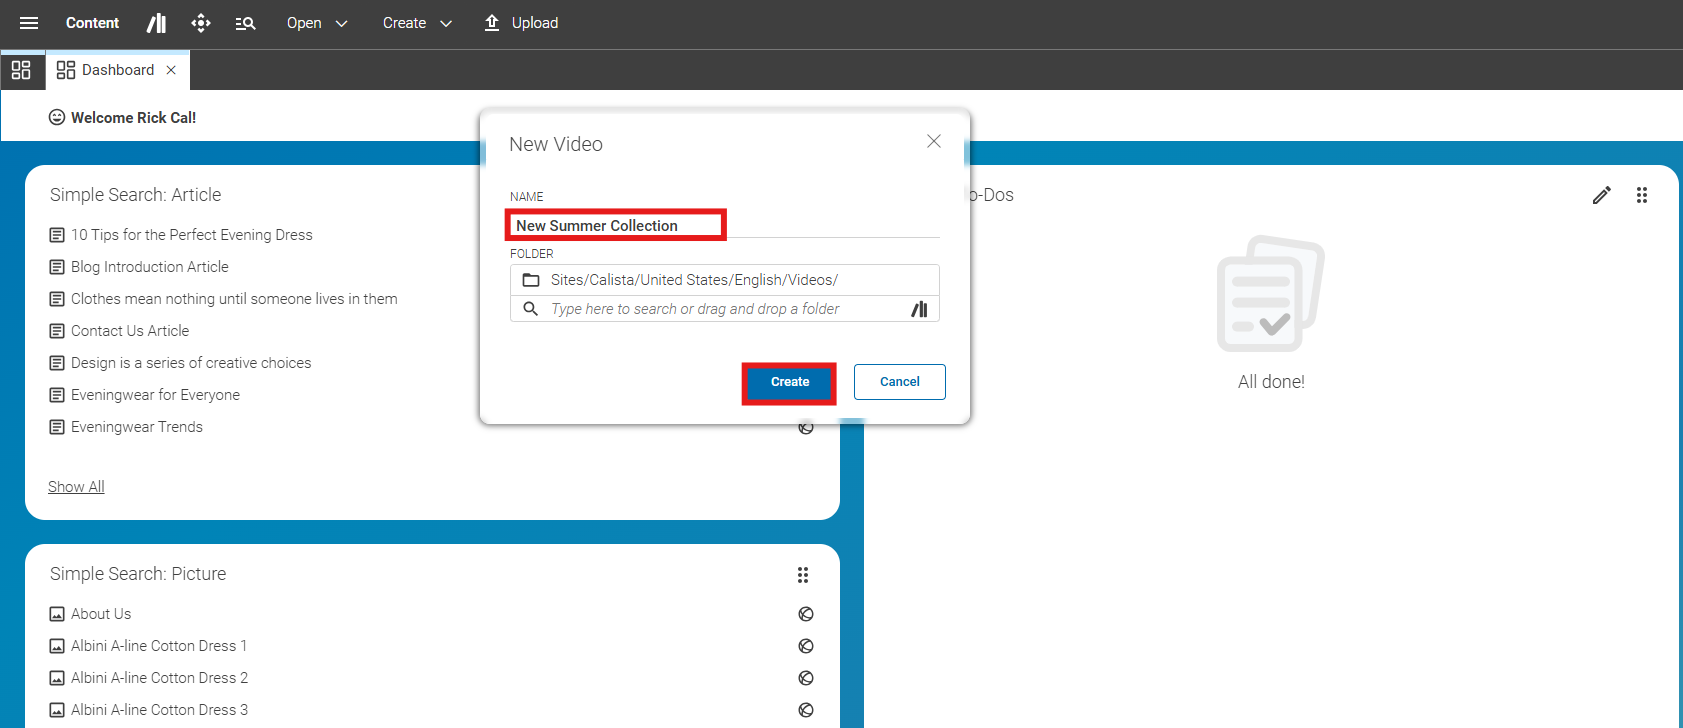
Create a new content item of the type Video
and add a title for your video in the Name field. Next, click on the Create button.
-
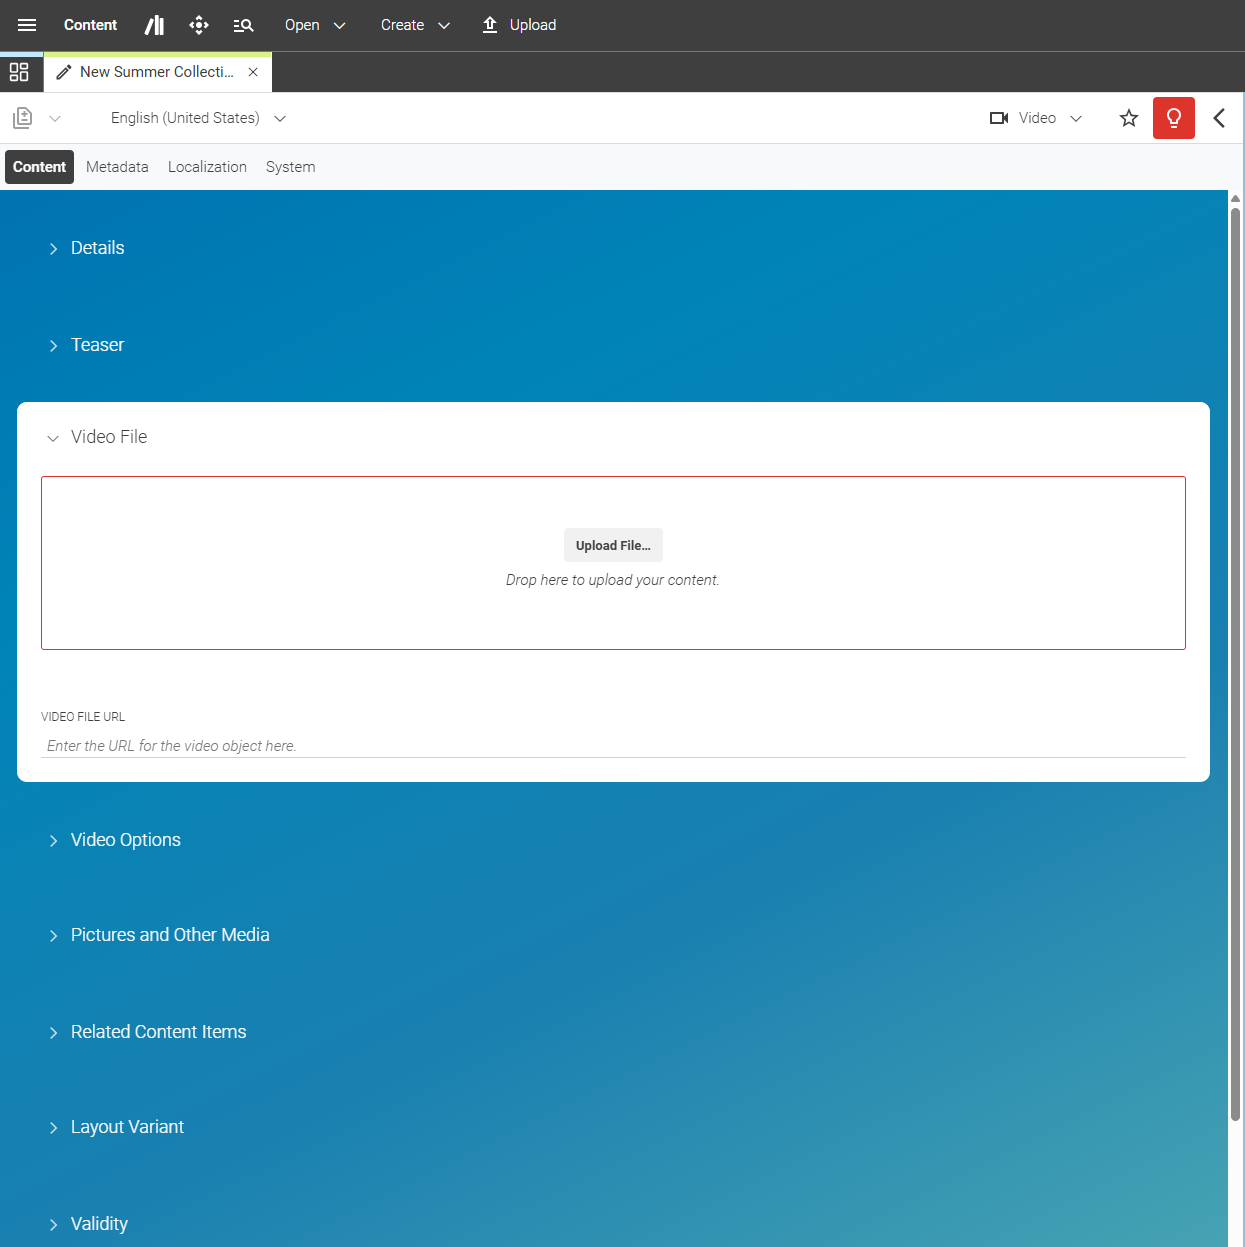
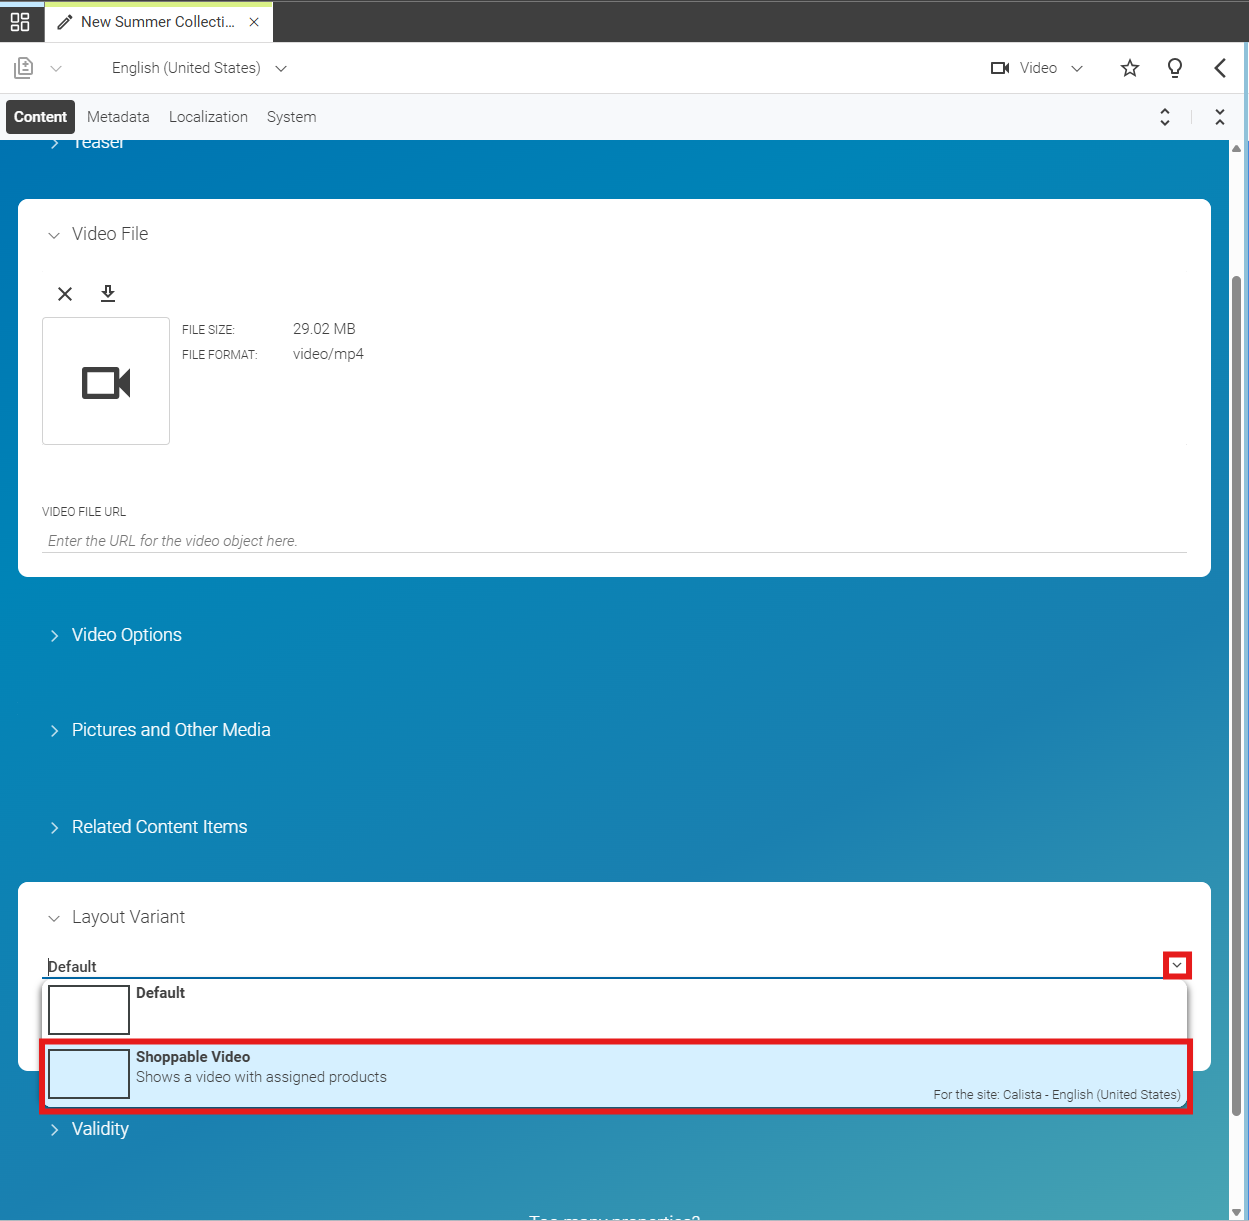
Scroll down to the property Video File and upload your video, which must be in the format MP4.
-
Scroll down to the property Layout Variant and change the layout to Shoppable Video.
-
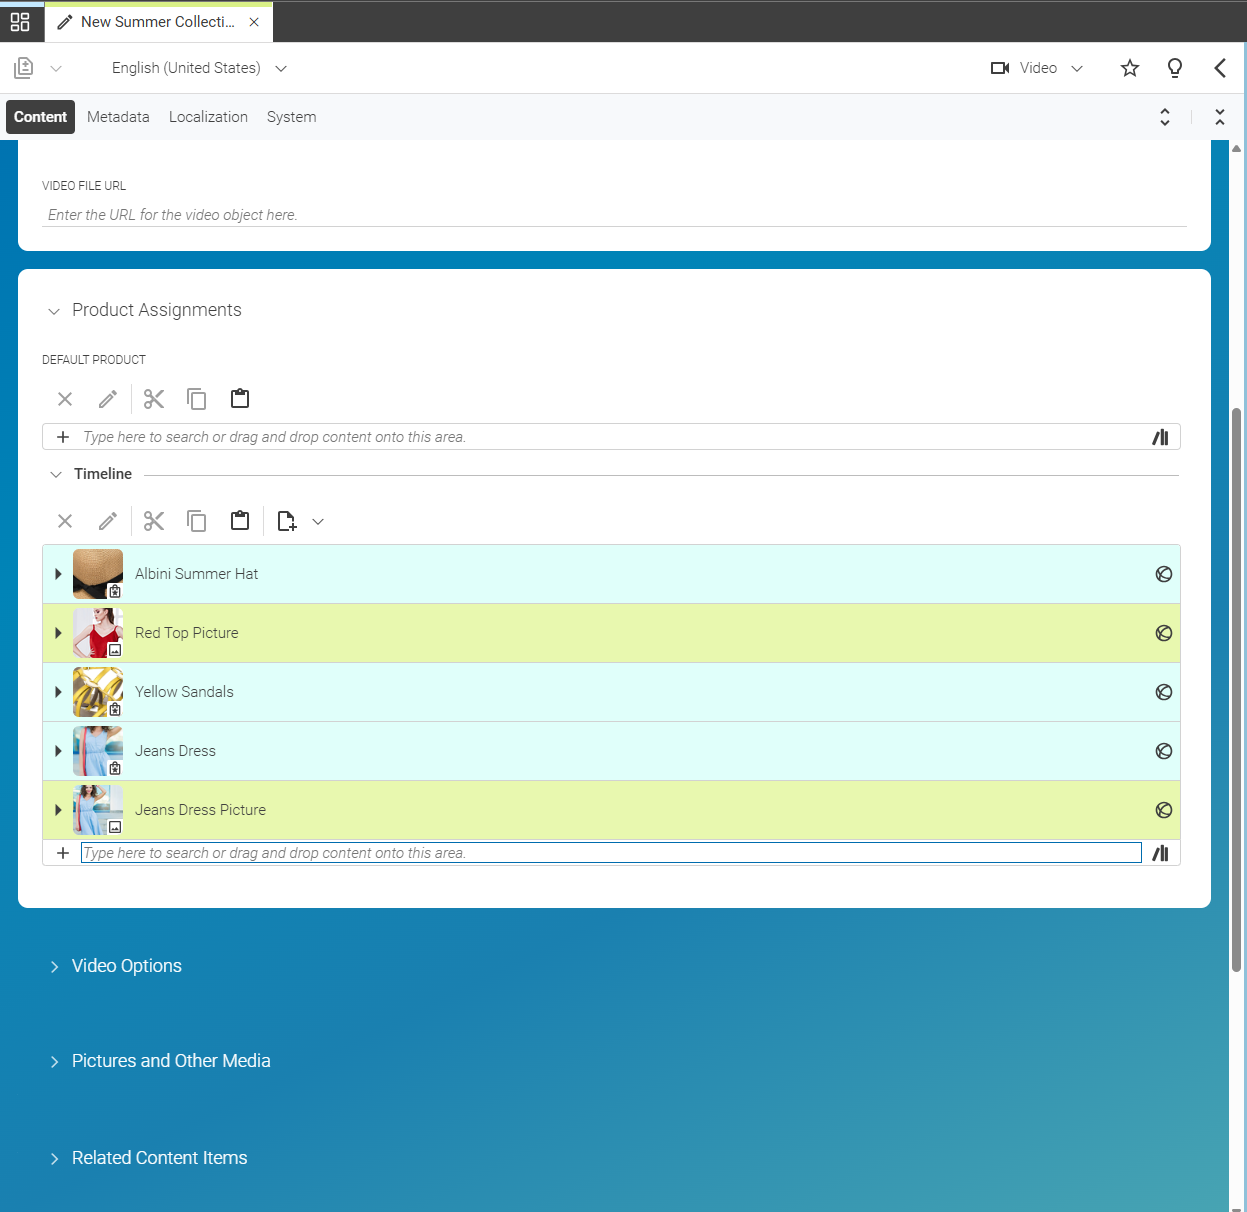
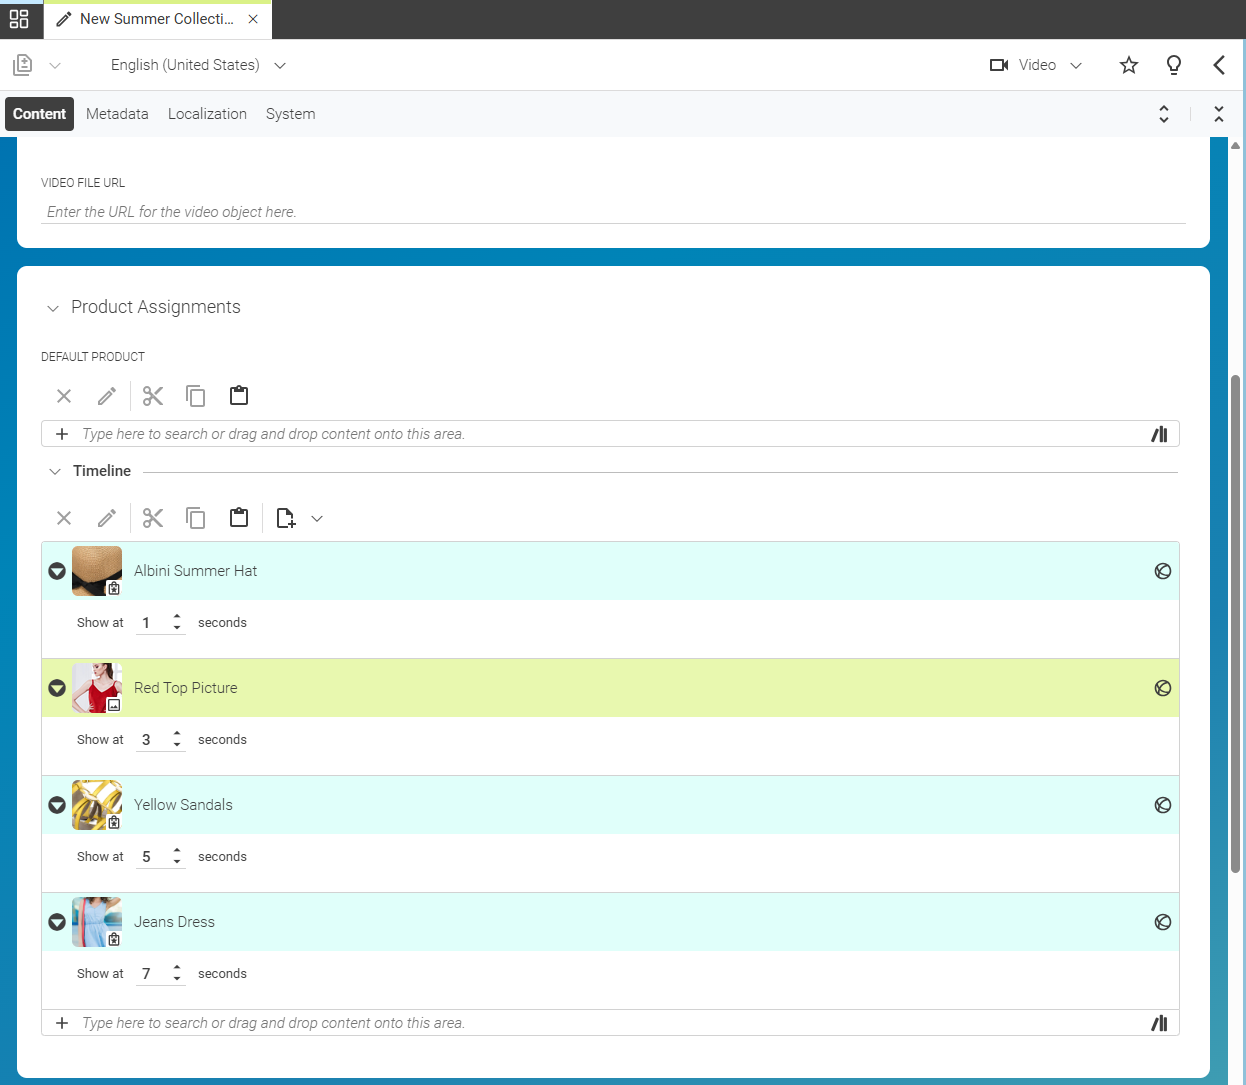
The new property Product Assignments appears.
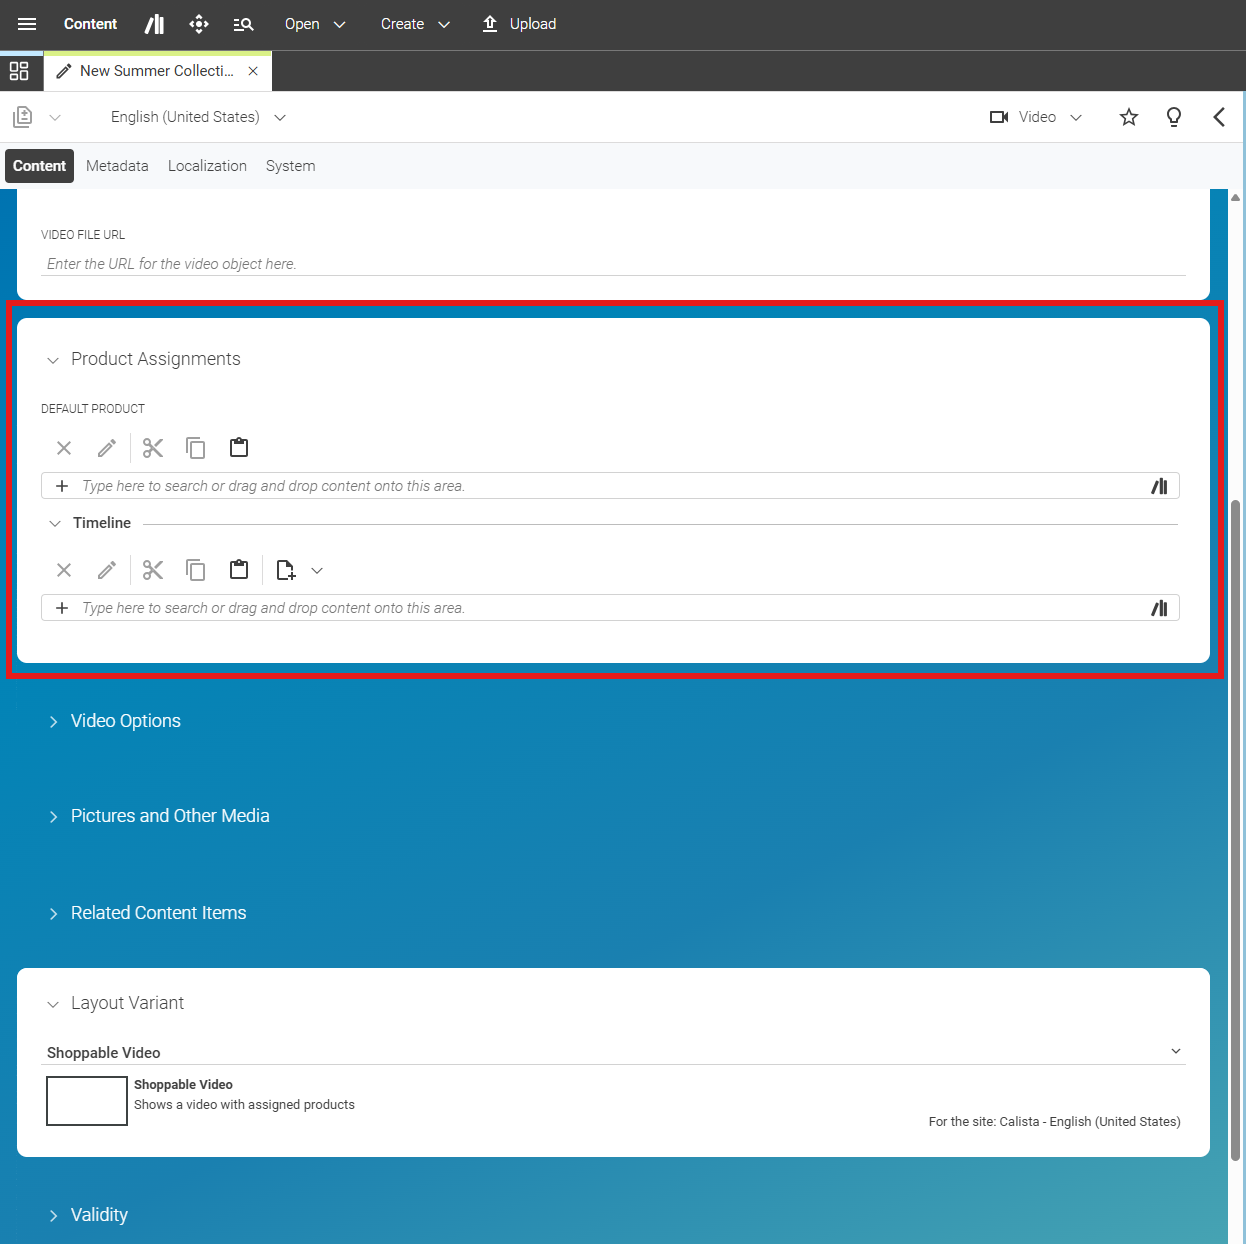
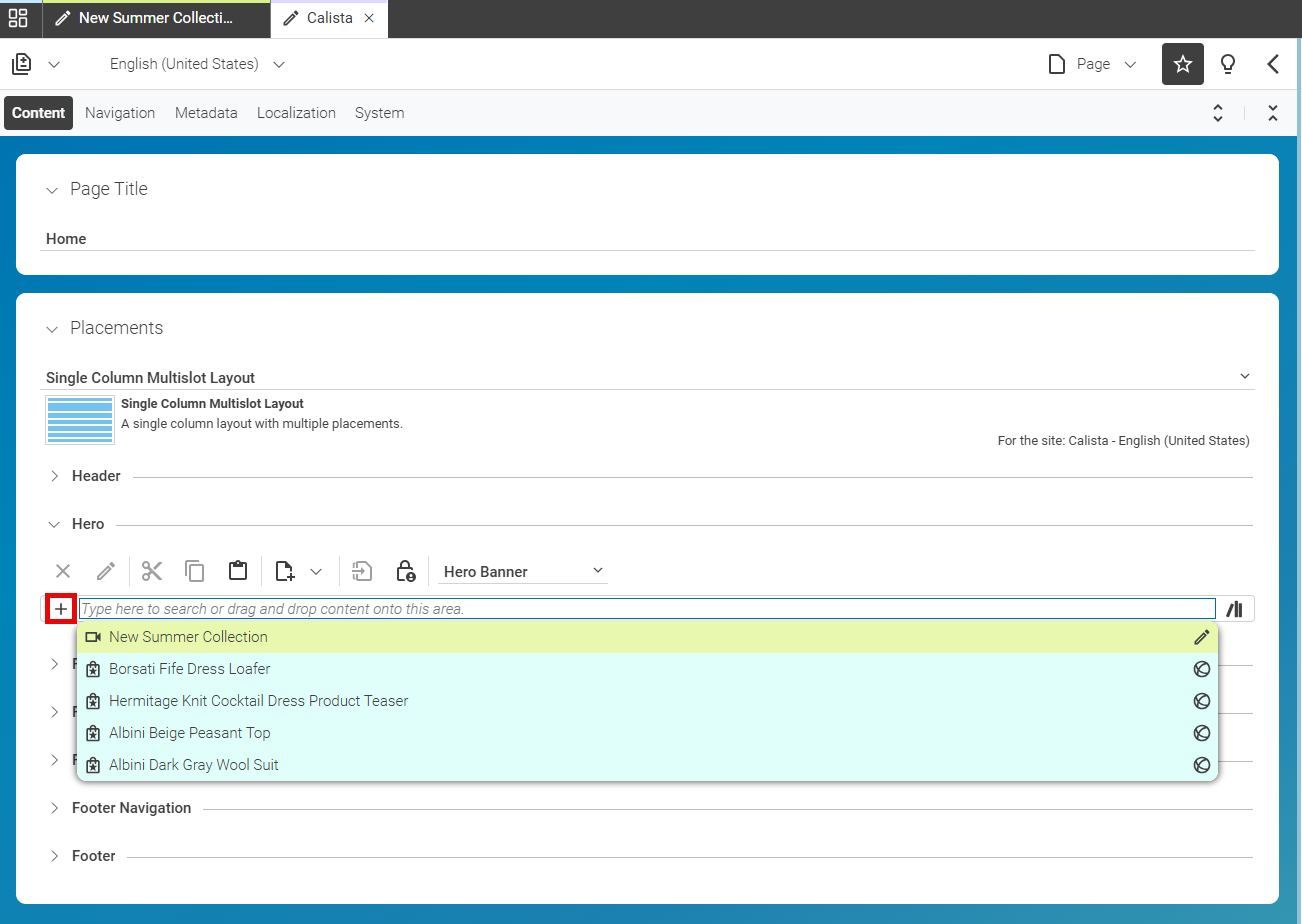
In the Timeline you may now add all content items to the video that can be shown as a teaser, for example, Articles, Images, Collections and many more.
-
For each of your content items in the Timeline, click on the arrow on the left and enter the start time at which you wish the product to appear. The content item will be shown when the video reaches the point in time you have just specified. It will be hidden when the start time of another content item in the timeline is reached.
When the last content item in the timeline is reached, it will be shown until the end of the video.
-
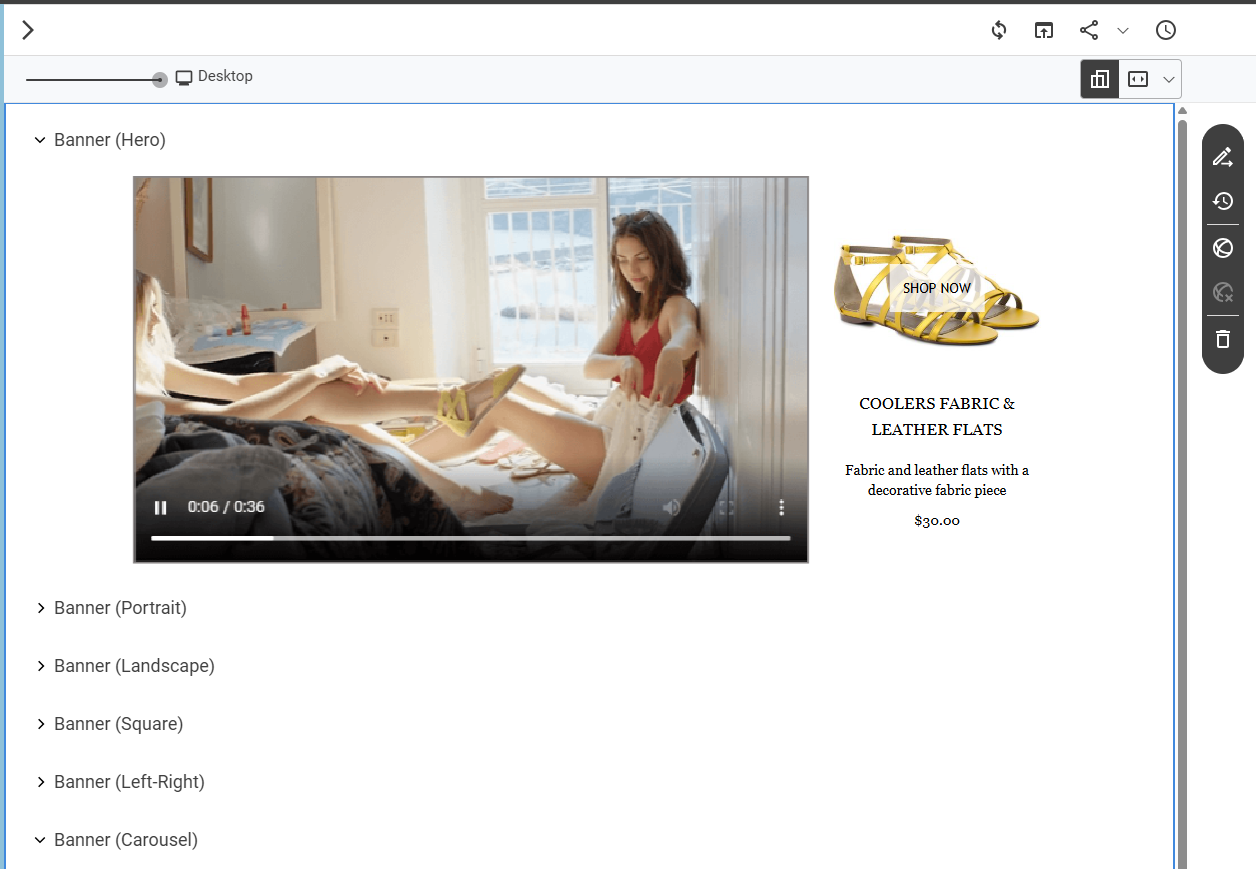
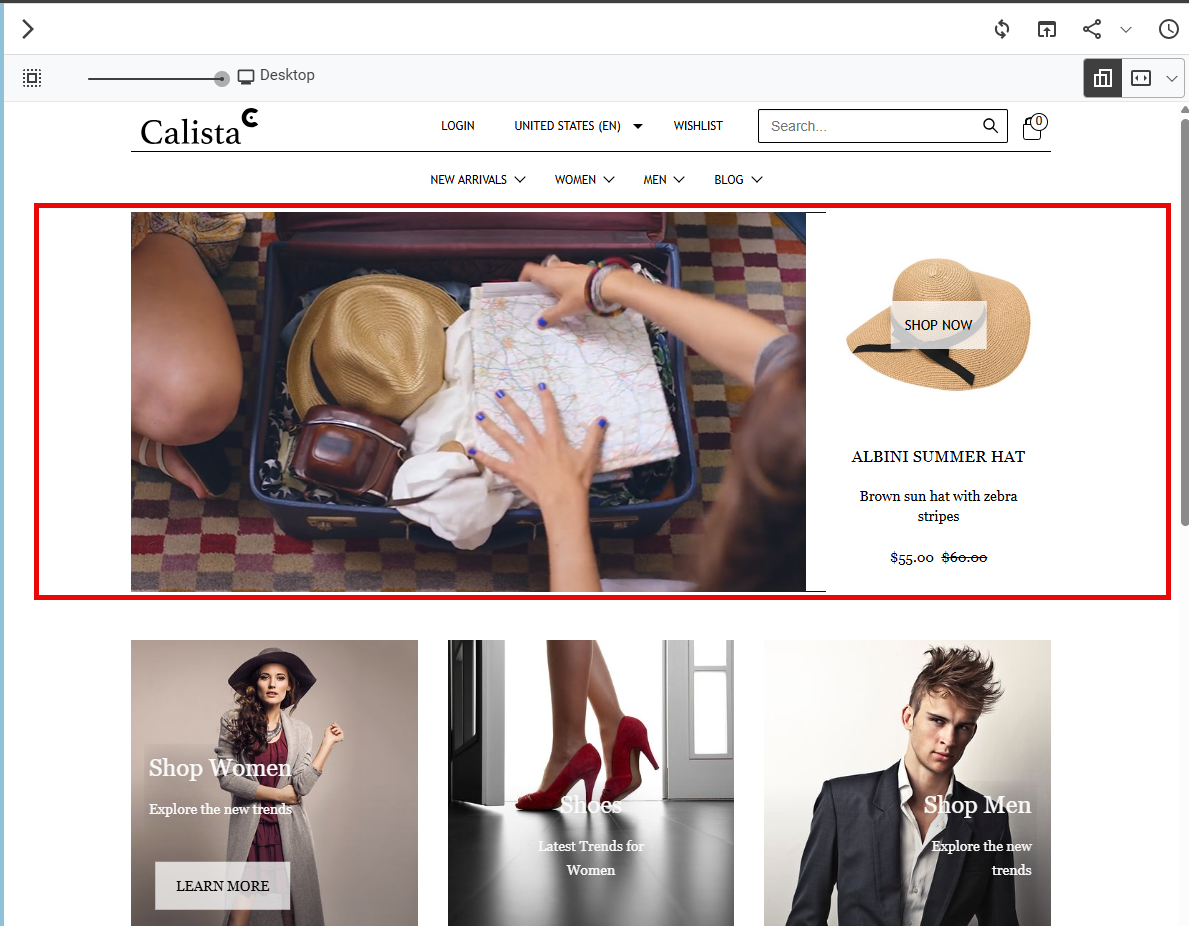
In the Preview you can see your video in the section Banner (Hero).
In case it is not shown, check if you can enlarge the Preview area on your screen.
-
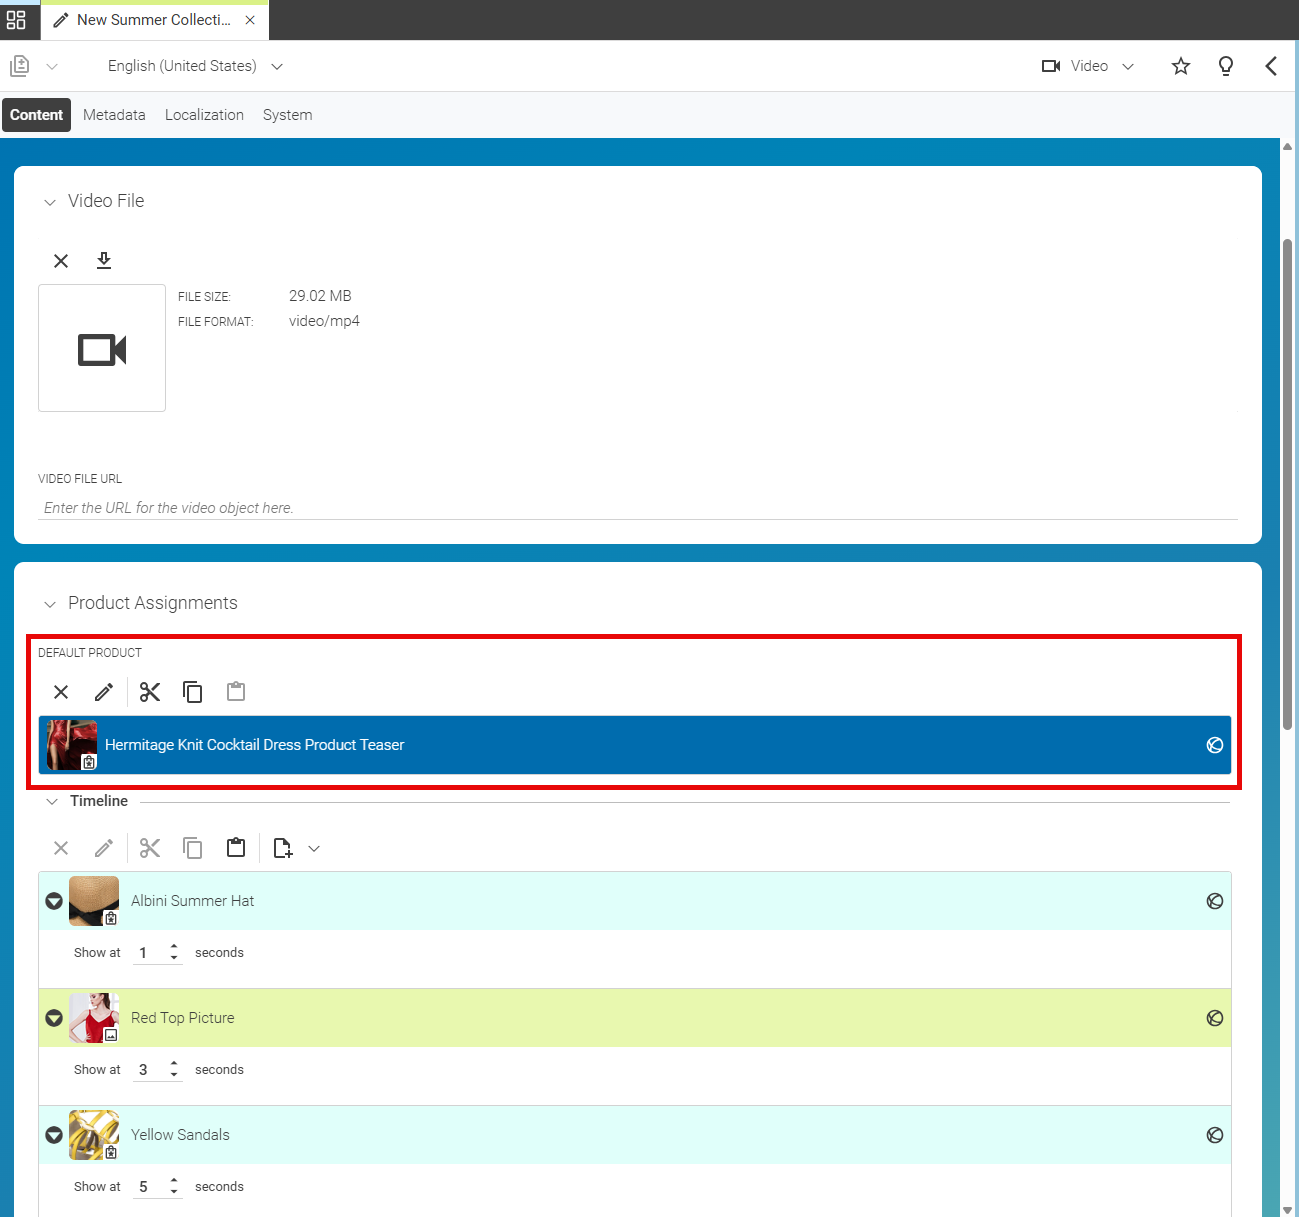
If you do not want your first content item to be shown straight away, you can define a Default Product above the Timeline. For example, you can show a Teaser until your first content item appears in the video.
-
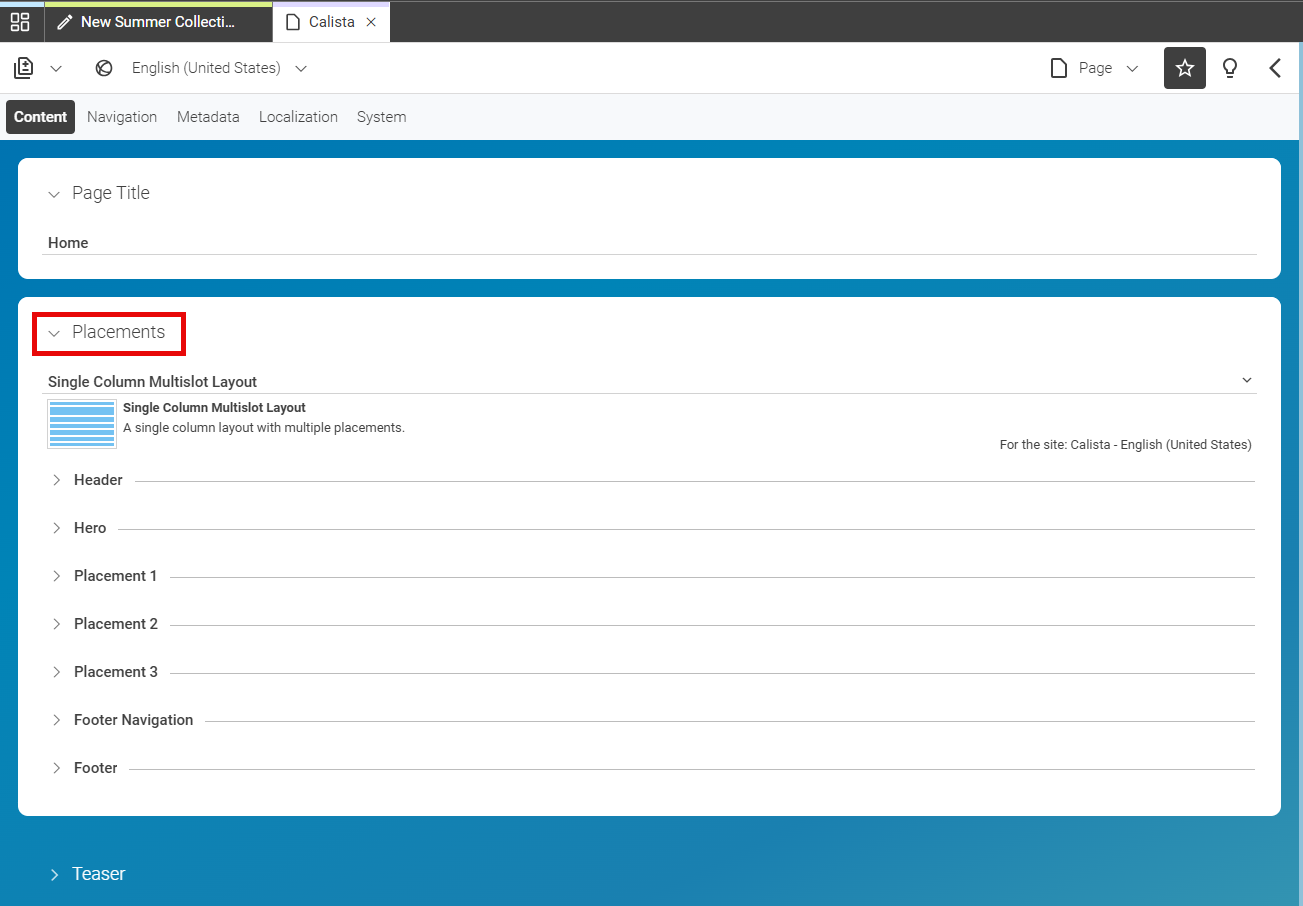
You can add the Shoppable Video to all content items that support video items. For example, you could add it to the Placements on a Page.
How to go on
Congratulations, you have now learned how to create and edit a Shoppable Video. To get more information, please visit our documentation section and have a look at the Studio User Manual.
Need support? Do not hesitate and reach out at support@coremedia.com.
And if you notice any problems, or find bugs, our Support Team will be glad to help as well.
Want more hands-on tutorials and training videos? Visit the CoreMedia Enablement Platform.
Is this page useful?