 What you will learn
- How to set a Preferred Site
- How to set a Preferred Language
- How to set Preferred Colors
 Prerequisites
- A working Login to CoreMedia Studio
 Target Audience
This guide is for Editors.
Table of Contents
Introduction
Studio offers various options to configure your workspace. Once set, your preferences apply automatically each time you log in—so you’re ready to go right away.
Getting Started
This guide covers three customization options:
-
Preferred site: Always start with your most-used site.
-
Preferred language: Choose English, Japanese, or German for the user interface.
-
Preferred colors: Distinguish content types at a glance.
Steps
1. Selecting a Preferred Site
CoreMedia Content Cloud allows you to manage multiple sites. Setting a preferred site ensures that new content is created in the correct location by default.
To select your preferred site:
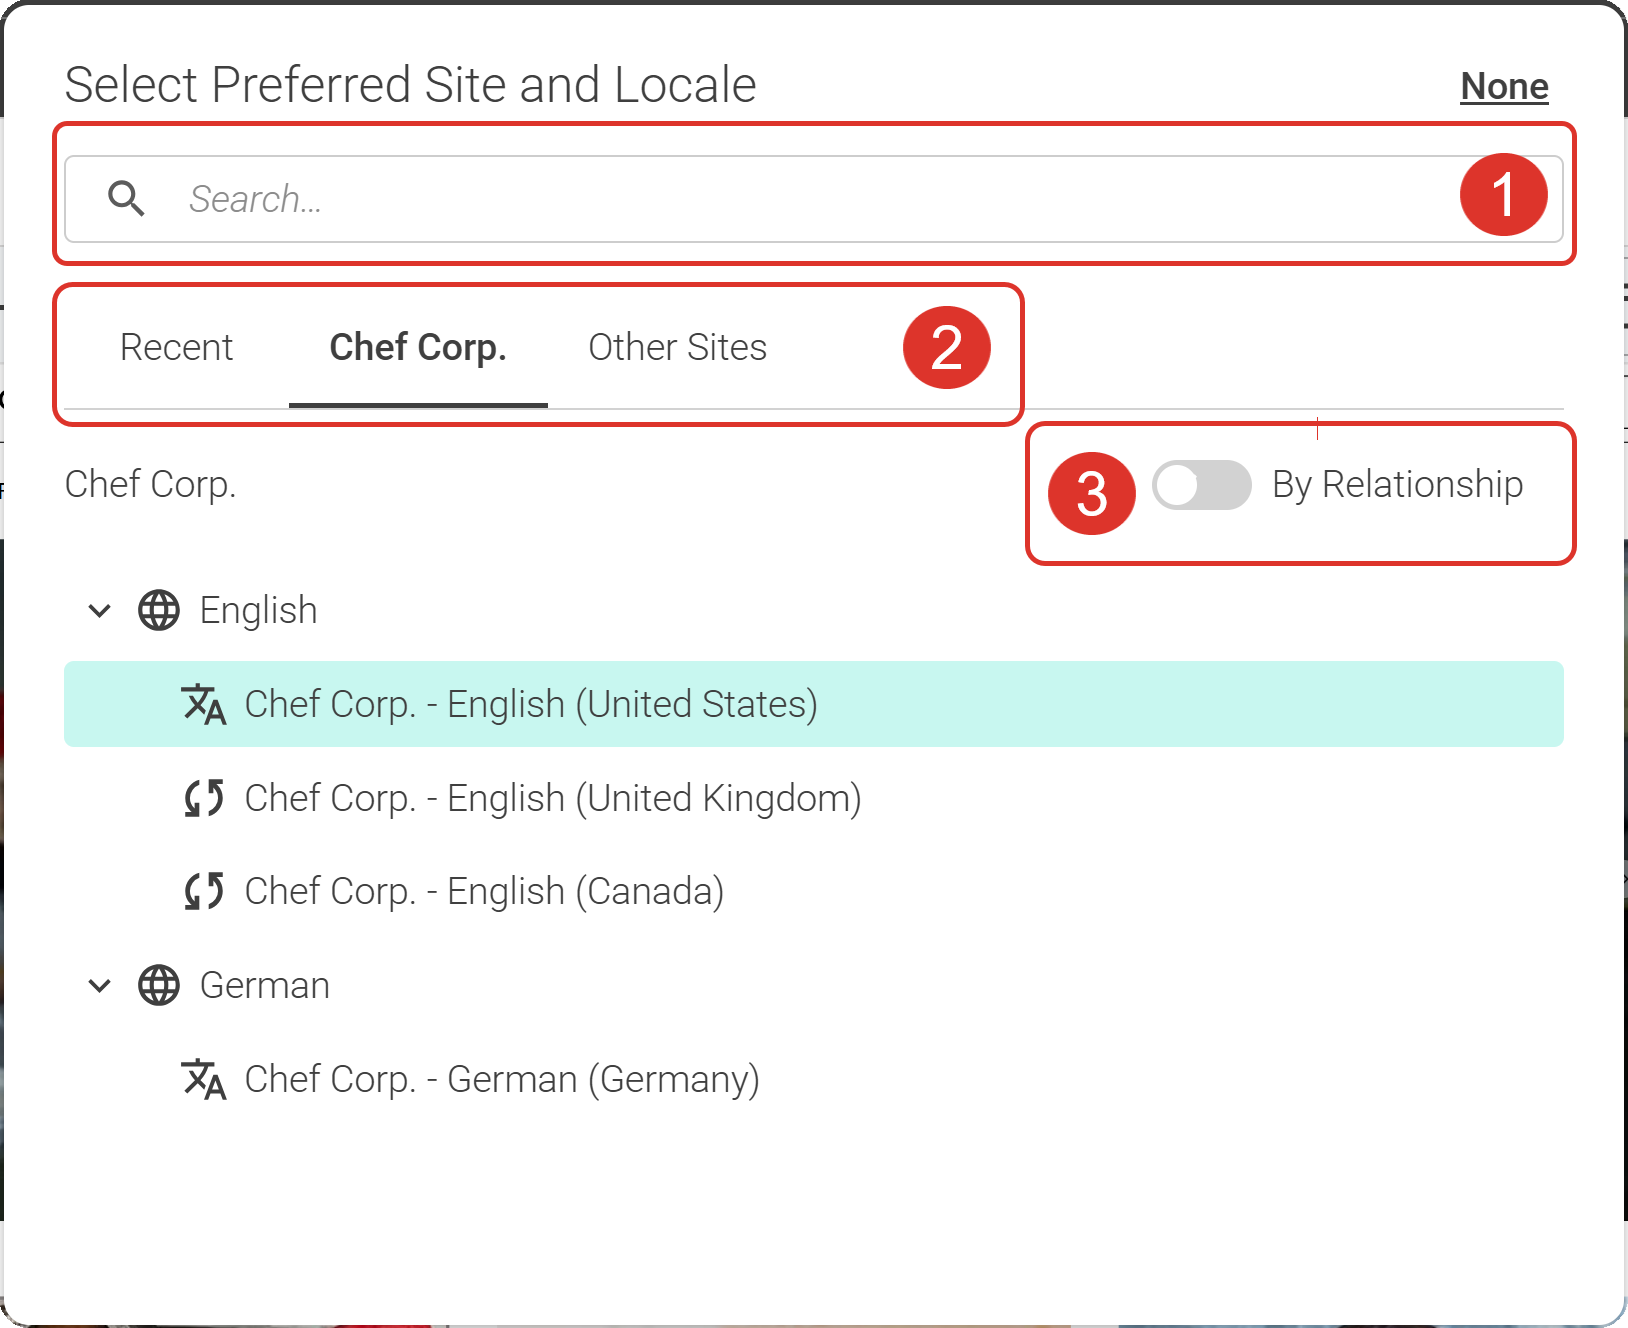
Figure 1. Select preferred site
-
Open the Site Chooser in the Header bar.
-
Select your site using one of these methods:
-
Click on a site in the dropdown list.
-
Use the search field (1) to find a specific site.
-
Choose from recently used sites, language variants, or other accessible sites (2).
-
Use By Relationship (3) to sort sites by language or by localization hierarchy.
-
2. Selecting a Preferred Language
Changing the language of the user interface is easy:
-
Open the User Menu (1) and select Preferences (2).

Figure 2. Open Preferences
-
In the Preferences window, select your language from the dropdown (3) and click Confirm.
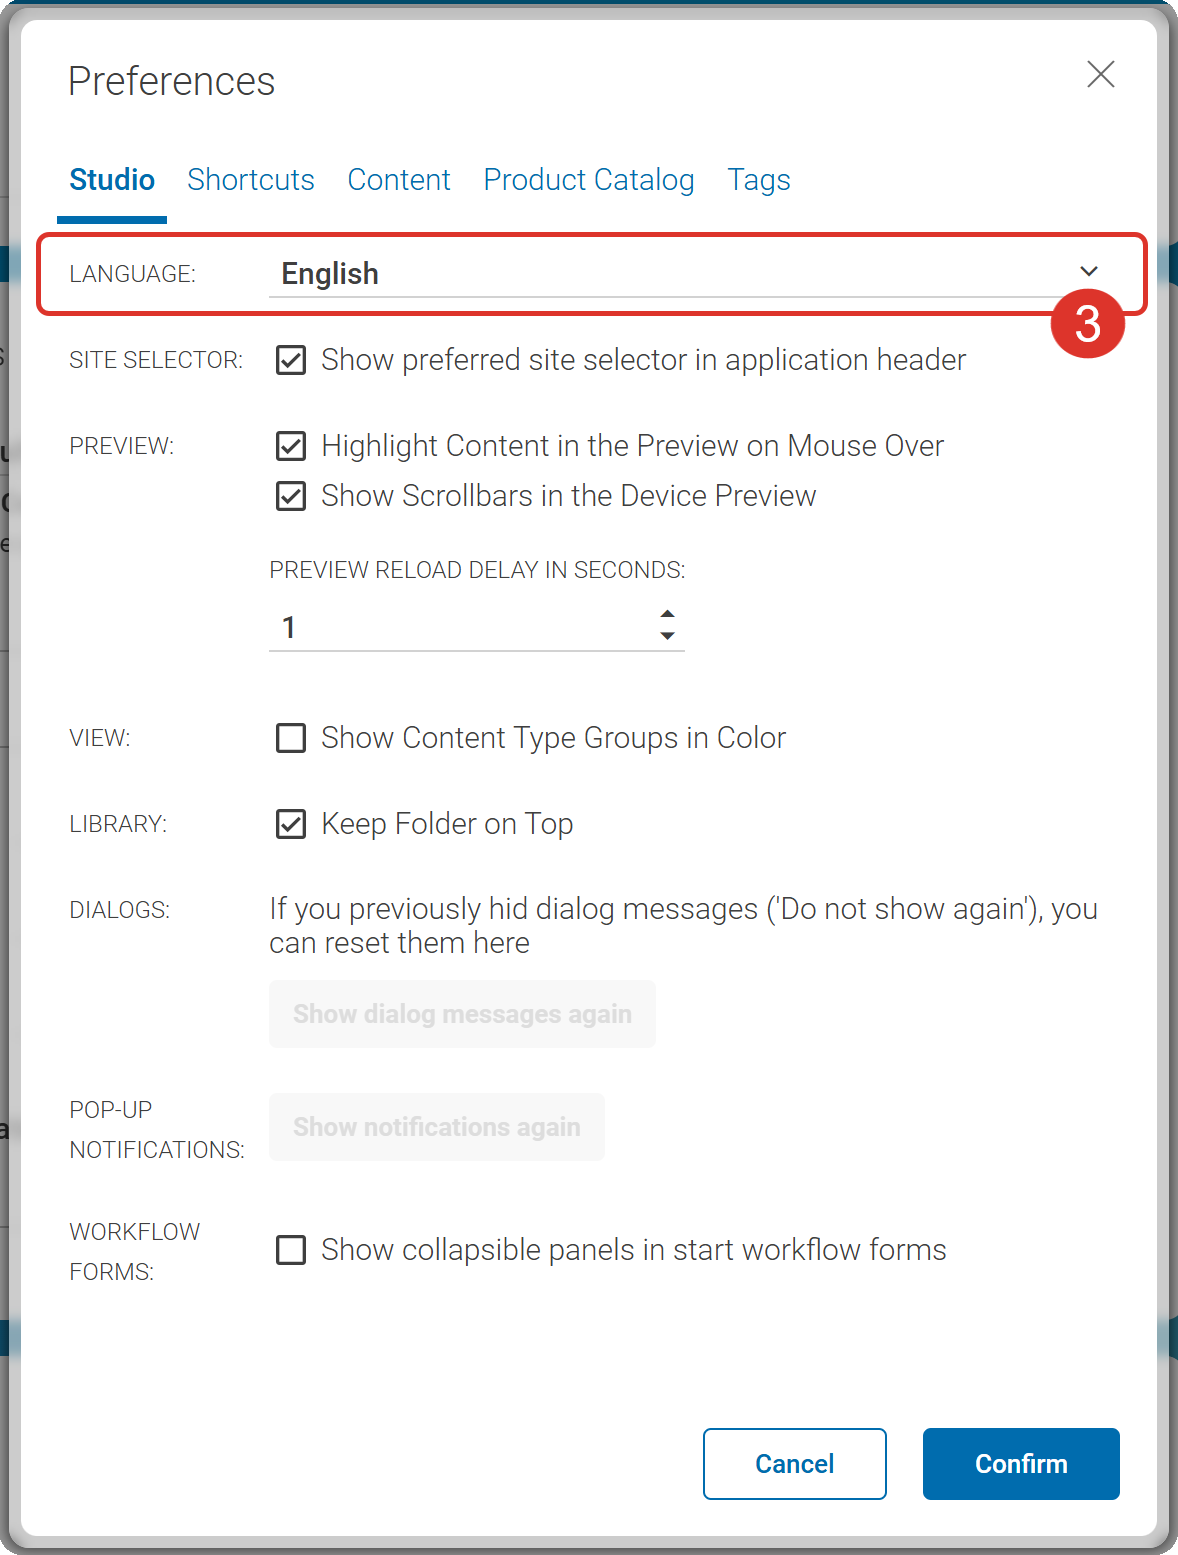
Figure 3. Select preferred language
Your selected language will apply until you change it again.
3. Colorful Content Type Representation
When enabled, content items in Studio tabs, lists, menus, and the Library are displayed in color groups, making it easier to distinguish content types at a glance.
|
This feature is experimental. CoreMedia reserves the right to change or remove it in future Studio releases. |
To activate this feature:
-
Open the User Menu and select Preferences.
-
Enable the checkbox Show Content Type Groups in Color (A) and click Confirm.
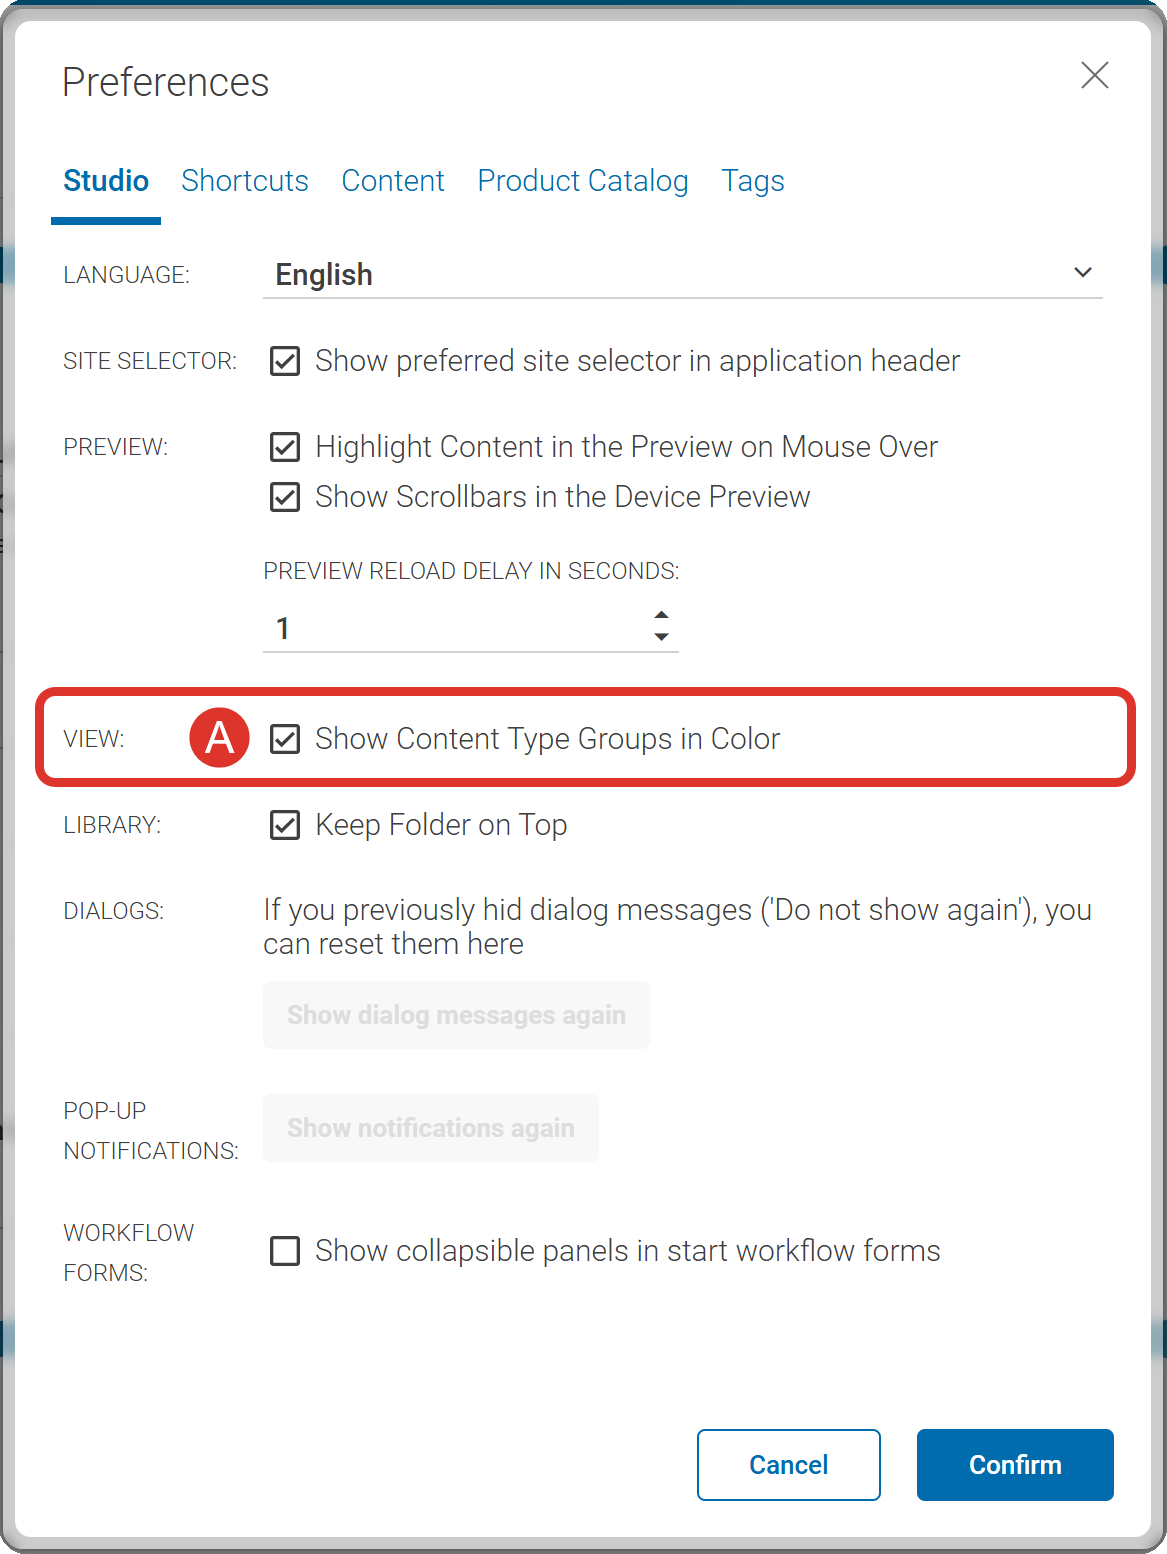
Figure 4. Colorful Studio Preferences window
Is this page useful?