


Blueprint Developer Manual / Version 2512.1
Table Of ContentsIn order to use Monetate experiences and segments in CoreMedia Studio, you need to define experiences that use the CoreMedia JavaScript action.
You can define three types of experiences:
Experiences for personalization and testing (see Section, “Creating Experiences for Personalization and Testing”).
Experiences for segmentation (see Section, “Creating Experiences for Segmentation”)
A technically required experience to minimize visually disturbing effects in the website (see Section, “Creating Experience for Content Masking”)
Prerequisites
Installation of the
p13n-coreextension and thep13n-adapter-monetateextension as described in Section 6.4.2.1, “Installing Personalization Hub”Configuration of the
p13n-coreExtension as described in Section, “Configuring the p13n-core Extension”.Set up of the Monetate integration as described in Section, “Connecting CoreMedia Content Cloud with Monetate”
In order to use experiences from Monetate in CoreMedia Sites you first have to create an action in Monetate.
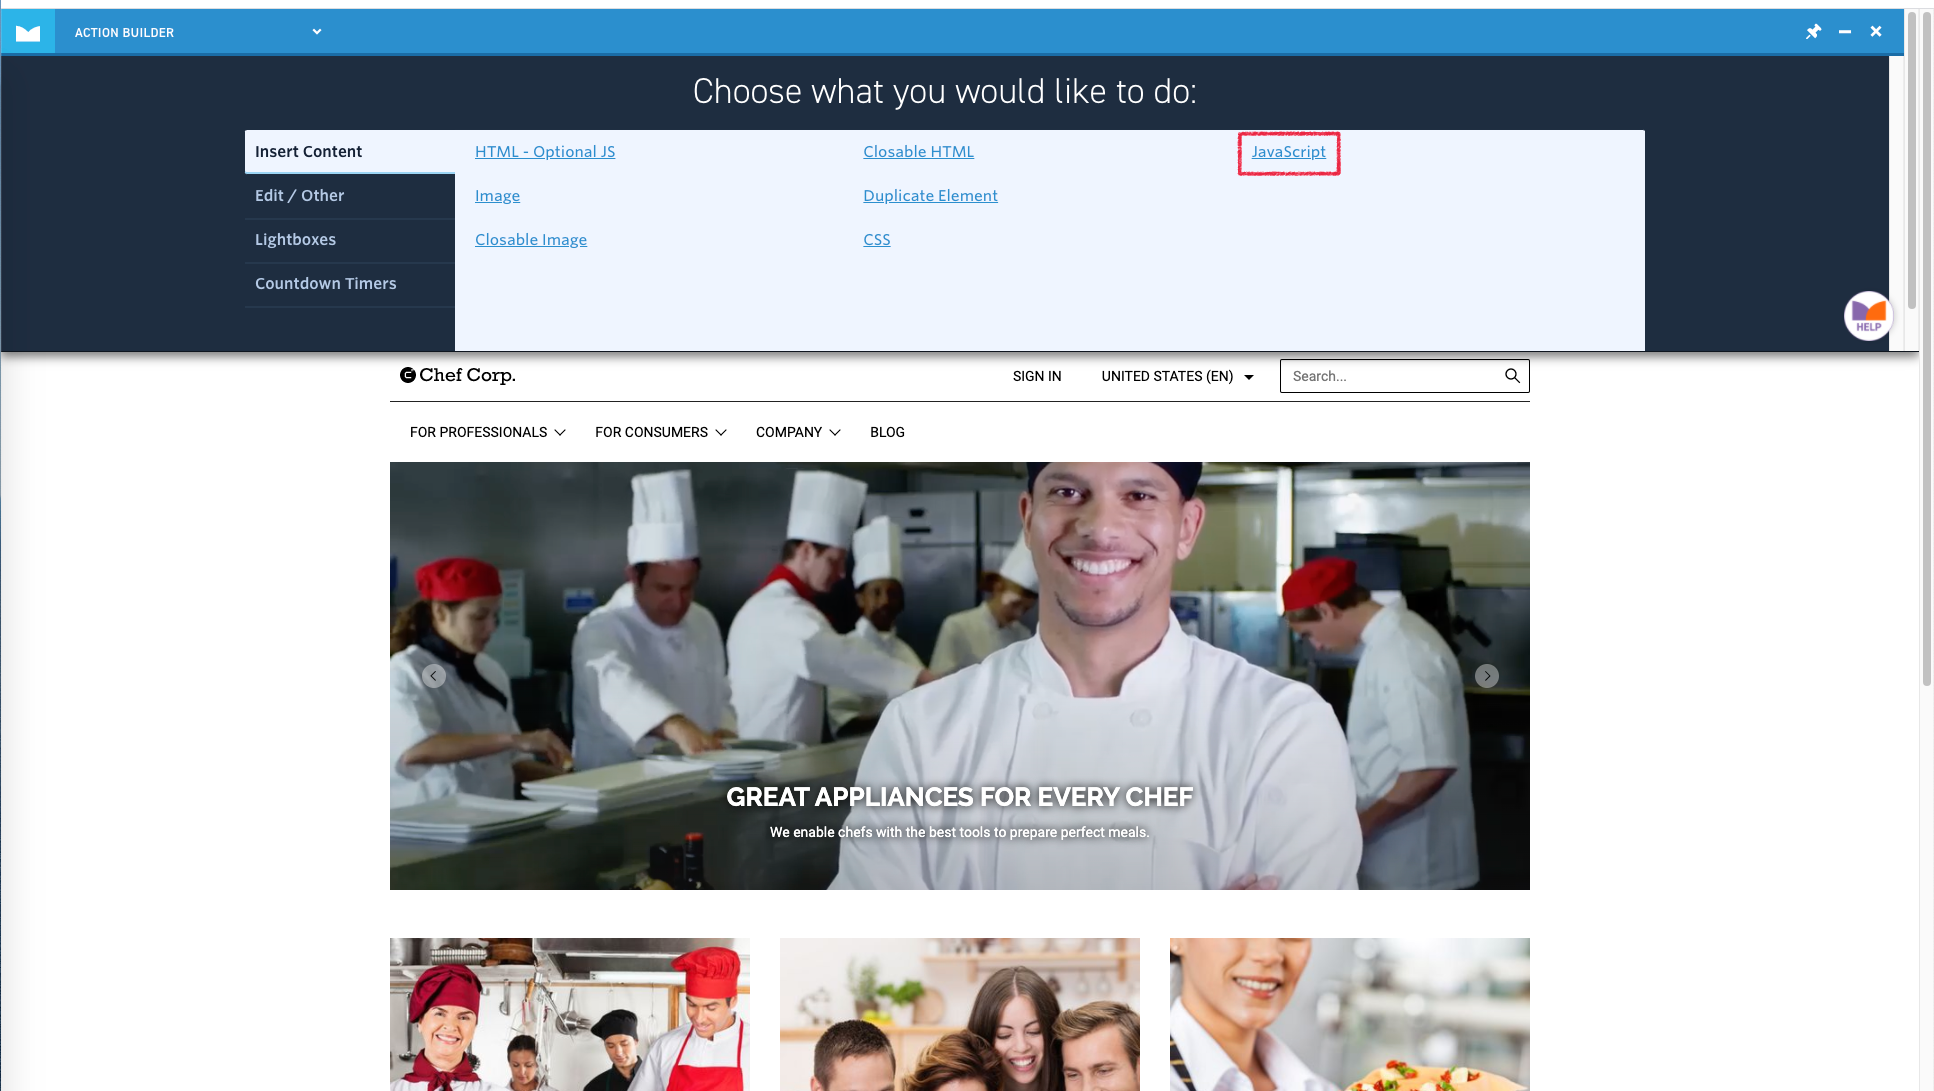
Go into the Monetate Action Builder, select → and click [Create Action] . The live website opens up and the Monetate overlay is enabled:
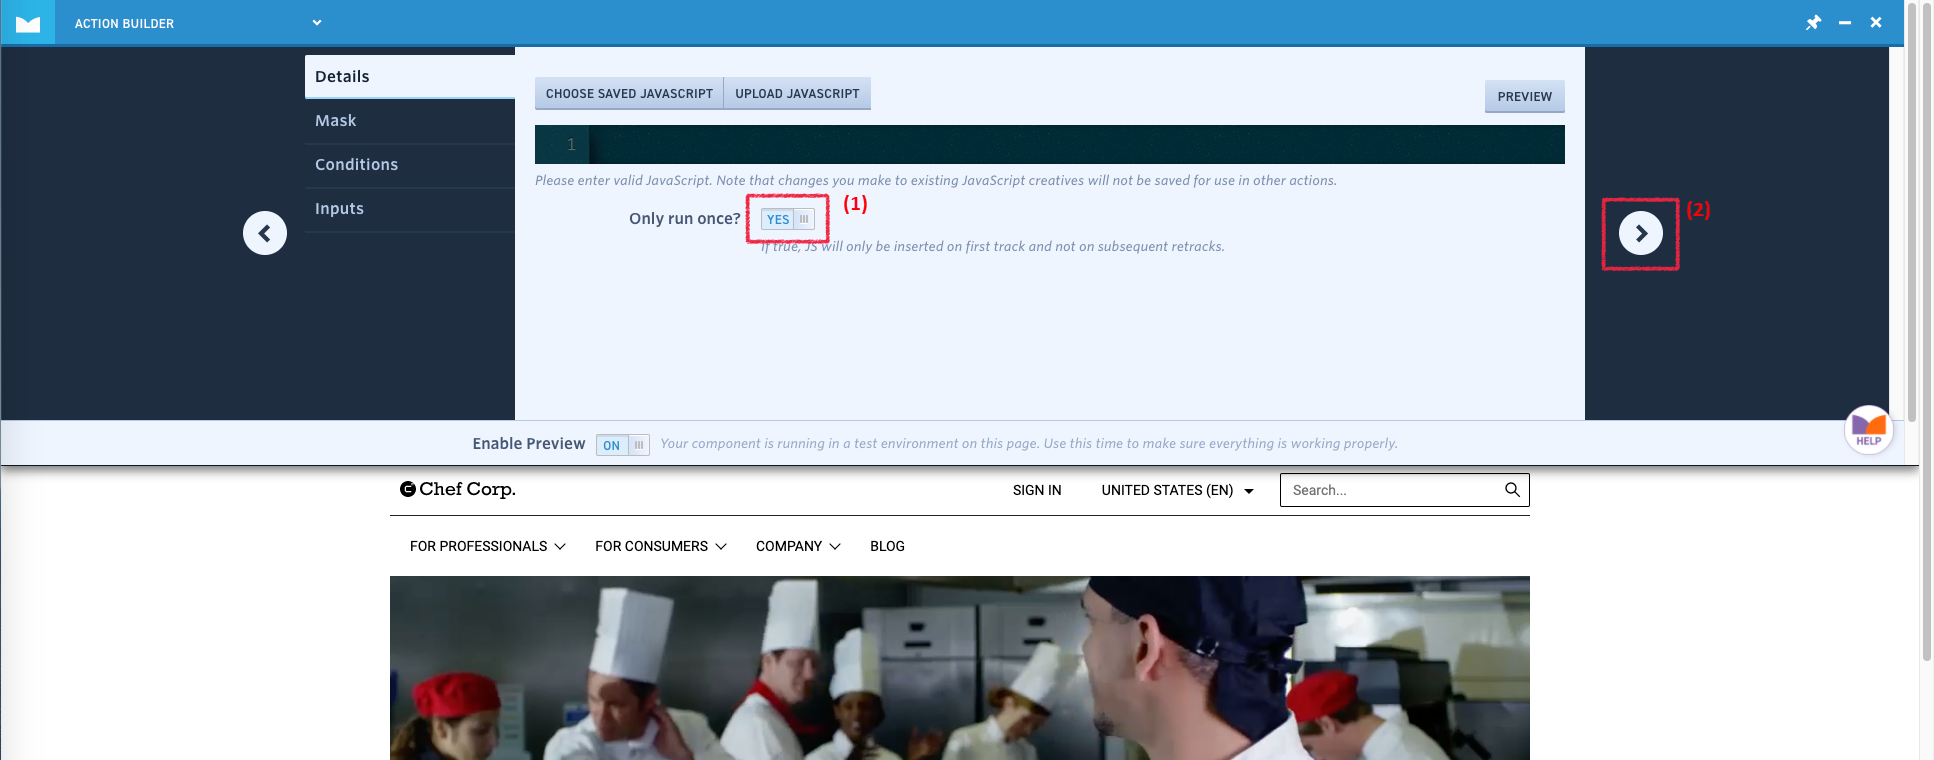
Select JavaScript and in the following screen set Only run once? (1) to Yes. Click the arrow (2) to go to the next screen.
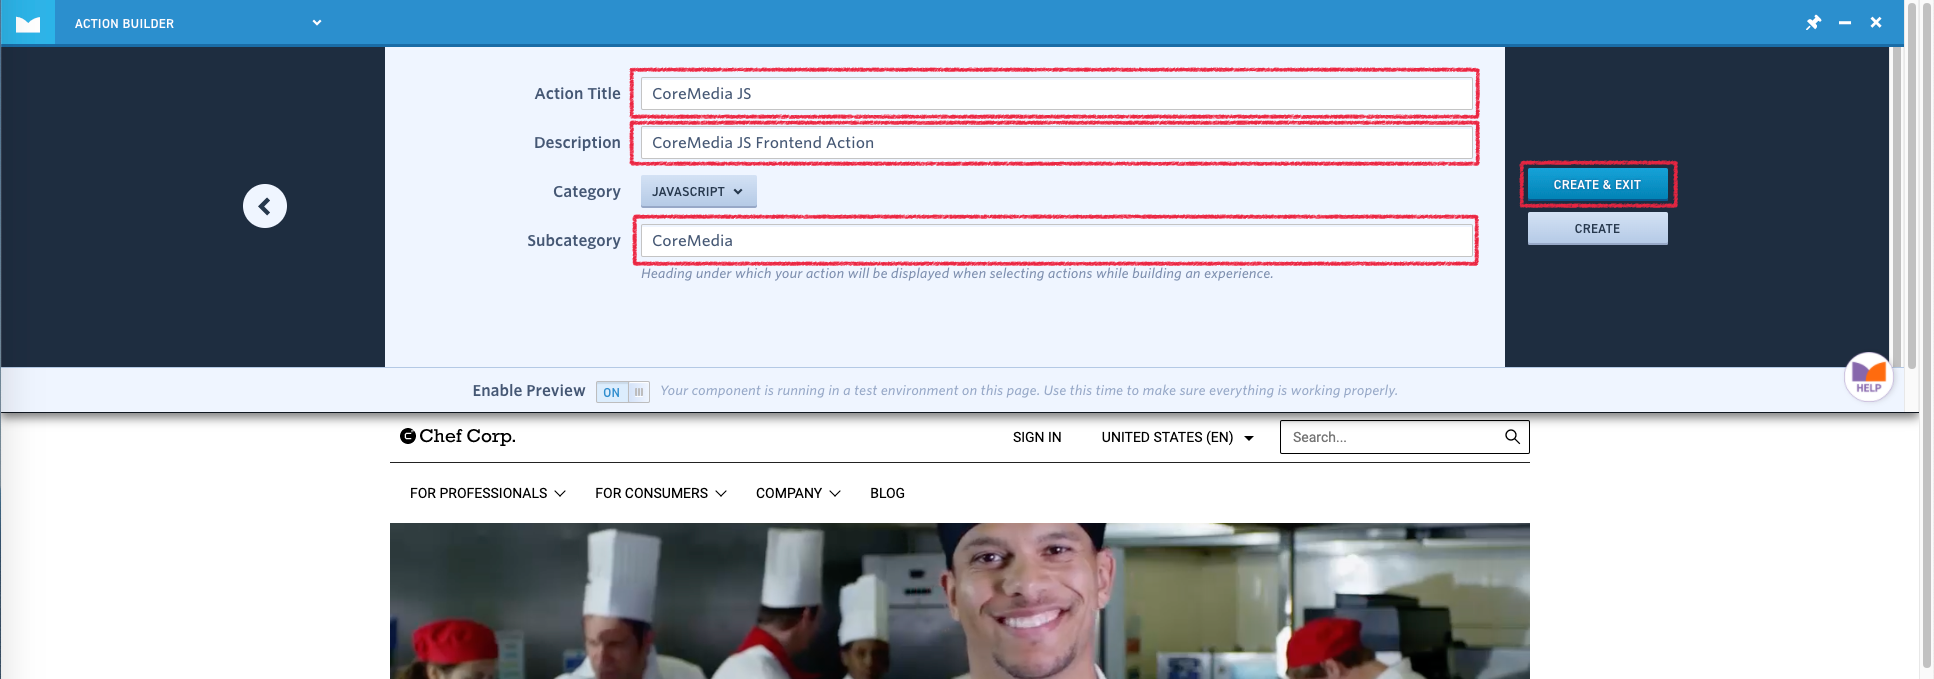
Fill the form fields as shown in the screenshot and click [Create & Exit] to create the action and to return to the Monetate portal.
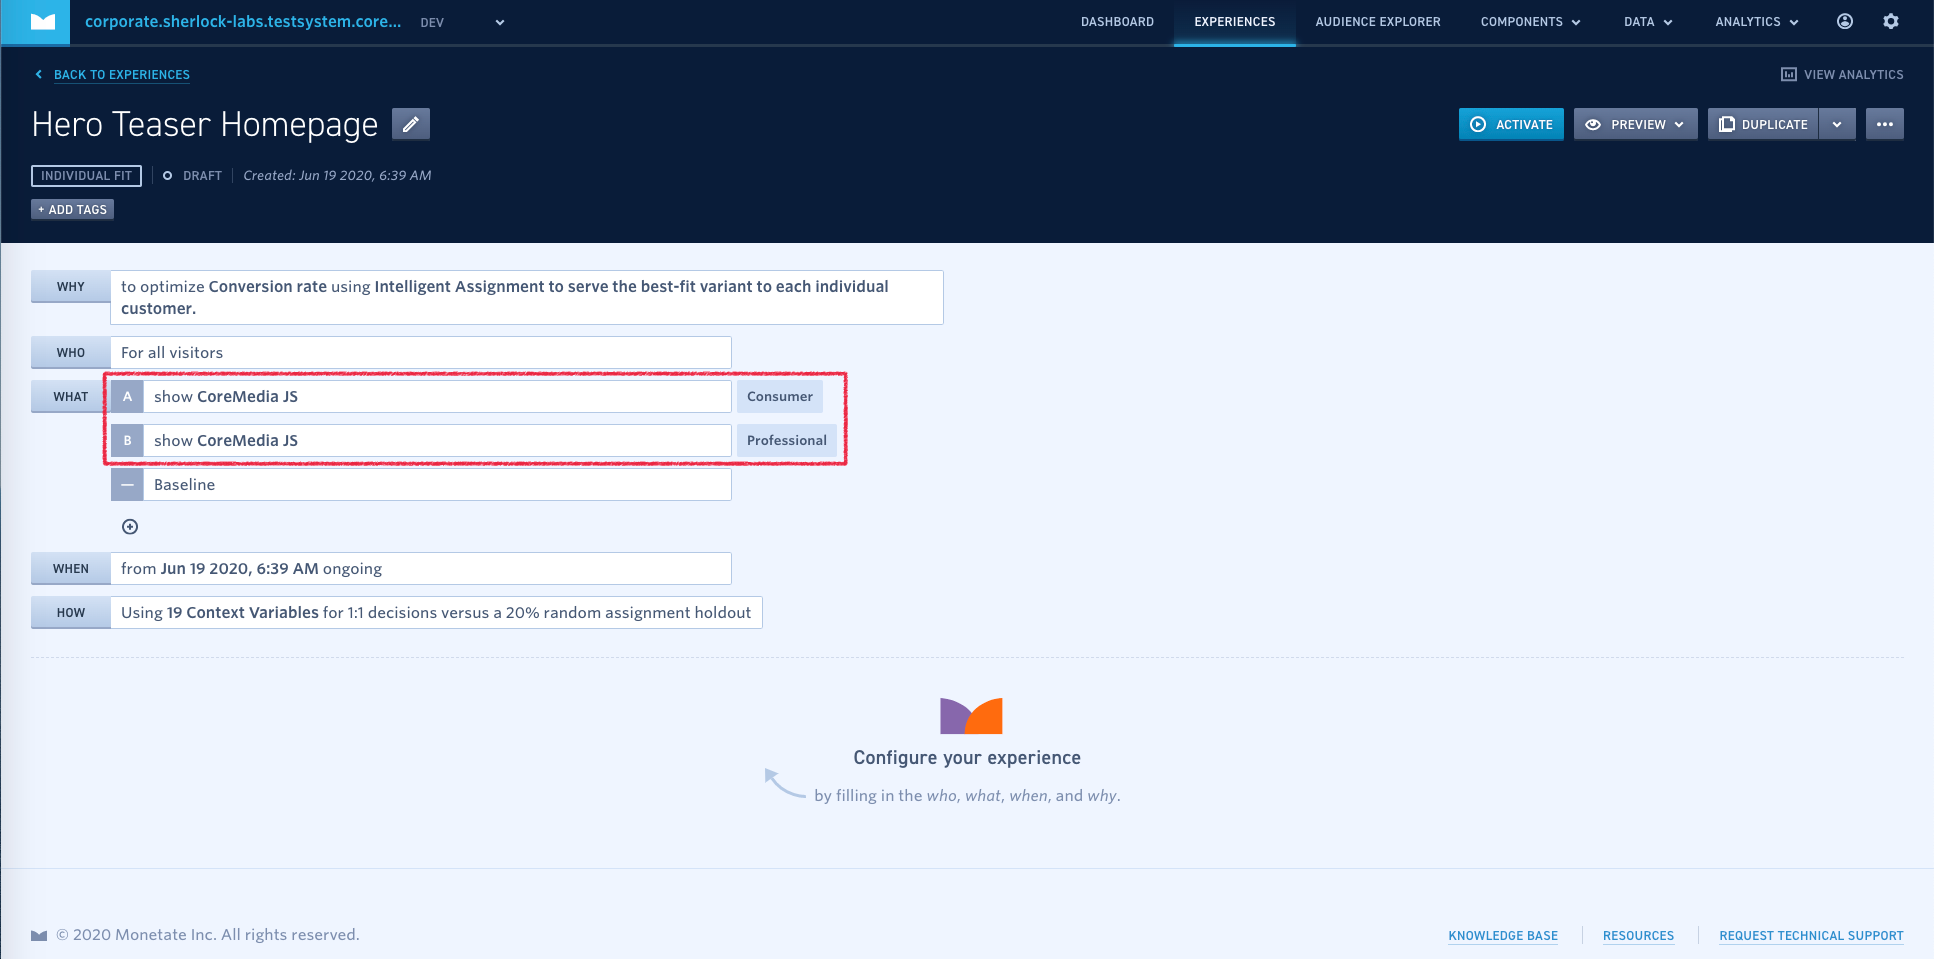
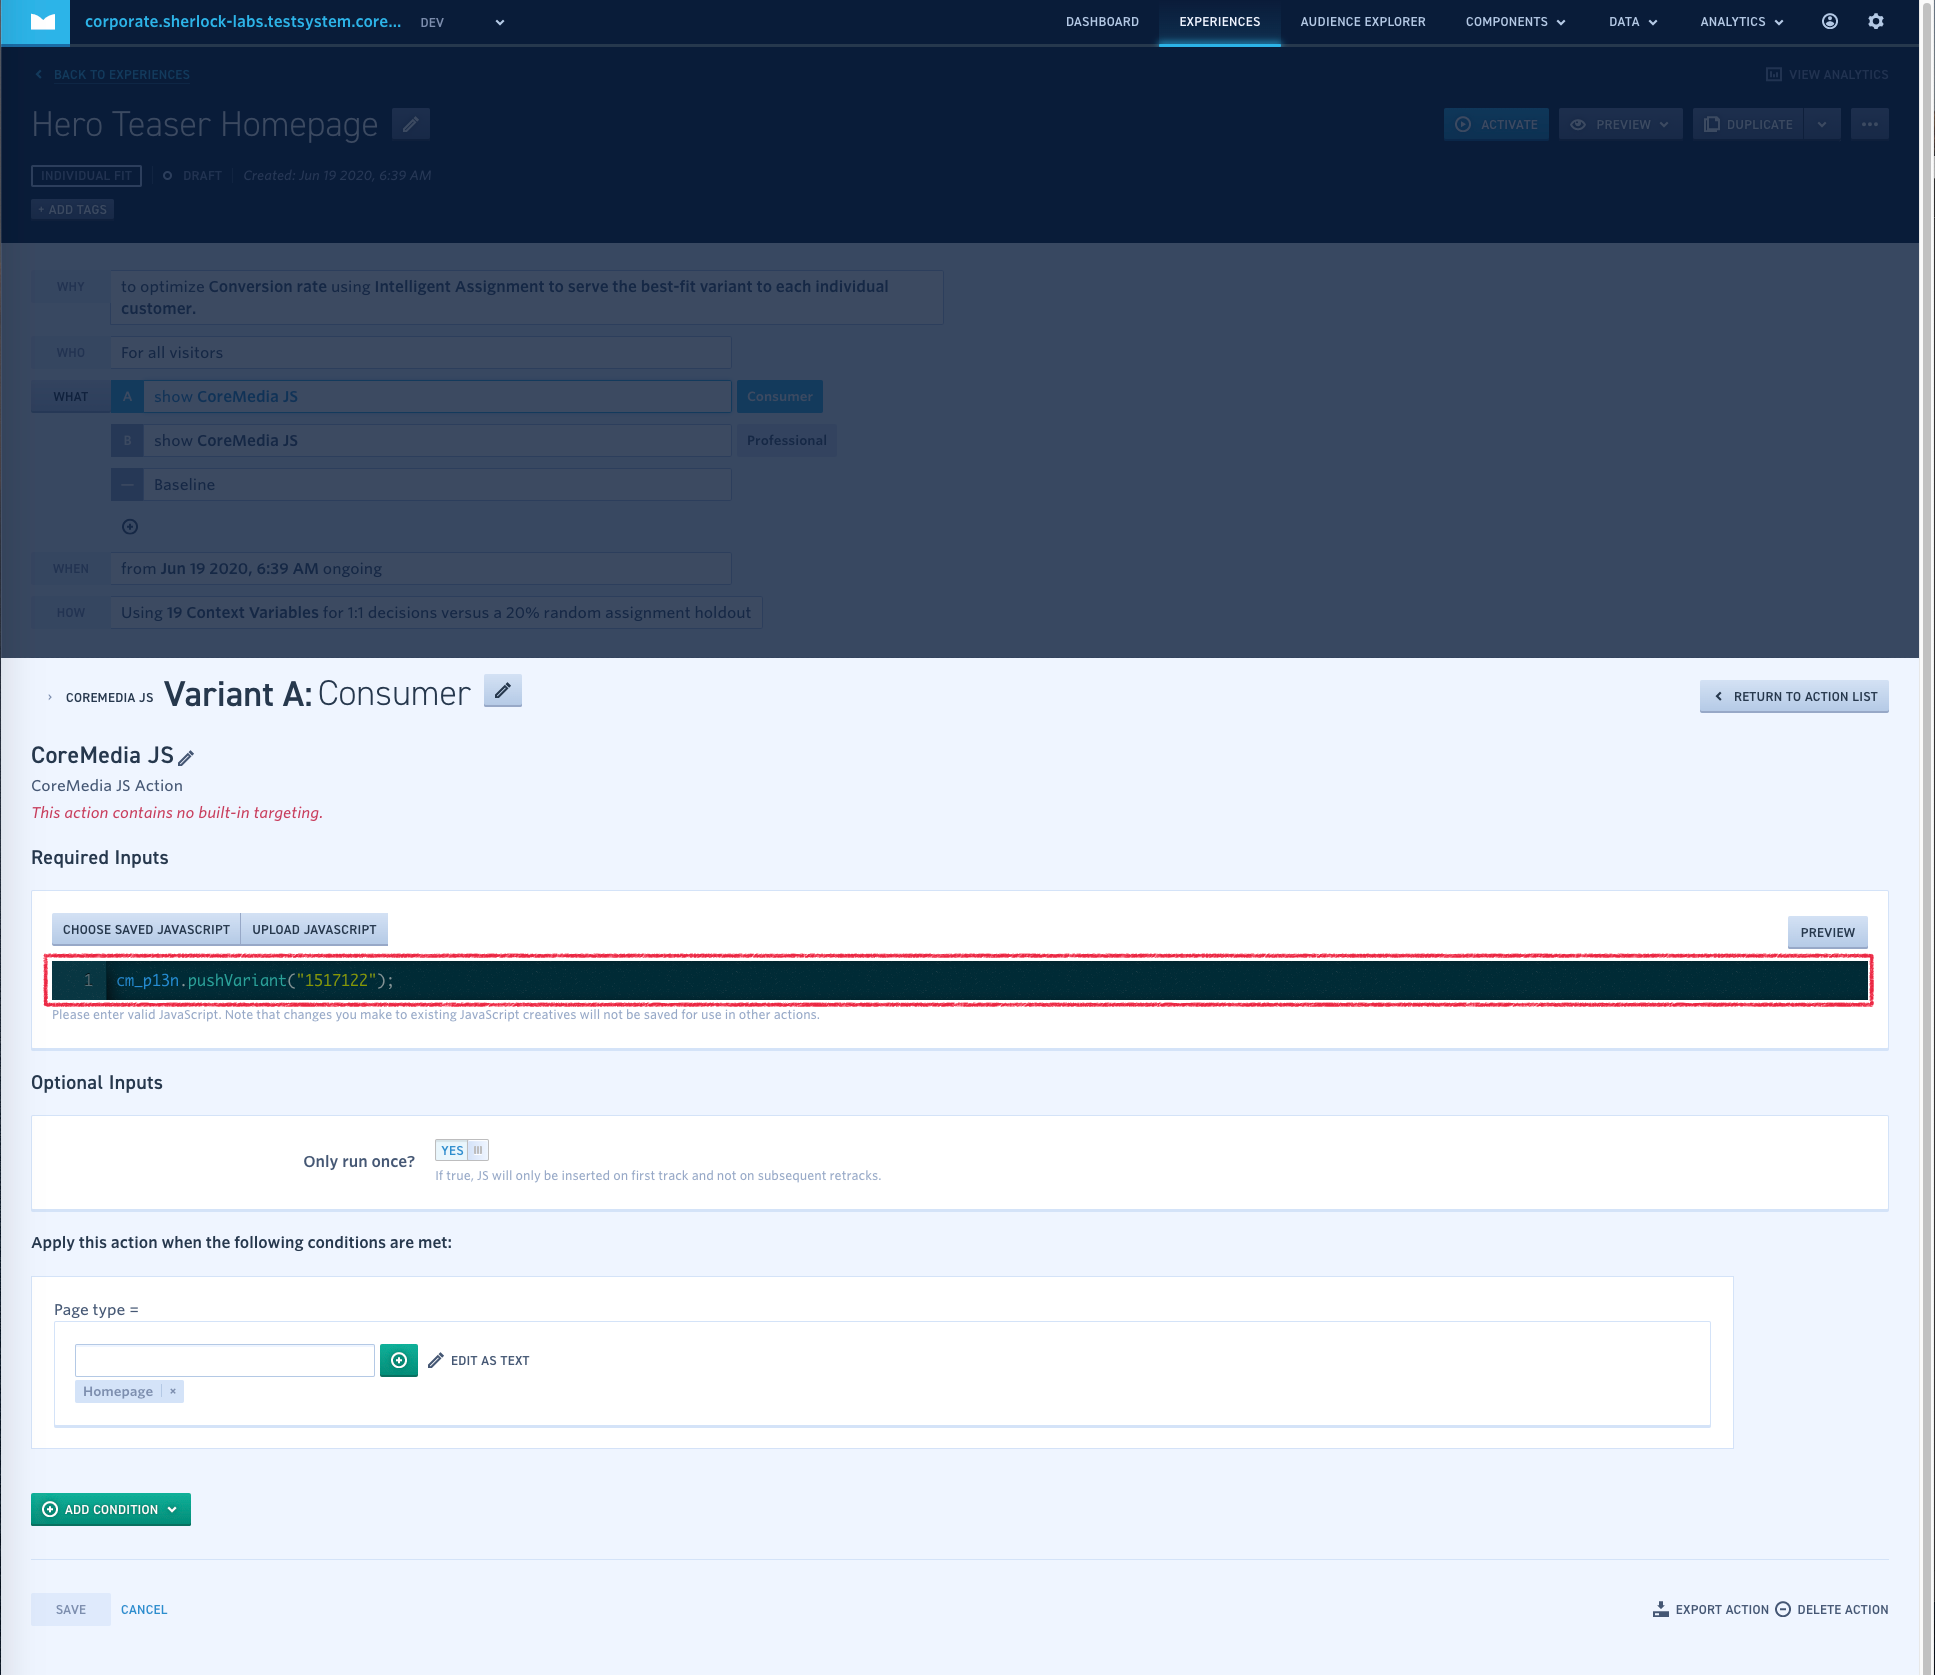
Follow the default steps for creating a Monetate experience. You can select any type of goal (WHY). Apply targeting rules as required (WHO). Then create the variants (WHAT). For each variant add a single action — the CoreMedia JavaScript action created in Section, “Setting Up a JavaScript Action”.
Configure each action with the required JavaScript code using one of the following two methods:
Look at the URL in your browser. It should look similar to
https://marketer.monetate.net/control/<ACCOUNT>/p/<DOMAIN>/experience/1275940#c1517122:what,a3489594. Note the number after #c, in this example 1517122. Copycm_p13n.pushVariant("<NUMBER>")to the clipboard where <NUMBER> is replaced by the number above.Change to CoreMedia Studio, select your preferred site and open the dashboard. If the dashboard does not contain the experience widget, add it to the dashboard. Select the newly created experience from the widget's list and open it in a new tab (if the experience is missing, use the reload button to update the list and check the widget's filter settings). In the variants panel each variant has a link button to copy the required JavaScript code the clipboard:
Click the [Copy JavaScript] button.
Go back to the Monetate portal, select the variant action and paste the copied code into the JavaScript code field.
If the experience should not be placed on every page, add conditions restricting the action to a single page or set of pages using the [Add Condition] button.

The supported segmentation use case divides the customer base into disjoint sets of segments. For each segment, you
want to use, you have to create a P13NSegment in CoreMedia Studio. You have two ways
of applying an experience to a segment:
Each segment can be used as a direct target rule of an experience.
The Monetate AI decides about the segment with a single individual fit experience.
For the first case you create an experience for each segment, while for the second case you only create one experience with all segments.
Create Segments in CoreMedia Studio
For the segmentation use case you have to create an External Segment
content item for each segment you want to use in the <Site Root>/Options/Personalization/Segments/monetate
folder of the site. For the content name use lower- and upper-case letters, numbers,
minus and underscore, no special characters are allowed.
Direct Target Rule
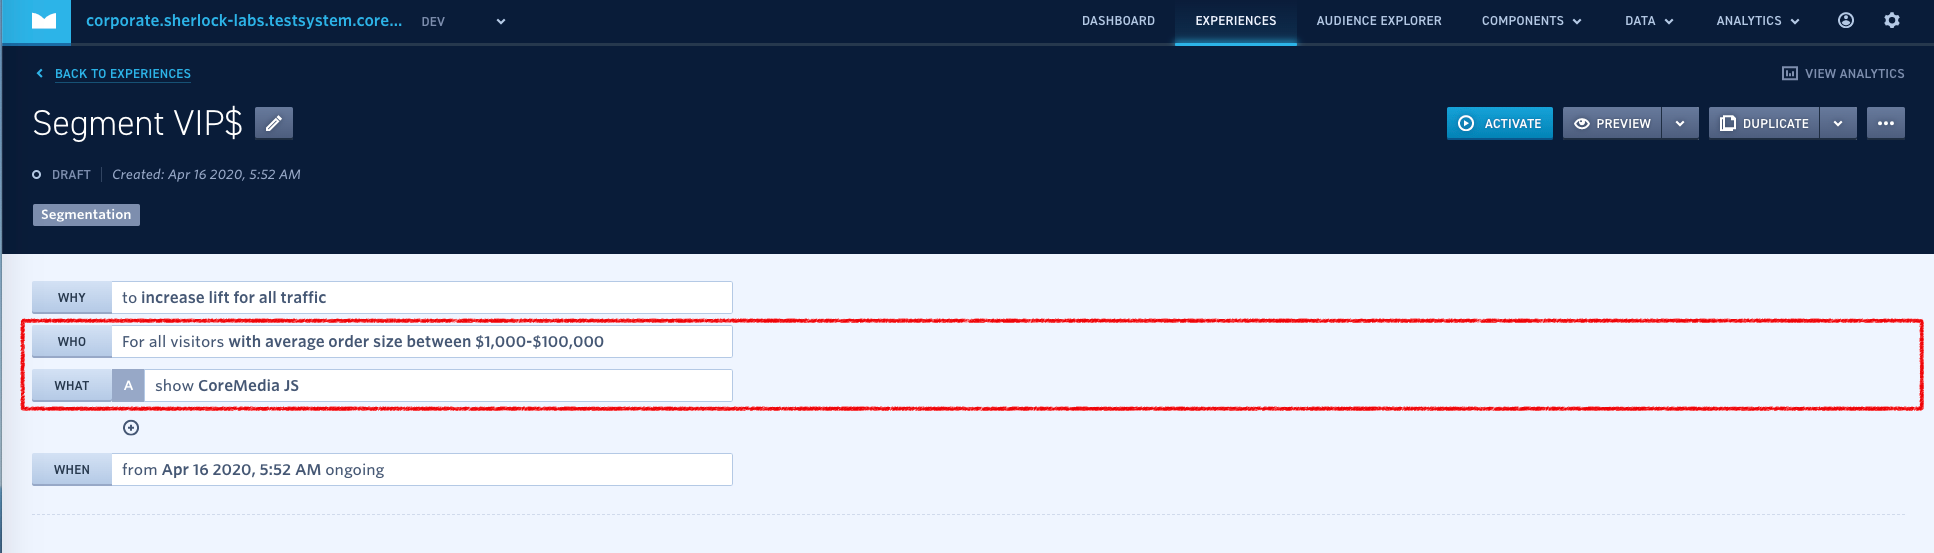
Define an experience with the goal to serve everyone the same experience. Apply the required targeting rules and add a single variant with the CoreMedia JavaScript action.
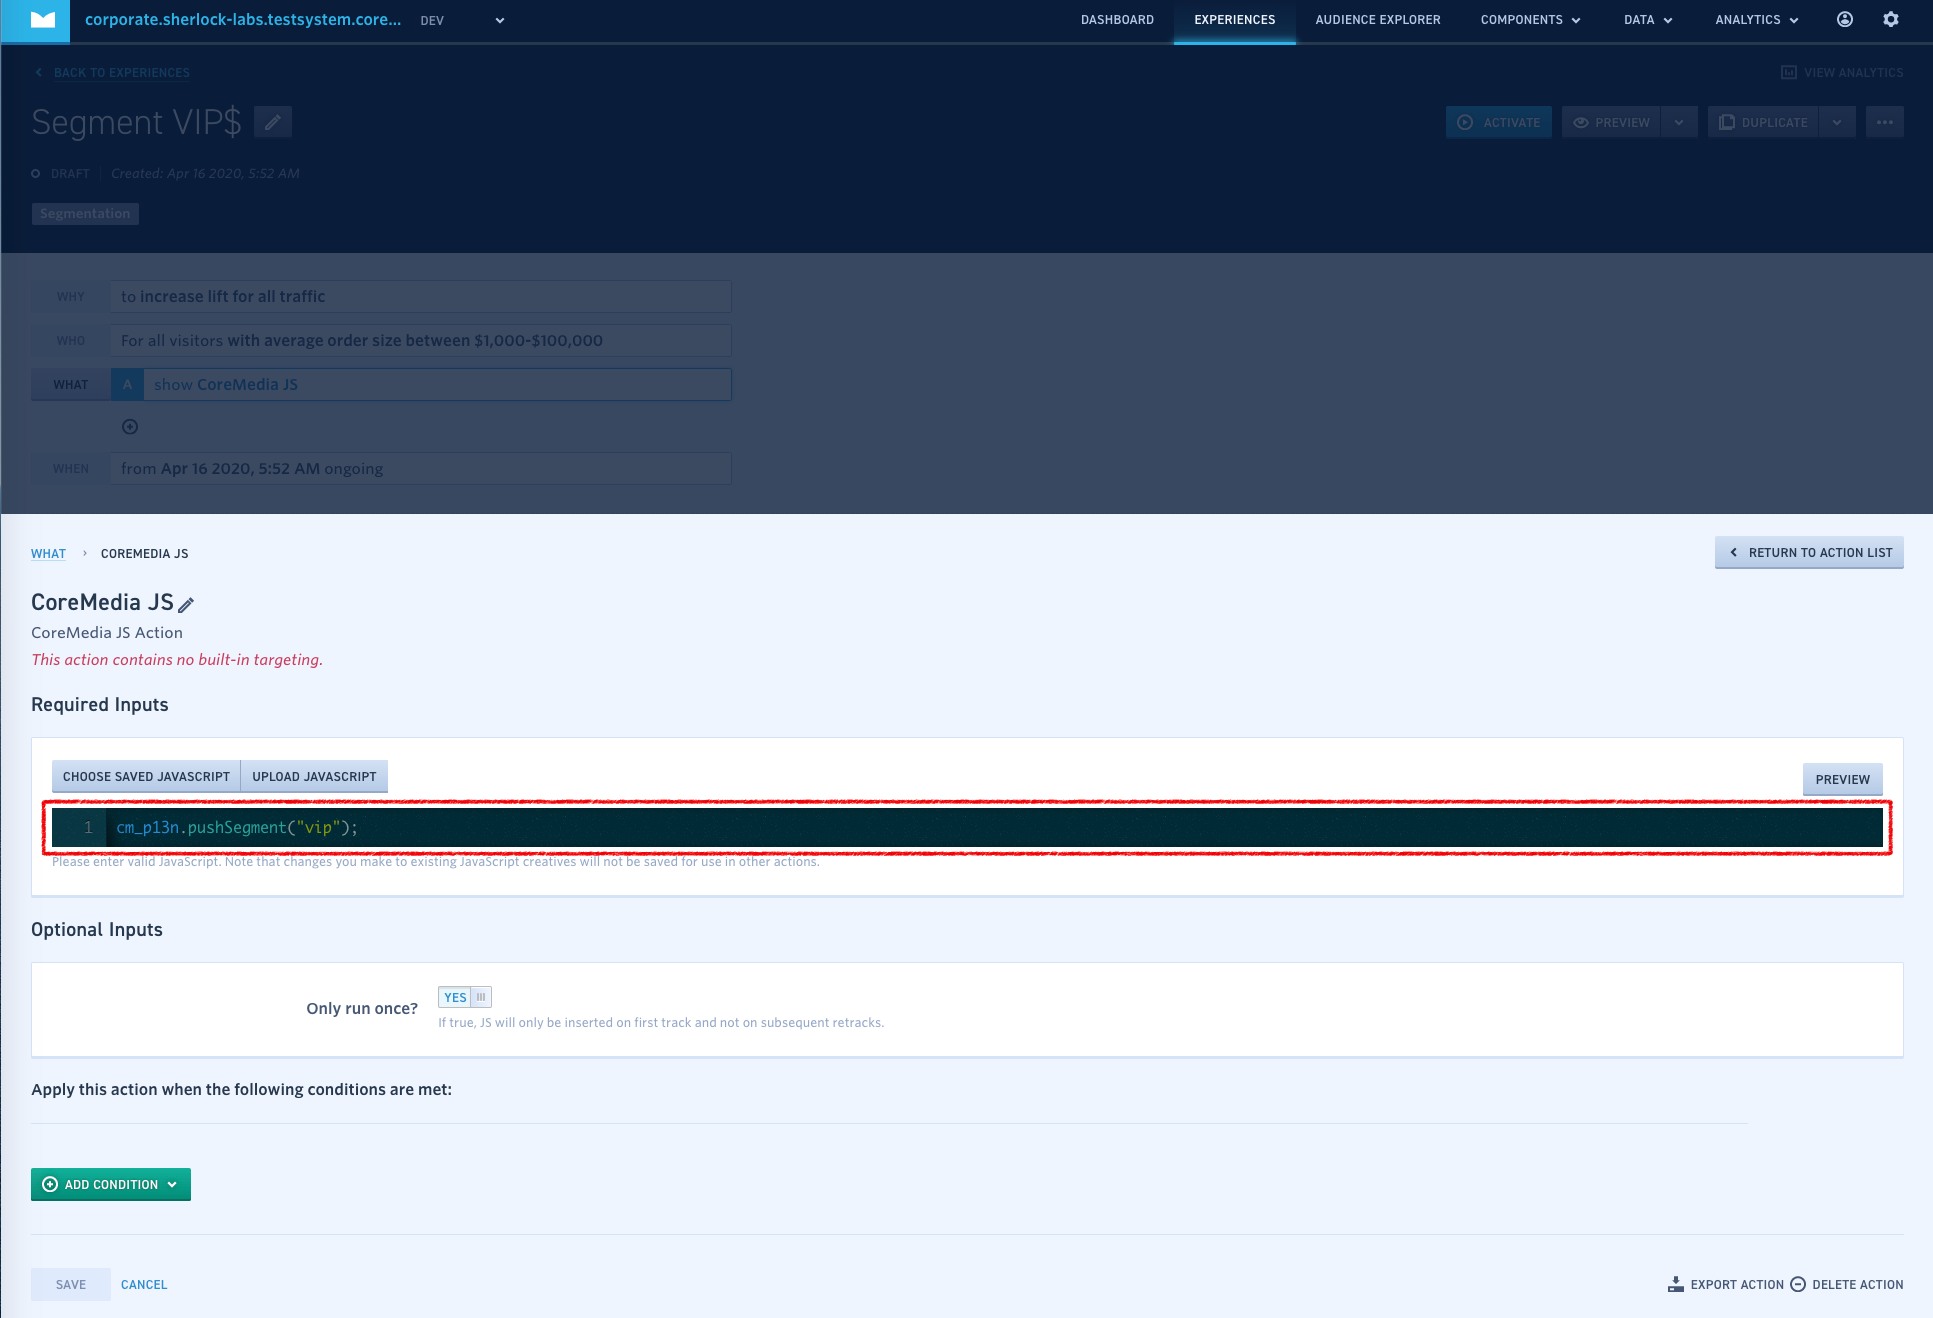
Select the variant action and paste the following code into the JavaScript code field:
cm_p13n.pushSegment("<segment_name>");Replace
<segment_name>with the name of the corresponding Studio content item, which you have created in Section “Create Segments in CoreMedia Studio”.Continue with experiences for other segments.
AI Optimized Content Selection
Create a single experience with goal To optimize my goal with Machine Learning. Individual Fit. For each segment add a variant.
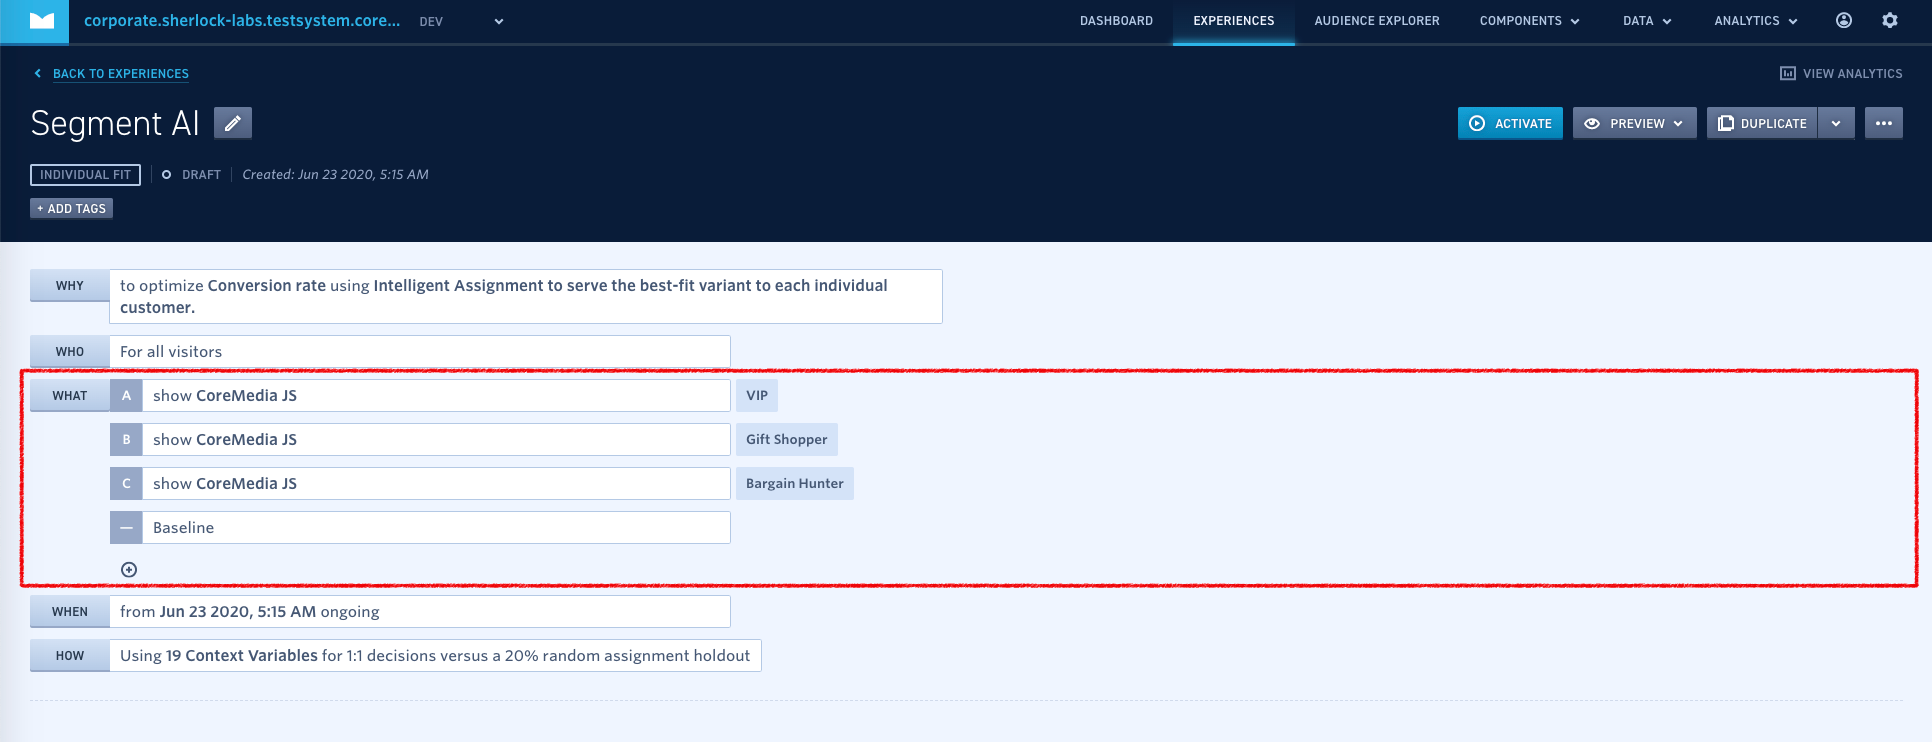
For each variant add a single CoreMedia action and paste the following code into the JavaScript code field:
cm_p13n.pushSegment("<segment_name>");
Replace <segment_name> with the name of the corresponding Studio content item, which
you have created in Section “Create Segments in CoreMedia Studio”.

The CoreMedia JavaScript frontend integration code - triggered by the Monetate Tag - dynamically loads content from the CAE backend via AJAX and injects it into the already displayed page. To minimize visually disturbing effects, such as elements flickering, popping up or moving around, during these page updates it is essential for the CoreMedia code to get notified when Monetate has finished processing all decisions. Hence, a special experience needs to be added, which must always be executed last by placing it at the end of the list of experiences:
Create a new experience, for example named Final.
Select to serve everyone the same experience as the goal. Don't add any targeting, let it apply to all visitors.
Add the CoreMedia JavaScript action to its single variant and insert the following code:
cm_p13n.completed('monetate');.Save and return to the experience overview.
Place the experience at the bottom of the list by giving it the highest priority value.

