 What you will learn
- Find out how to access the User Manager
- Learn about the options for searching a user
- Learn how to add new users and how to assign them to specific groups
 Prerequisites
- A working Login to CoreMedia Studio
 Target Audience
This guide is for Editors, Administrative Users.
Table of Contents
Introduction
The Rights & Roles Concept
CoreMedia Studio allows you to set up and manage users and assign them to groups. Each group represents a defined role and comes with a specific set of rights. A single user can be a member of multiple groups.
The User Manager App
CoreMedia Studio includes the integrated User Manager App. Administrative users can access it from the Main Menu.
Steps
Follow these steps to add a new user:
-
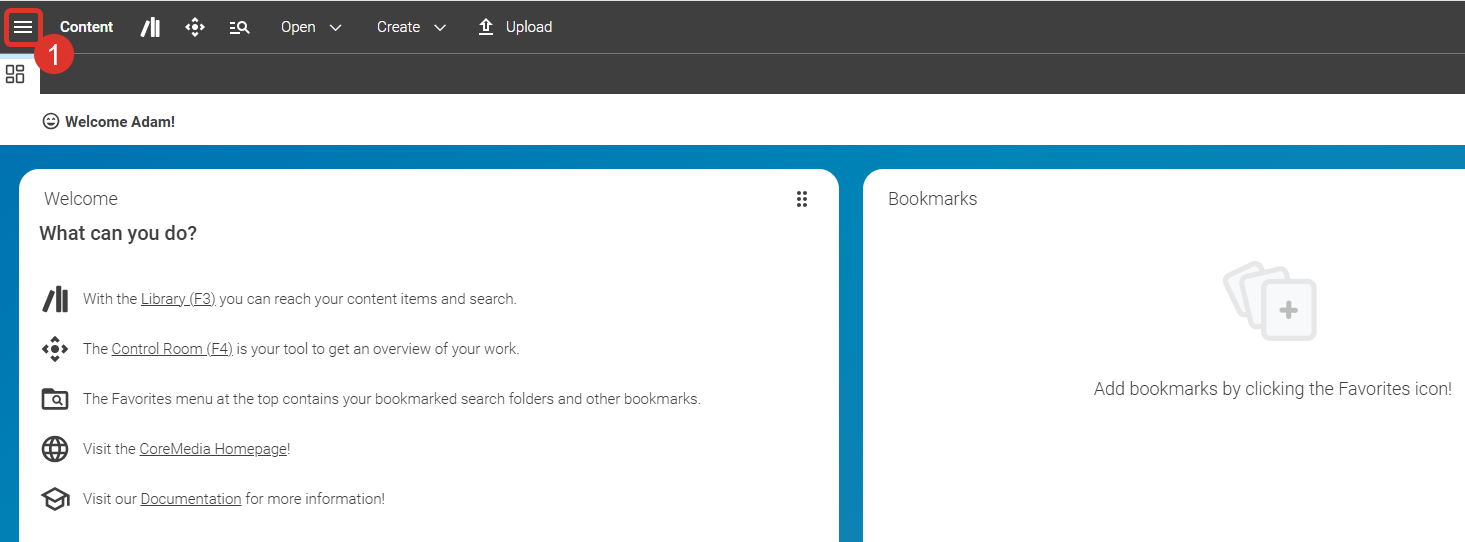
Open the Main Navigation menu (1).
 Figure 1. Open main menu
 -
In the open Main Menu, select User Manager (2) from the Content category. The User Manager App opens in a new tab.
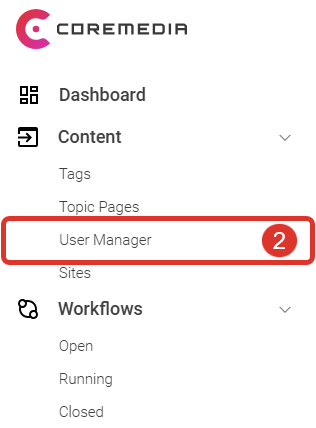 Figure 2. Main menu
 -
Users and groups are only shown after a search. In the top area, you will find a set of fields (3) for specifying your search criteria.
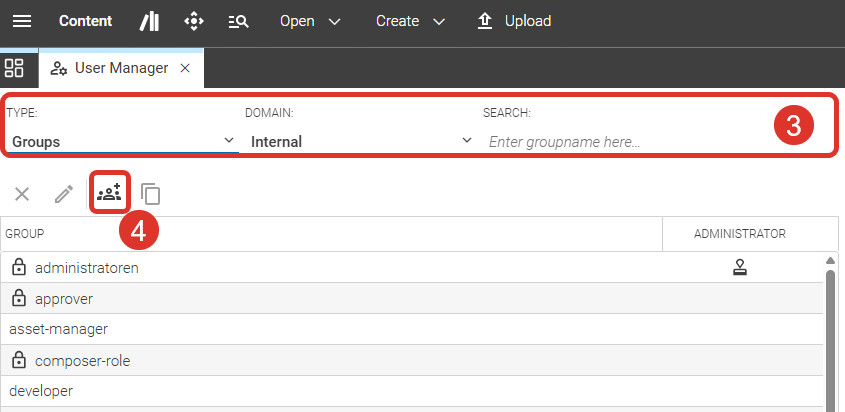 Figure 3. User Window
If you don’t need the search option, you can use the Create a new group (4) or Create new user buttons (the latter becomes visible once you switch Type to "Users") to directly create a new user or group. Another way to open the Create a new user dialog is described in step 5.
Use the available fields to narrow your search:
-
Use the Type field to toggle between Groups and Users.
-
Use the Domain field to display groups or users for a specific domain.
-
Use the Search field to find specific groups or users. Matching results appear in the list below.
-
-
A common starting point when creating a new user is to find an existing user with similar rights and group memberships — for example, a colleague from your team — so you can use them as a reference or copy their settings.
In this example, you are looking for a user named Peter. Type the first three characters, "Pet", in the Search field (5). Results appear immediately — no need to press Enter. Note that the search is case-sensitive.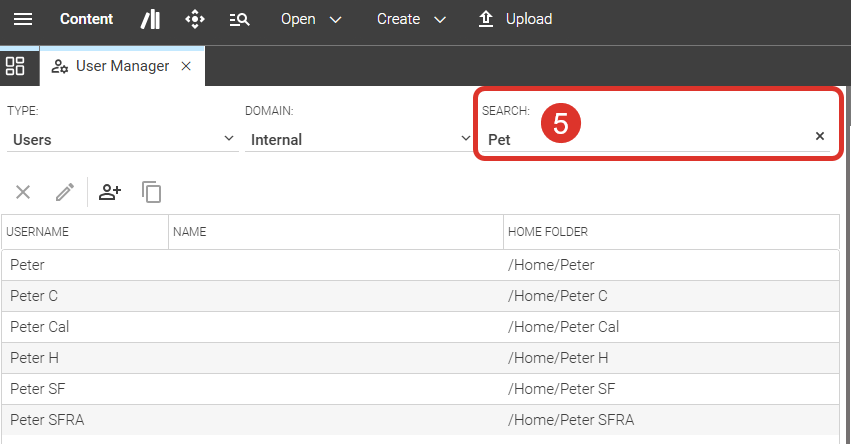 Figure 4. Search User
 -
Above the list, you will find the Action Bar (6), which provides four user management actions: delete user, edit user, create a new user, or copy user.
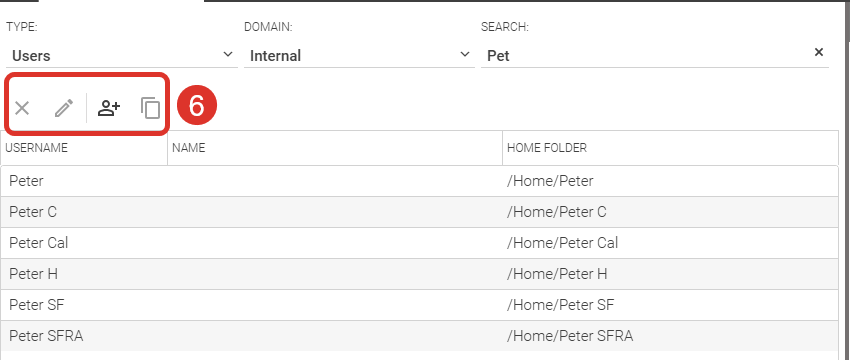 Figure 5. User Window
 -
Click the Create a new user button in the Action Bar to open the creation dialog. Fill in the required data and click Confirm (7).
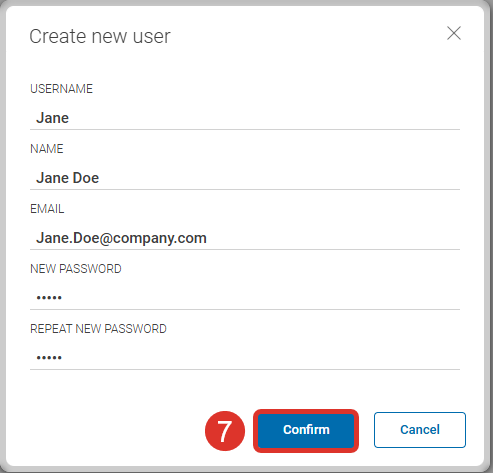 Figure 6. Create new User dialog
-
The user details open in a new tab, where you can review and further configure the new user.
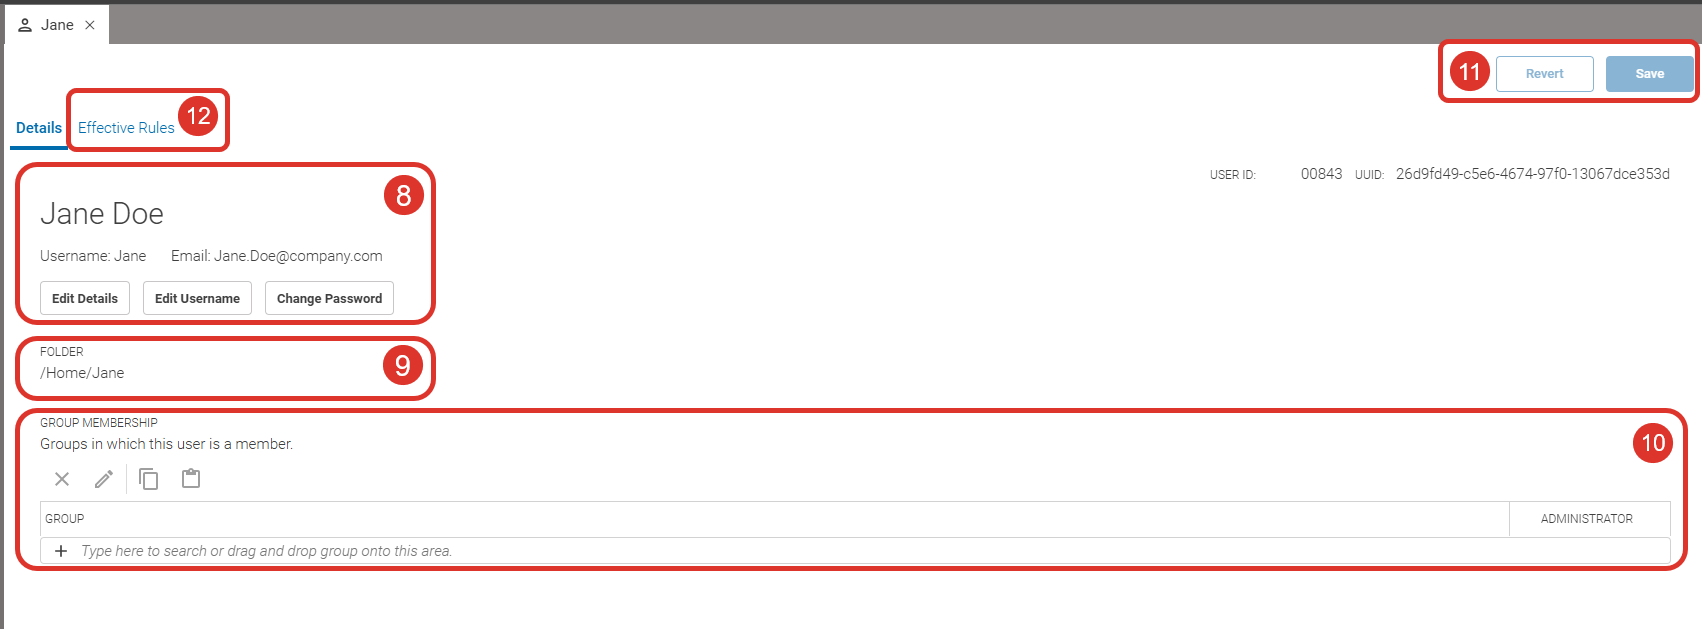 Figure 7. User Details


|
The most important step in the Details tab is to assign the user to one or more groups. |
-
In the upper area (8), you can review and verify the details entered in the previous step. Use the three buttons to update these details at any time.
-
Under Folder (9), the path to the user’s home folder is displayed. The home folder stores personal content items, queries, and user settings.
-
Under Group Membership (10), assign the user to one or more groups. Group membership determines what the user can access and do in CoreMedia Studio.
-
Use the buttons (11) in the upper right corner to save or revert your changes.
-
The Effective Rules tab (12) shows the active permissions the user has based on their group memberships. You can view and edit these rules here.
The new user is now set up and ready to use CoreMedia Studio with the rights defined by their group memberships.
Learn More
For more detailed information on user management, reach out to us, contact your system administrator, or please refer to the CoreMedia documentation:
-
see the Studio User Manual chapter Managing Users and Groups, or
-
see the Studio Developer Manual chapter on User Properties, or
-
try the Search for "User Manager" in the documentation search bar for more related content.
Is this page useful?