 What you will learn
- Different ways to upload files
- Important considerations
- Get to know the Upload Dialog
 Prerequisites
- A working Login to CoreMedia Studio
 Target Audience
This guide is for Editors.
If you want to upload files from your computer into the CoreMedia Studio repository, there are three different ways to do so:
-
Create a new content item of your choice (for example, a Picture) and drag the file into this content. All steps are described in the Studio User Manual section Creating Content Items in the Library.
-
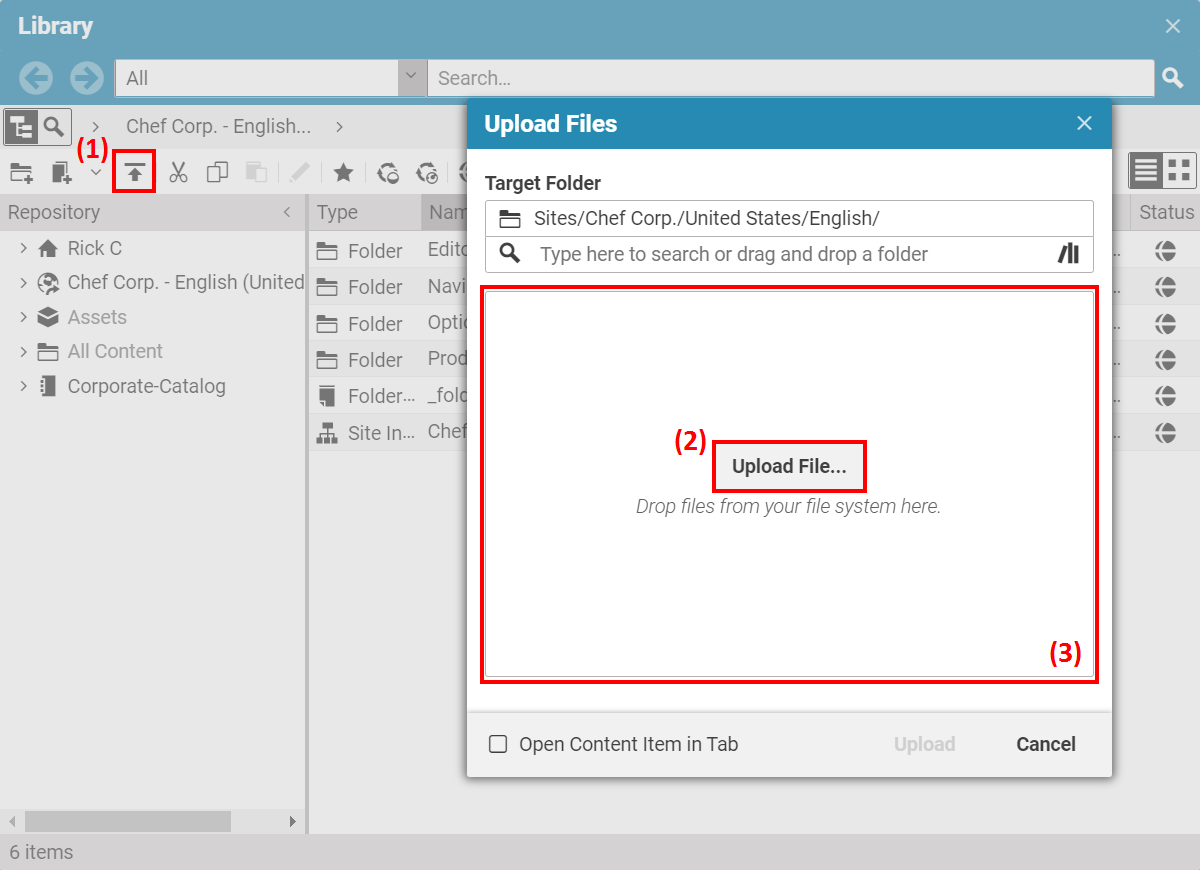
In the Library, click the button Upload(1). Then click on the button Upload File (2). This opens a new window to browse for and select the file(s) from your computer. This automatically creates a new content item for each file. The type of the created content item depends on the type of the file; for example, JPGs will become Pictures, and Word docs will become Articles. CoreMedia Studio comes with a predefined mapping for you.
-
Instead of clicking the Upload File button, you can also directly drag and drop a file into the marked area (3).
Figure 1. Upload Dialog
|
You can drag and drop more than one file into the Upload dialog at the same time, and the files can even be of different types. |
Is this page useful?