 What you will learn
- Different ways to upload files
- Important considerations
- Get to know the Upload Dialog
 Prerequisites
- A working Login to CoreMedia Studio
 Target Audience
This guide is for Editors.
There are three ways to upload files from your computer into CoreMedia Studio:
-
Create a new content item (for example, a Picture) and drag the file into it. For details, see Creating Content Items in the Library in the Studio User Manual.
-
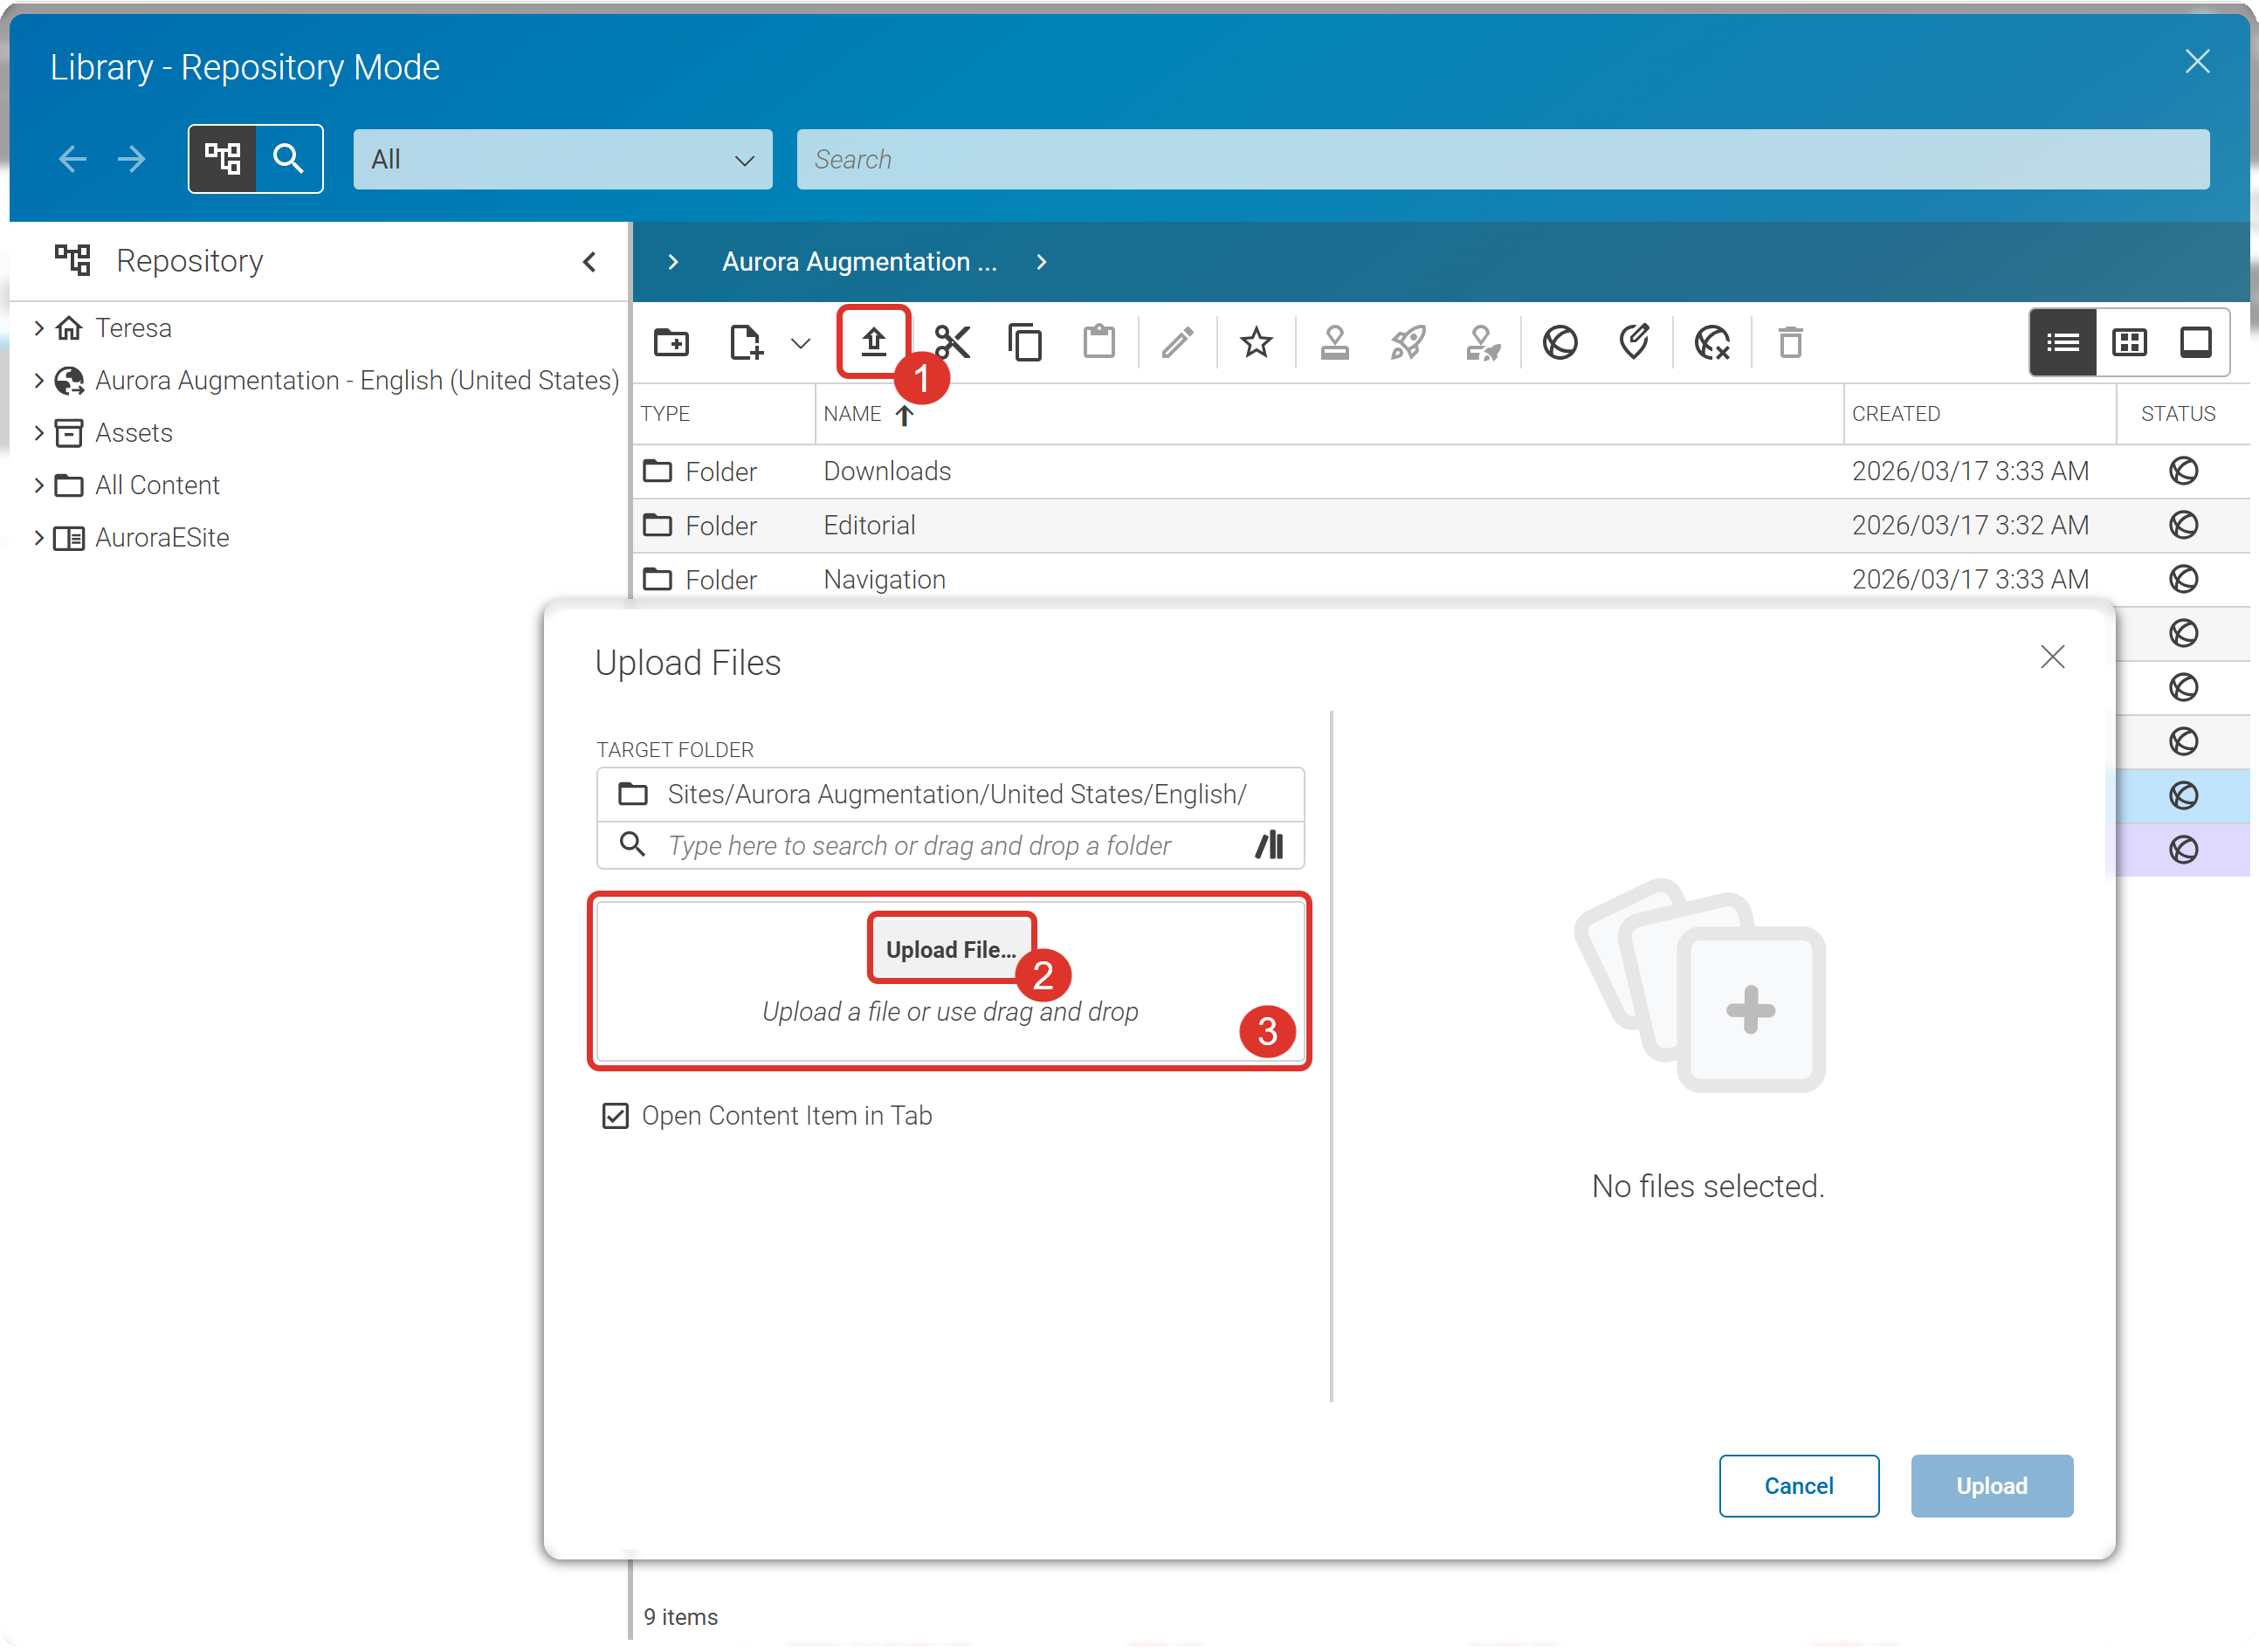
In the Library, click the Upload button (1). Then click the Upload File button (2). A file browser opens where you can select one or more files from your computer. This automatically creates a new content item for each file. The content type depends on the file type; for example, JPGs become Pictures and Word documents become Articles. CoreMedia Studio uses a predefined mapping to determine the content type.
-
Alternatively, drag and drop files directly into the marked area (3).
Figure 1. Upload Dialog
|
You can drag and drop multiple files at once, even if they are of different types. |
Is this page useful?