<head>
    <title>Documentation Newsletter Subscription</title>
    <meta name="description" content="This page allows you to subscribe to our monthly newsletter. Receive information about the recent topics added to the documentation site.">
    <meta name="robots" content="index,nofollow">
    <meta name="keywords" content="newsletter,documentation">
    ...
</head>Configuring a Landing Page
Last updated 16 minutes ago
Create a landing page for your website to host temporary campaigns.
Table of Contents
Prerequisites
Before you start:
-
Log in to Engagement Studio with a user that has role
Manager. -
Create a campaign of type
Landing Page.
Steps
After creating the Landing Page, Engagement Studio shows you the Edit Landing Page window.
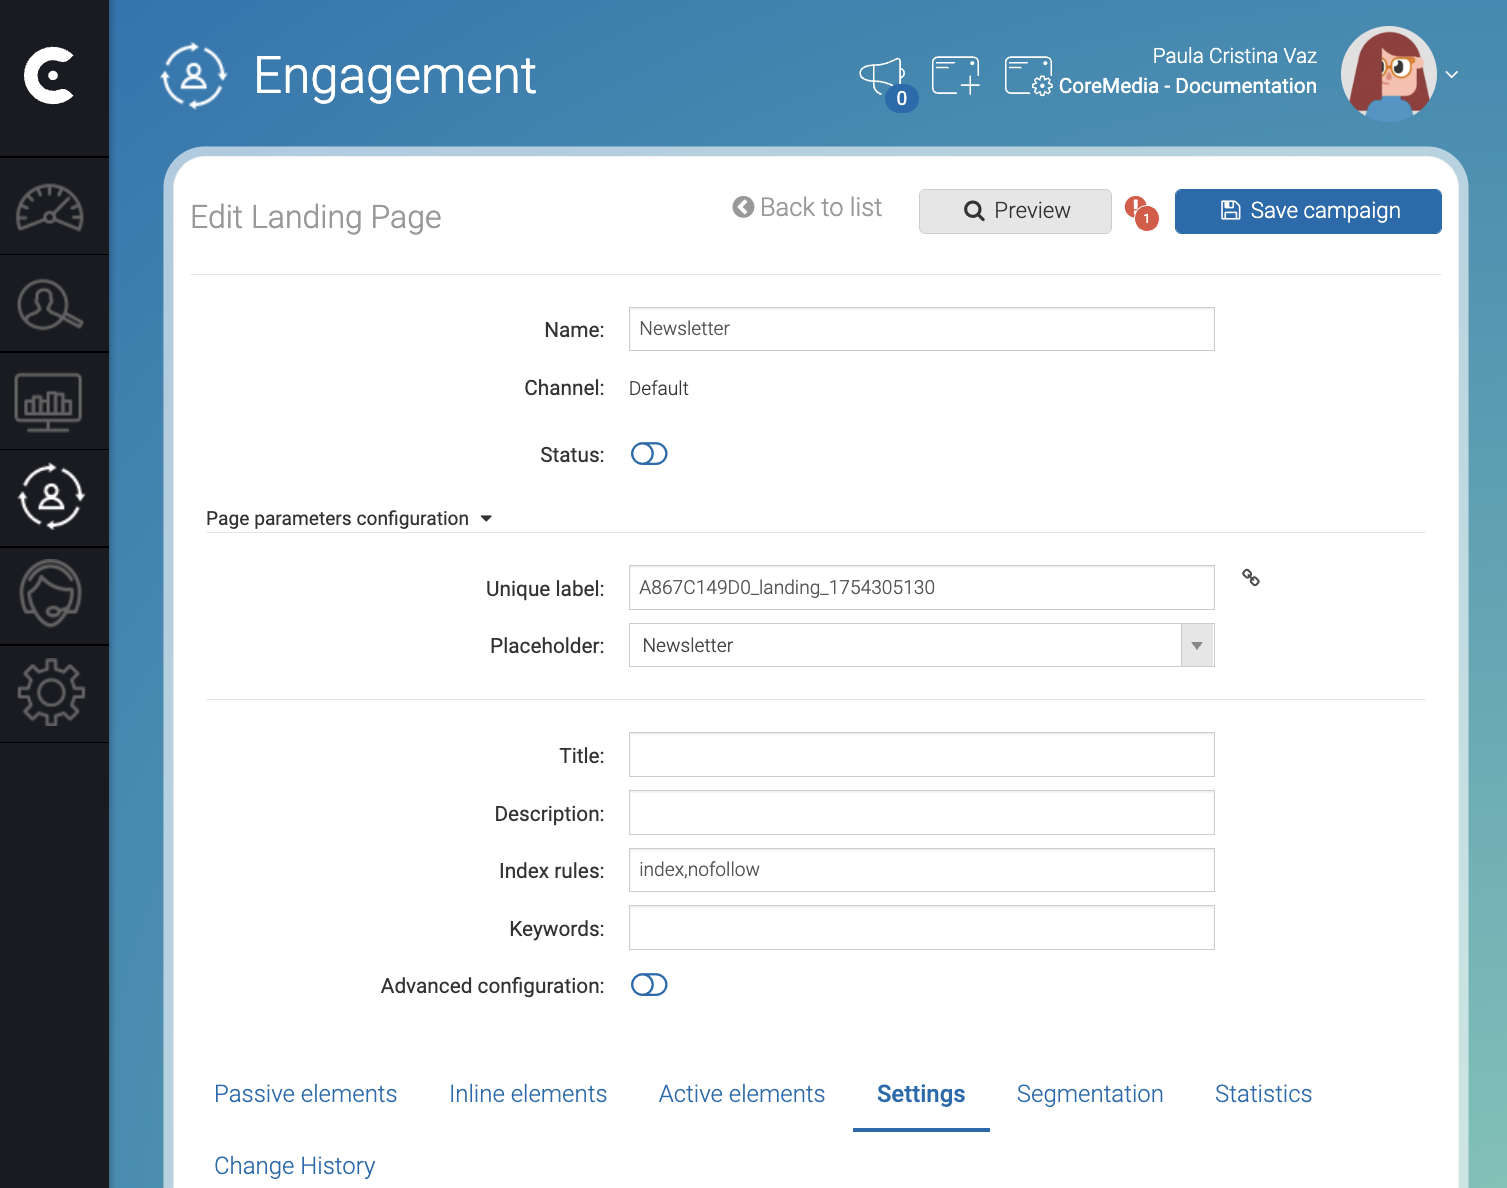
1. Configure meta information
In the Edit Landing Page window, fill the landing page meta information:
-
Title: Define a title for the page. For example,
Documentation Newsletter Subscription. -
Description: Add a description for the page. For example,
This page allows you to subscribe to our monthly newsletter. Receive information about the recent topics added to the documentation site.. -
Keywords: Define the keywords for SEO. For example,
newsletteranddocumentation.
In the top right corner of the Edit Landing Page window, click Save campaign.
Engagement Cloud adds the following lines to the head of the landing page:
To visualize the landing page, click 🔗 in the right side of the Unique label field.
2. Configure the header and the footer
Toggle the switch above the tabs to add more HTML code to your landing page.
-
Content to insert in the HEAD tag: Add more information to the head of your page. For example, add CSS code to style the elements of the landing page such as
<style> body { text-align: center;}</style> -
Content to insert before the page elements: Add HTML content that will appear before any passive placeholder inserted in the page. For example,
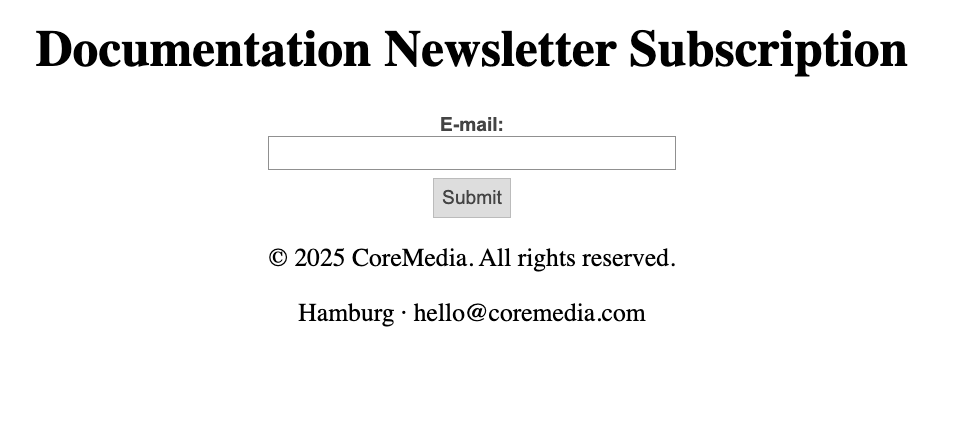
<h1>Documentation Newsletter Subscription</h1>. -
Content to insert after the page elements: Add HTML content that will appear at the bottom of the page, For example, a footer such as
<footer><p>© 2025 CoreMedia. All rights reserved.</p><p>Hamburg · hello@coremedia.com</p></footer>
3. Add passive elements
For example, add an element of type Newsletter subscription to
collect the email of the visitors.
Activate the following elements:
-
In the Status switch, activate the landing page.
-
In the Status switch of the passive element, activate the element.
In the top right corner of the Edit Landing Page window, click Save campaign.
Result
After saving the campaign, click 🔗 in the right side of the Unique label field. Copy the Landing page URL and load the landing page in a tab of your browser to render the landing page.
Is this page useful?