Creating a Campaign
Learn how to create a new Campaign in just a few simple steps.
1. Collecting Content from a Project
Before you can start to create a Campaign, you have to collect the content you want to use into a project as described in Using Projects.
Keep in mind that for Campaigns, a project is simply used as a container to collect all content needed for the Campaign. All other features of a project have no impact on your Campaign.
| Don’t have all the content items in place at the point in time when you’re creating the Campaign? No problem. You can easily add content to the project at any time. |
2. Switching to Campaigns
There are two ways to open the Campaign App:
-
Click the Create Campaign button in the Project window:
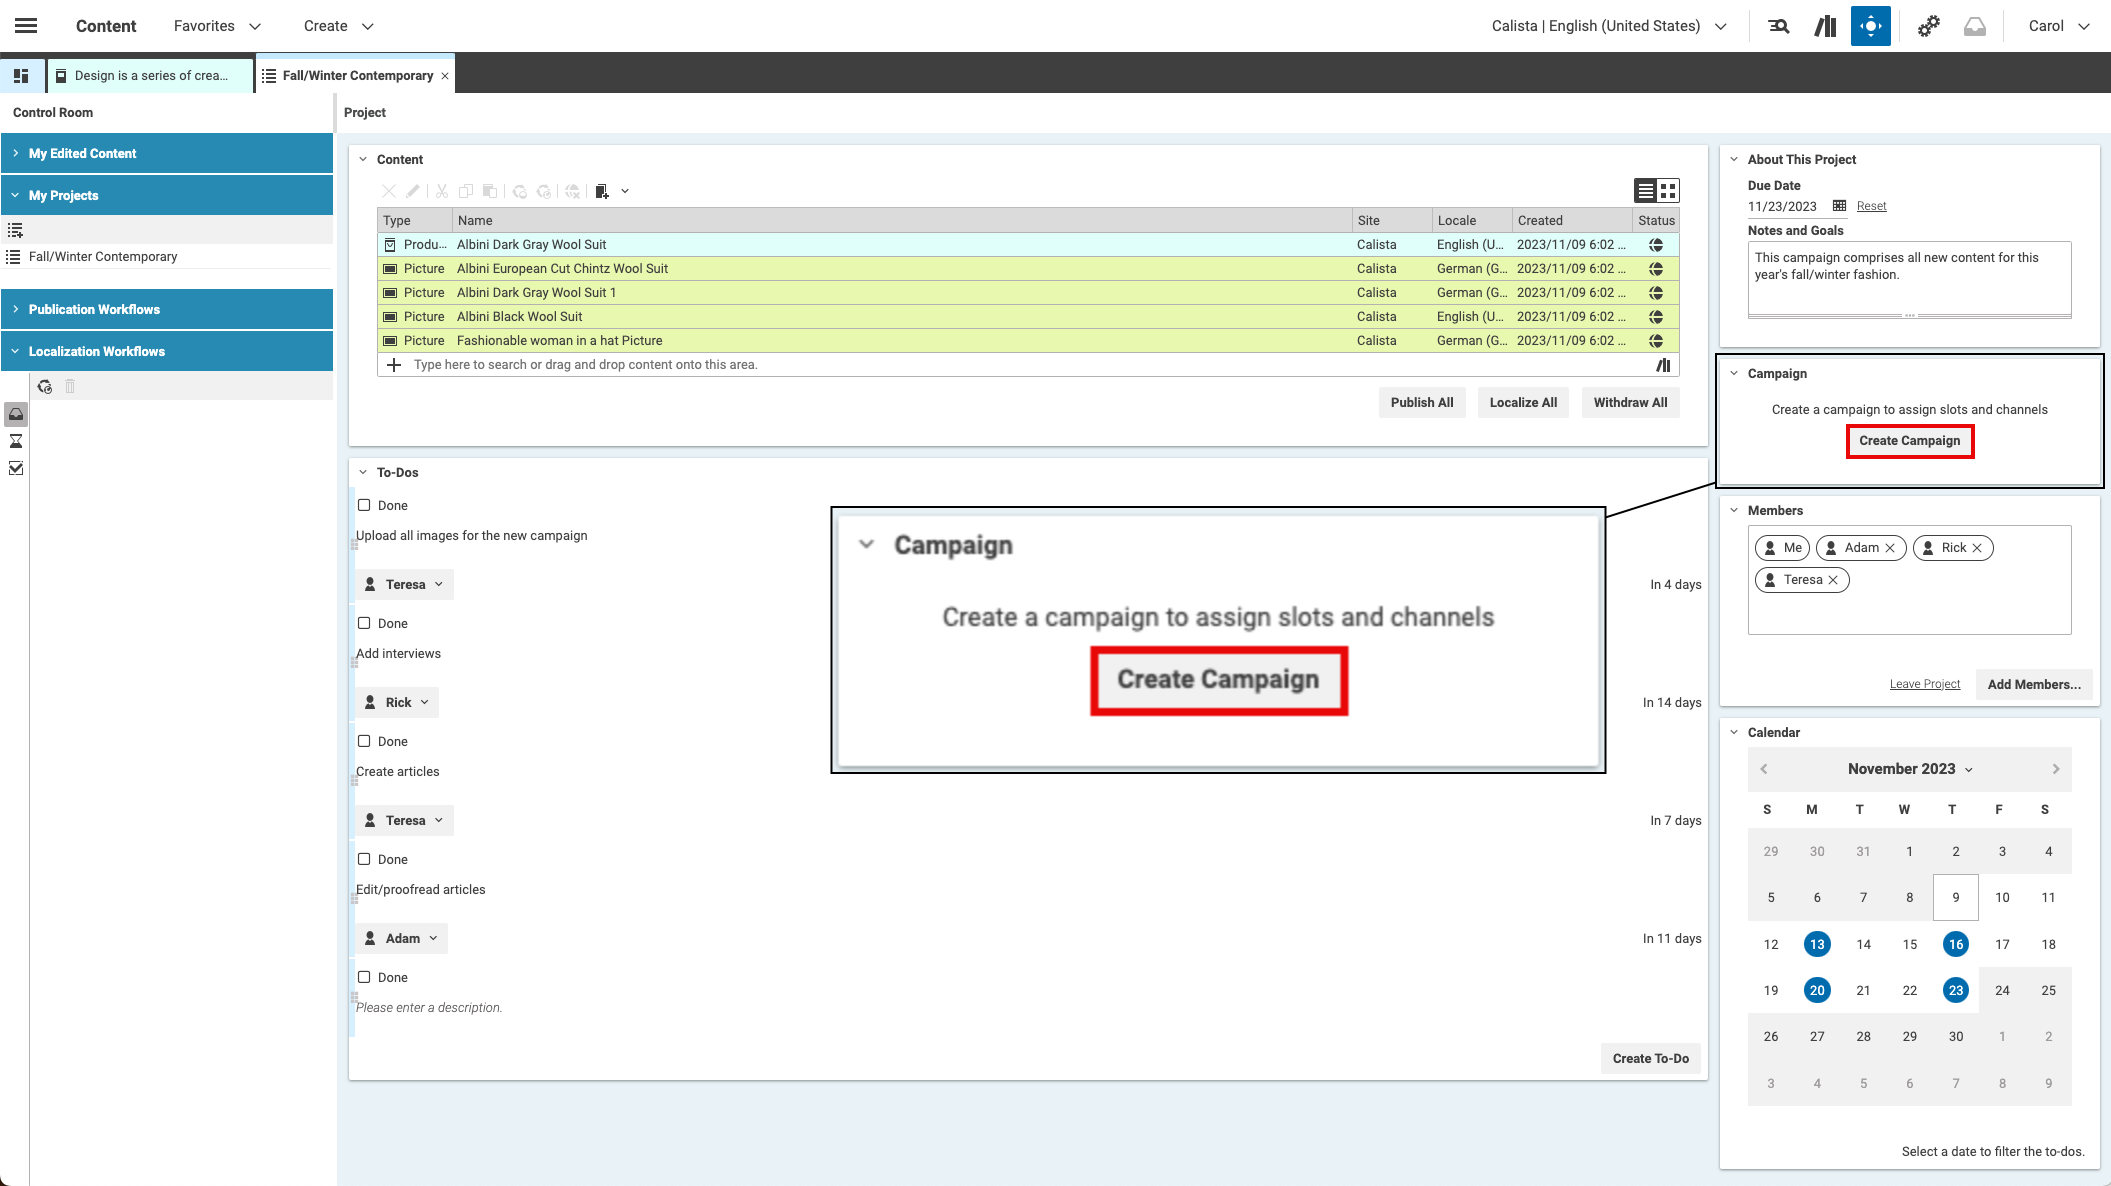 Start Campaign Creation from Project
The button 'Create Campaign' will be replaced by 'Open in Campaign App' as soon as the Campaign is created. -
Click the Campaigns menu item in the main menu of CoreMedia Studio:
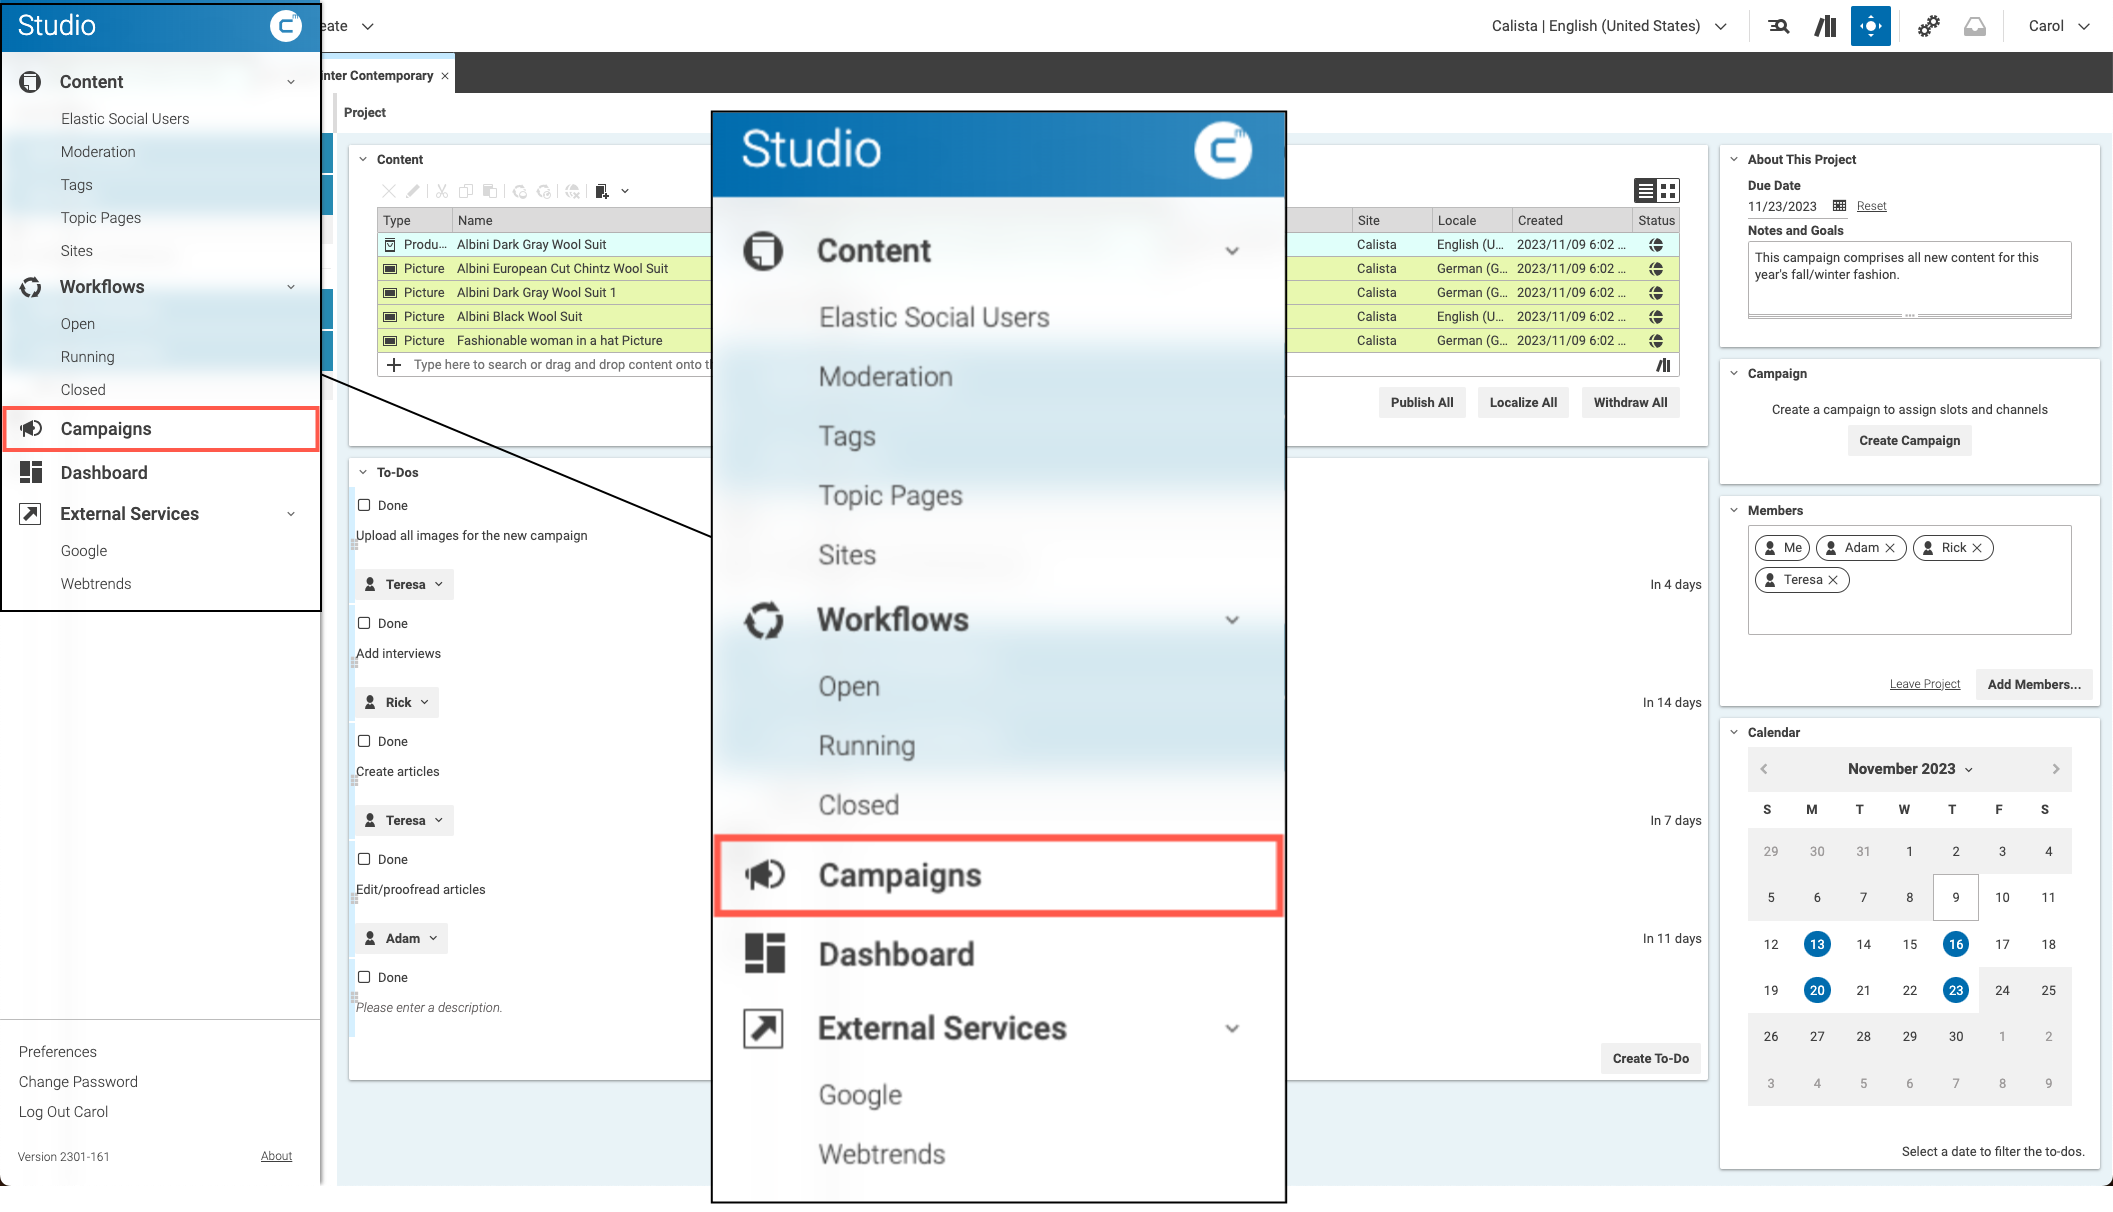 Start Campaign Creation from the Main Menu
Once you have opened CoreMedia Campaigns for the first time, you can simply switch between the Content App and Campaigns App by selecting the appropriate tab in your browser.
3. Enter Campaign Data
Now, the Campaign App opens in a new tab of your browser, with the Create New Campaign dialog box opened.

-
Select the project from which you want to take your content. The field is prefilled with your current project(s).
-
Select the site in which you want to run the campaign. The field is prefilled with your preferred site.
-
Select the locale for which you (initially) want to create the campaign.
-
Once you are done, click Next.
4. Select Dates and Create Campaign
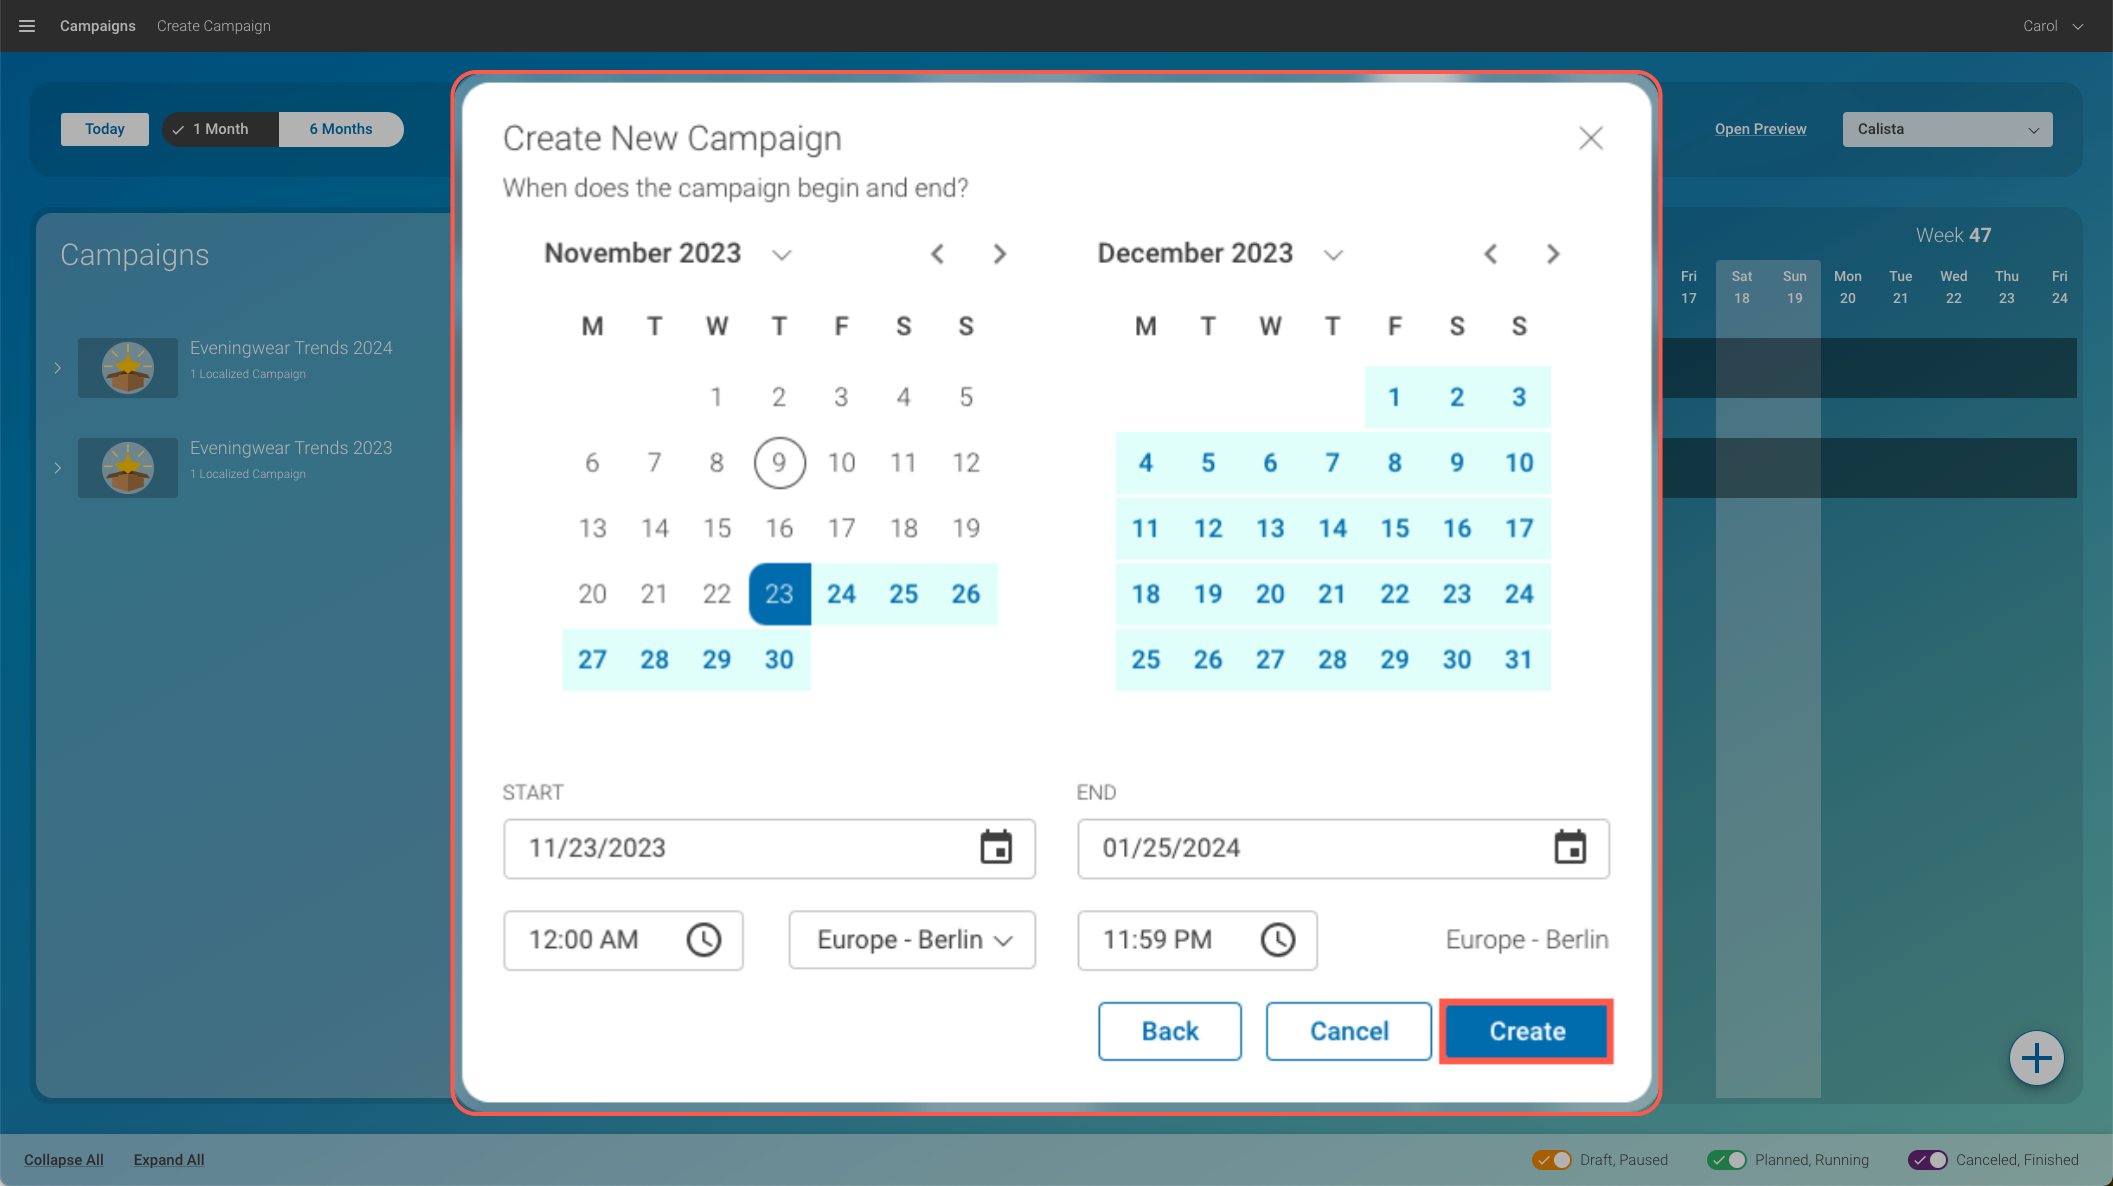
Enter the start date and end date of your campaign. Then, click Create to create the Campaign.
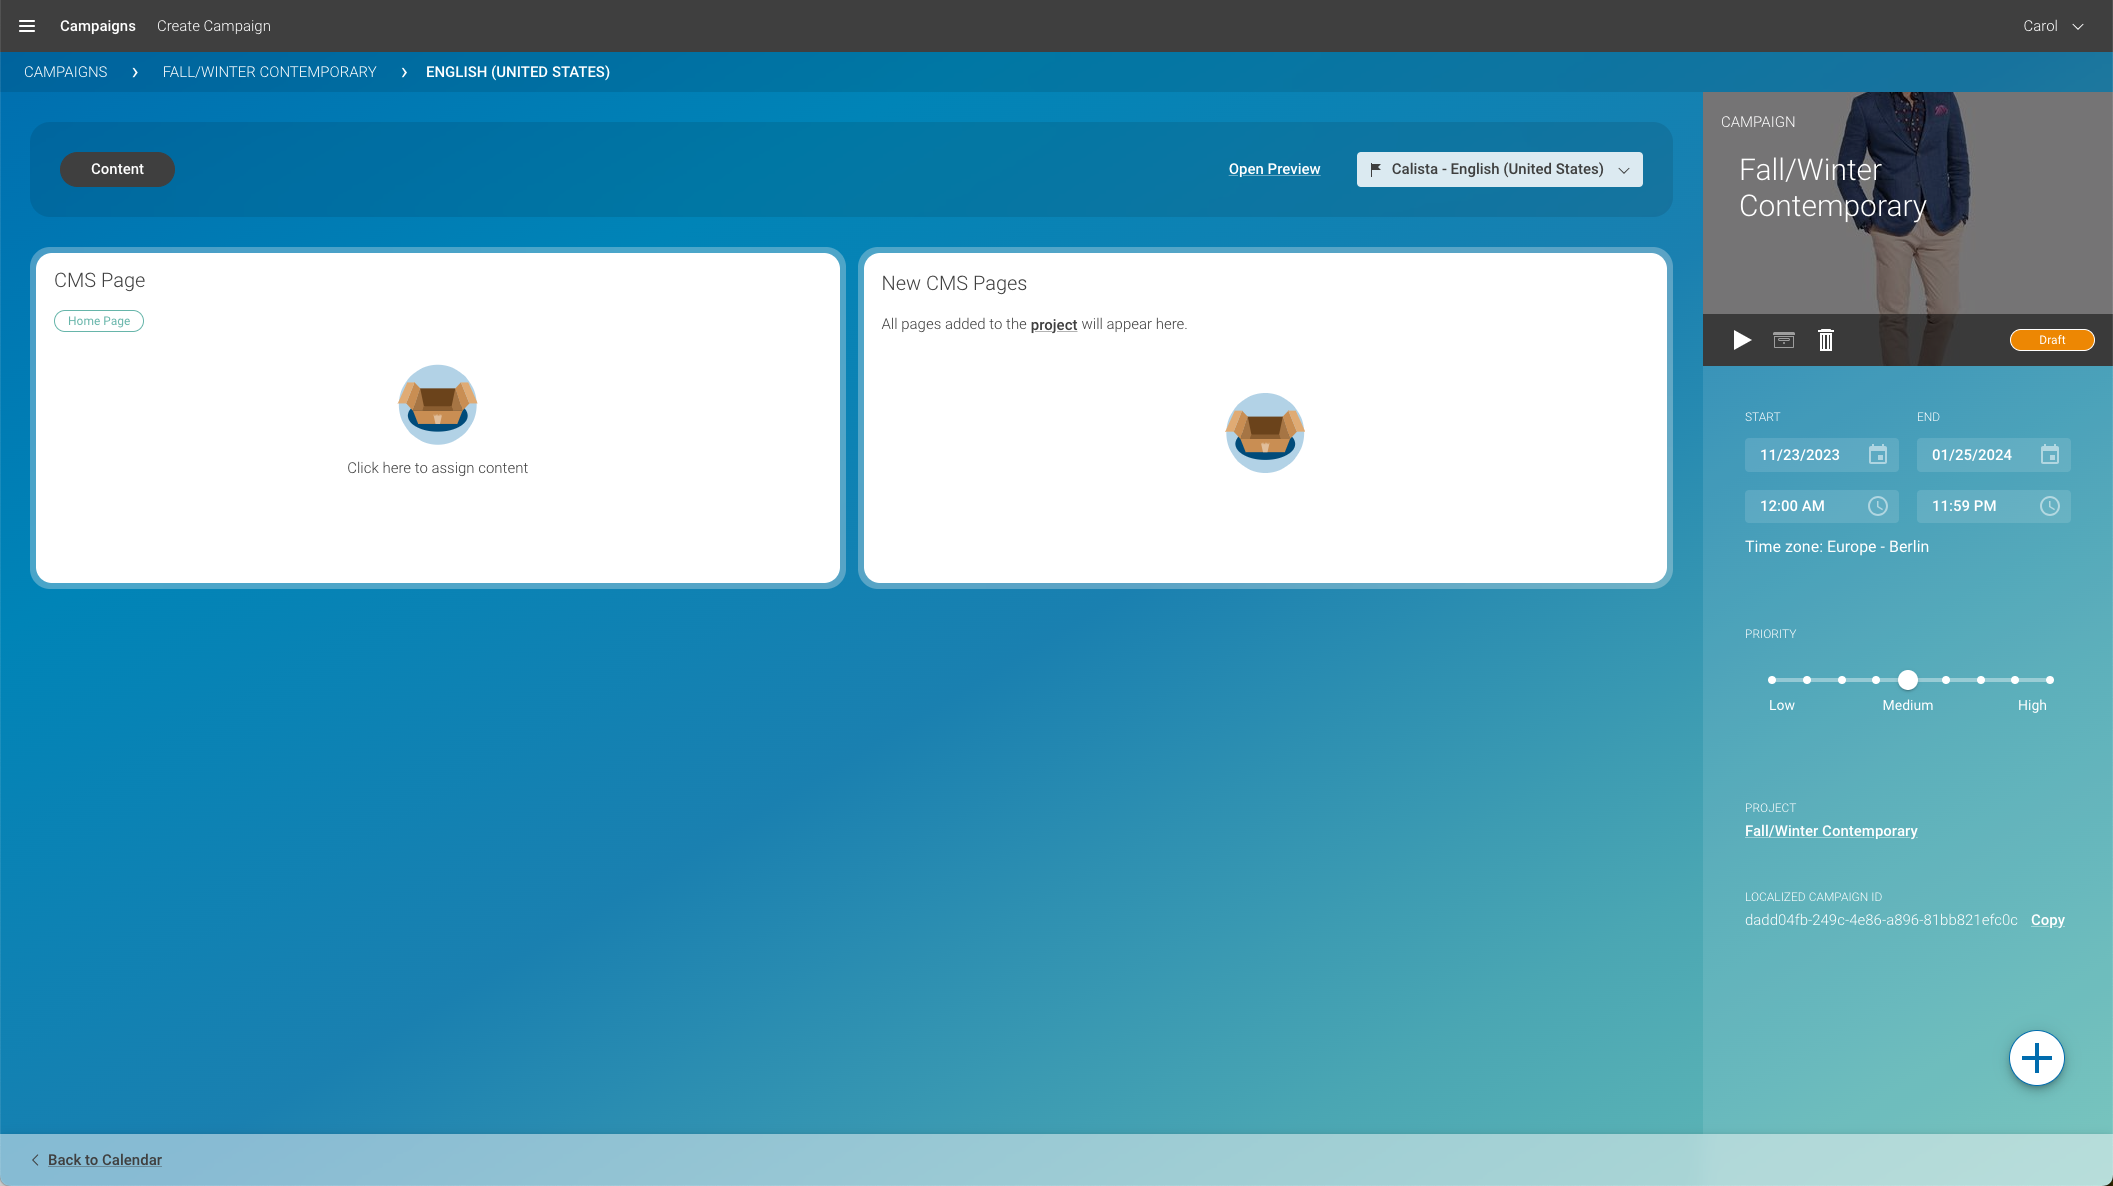
Next, you will see your campaign, without any content or further details; at this point, it is more like a blank Campaign:
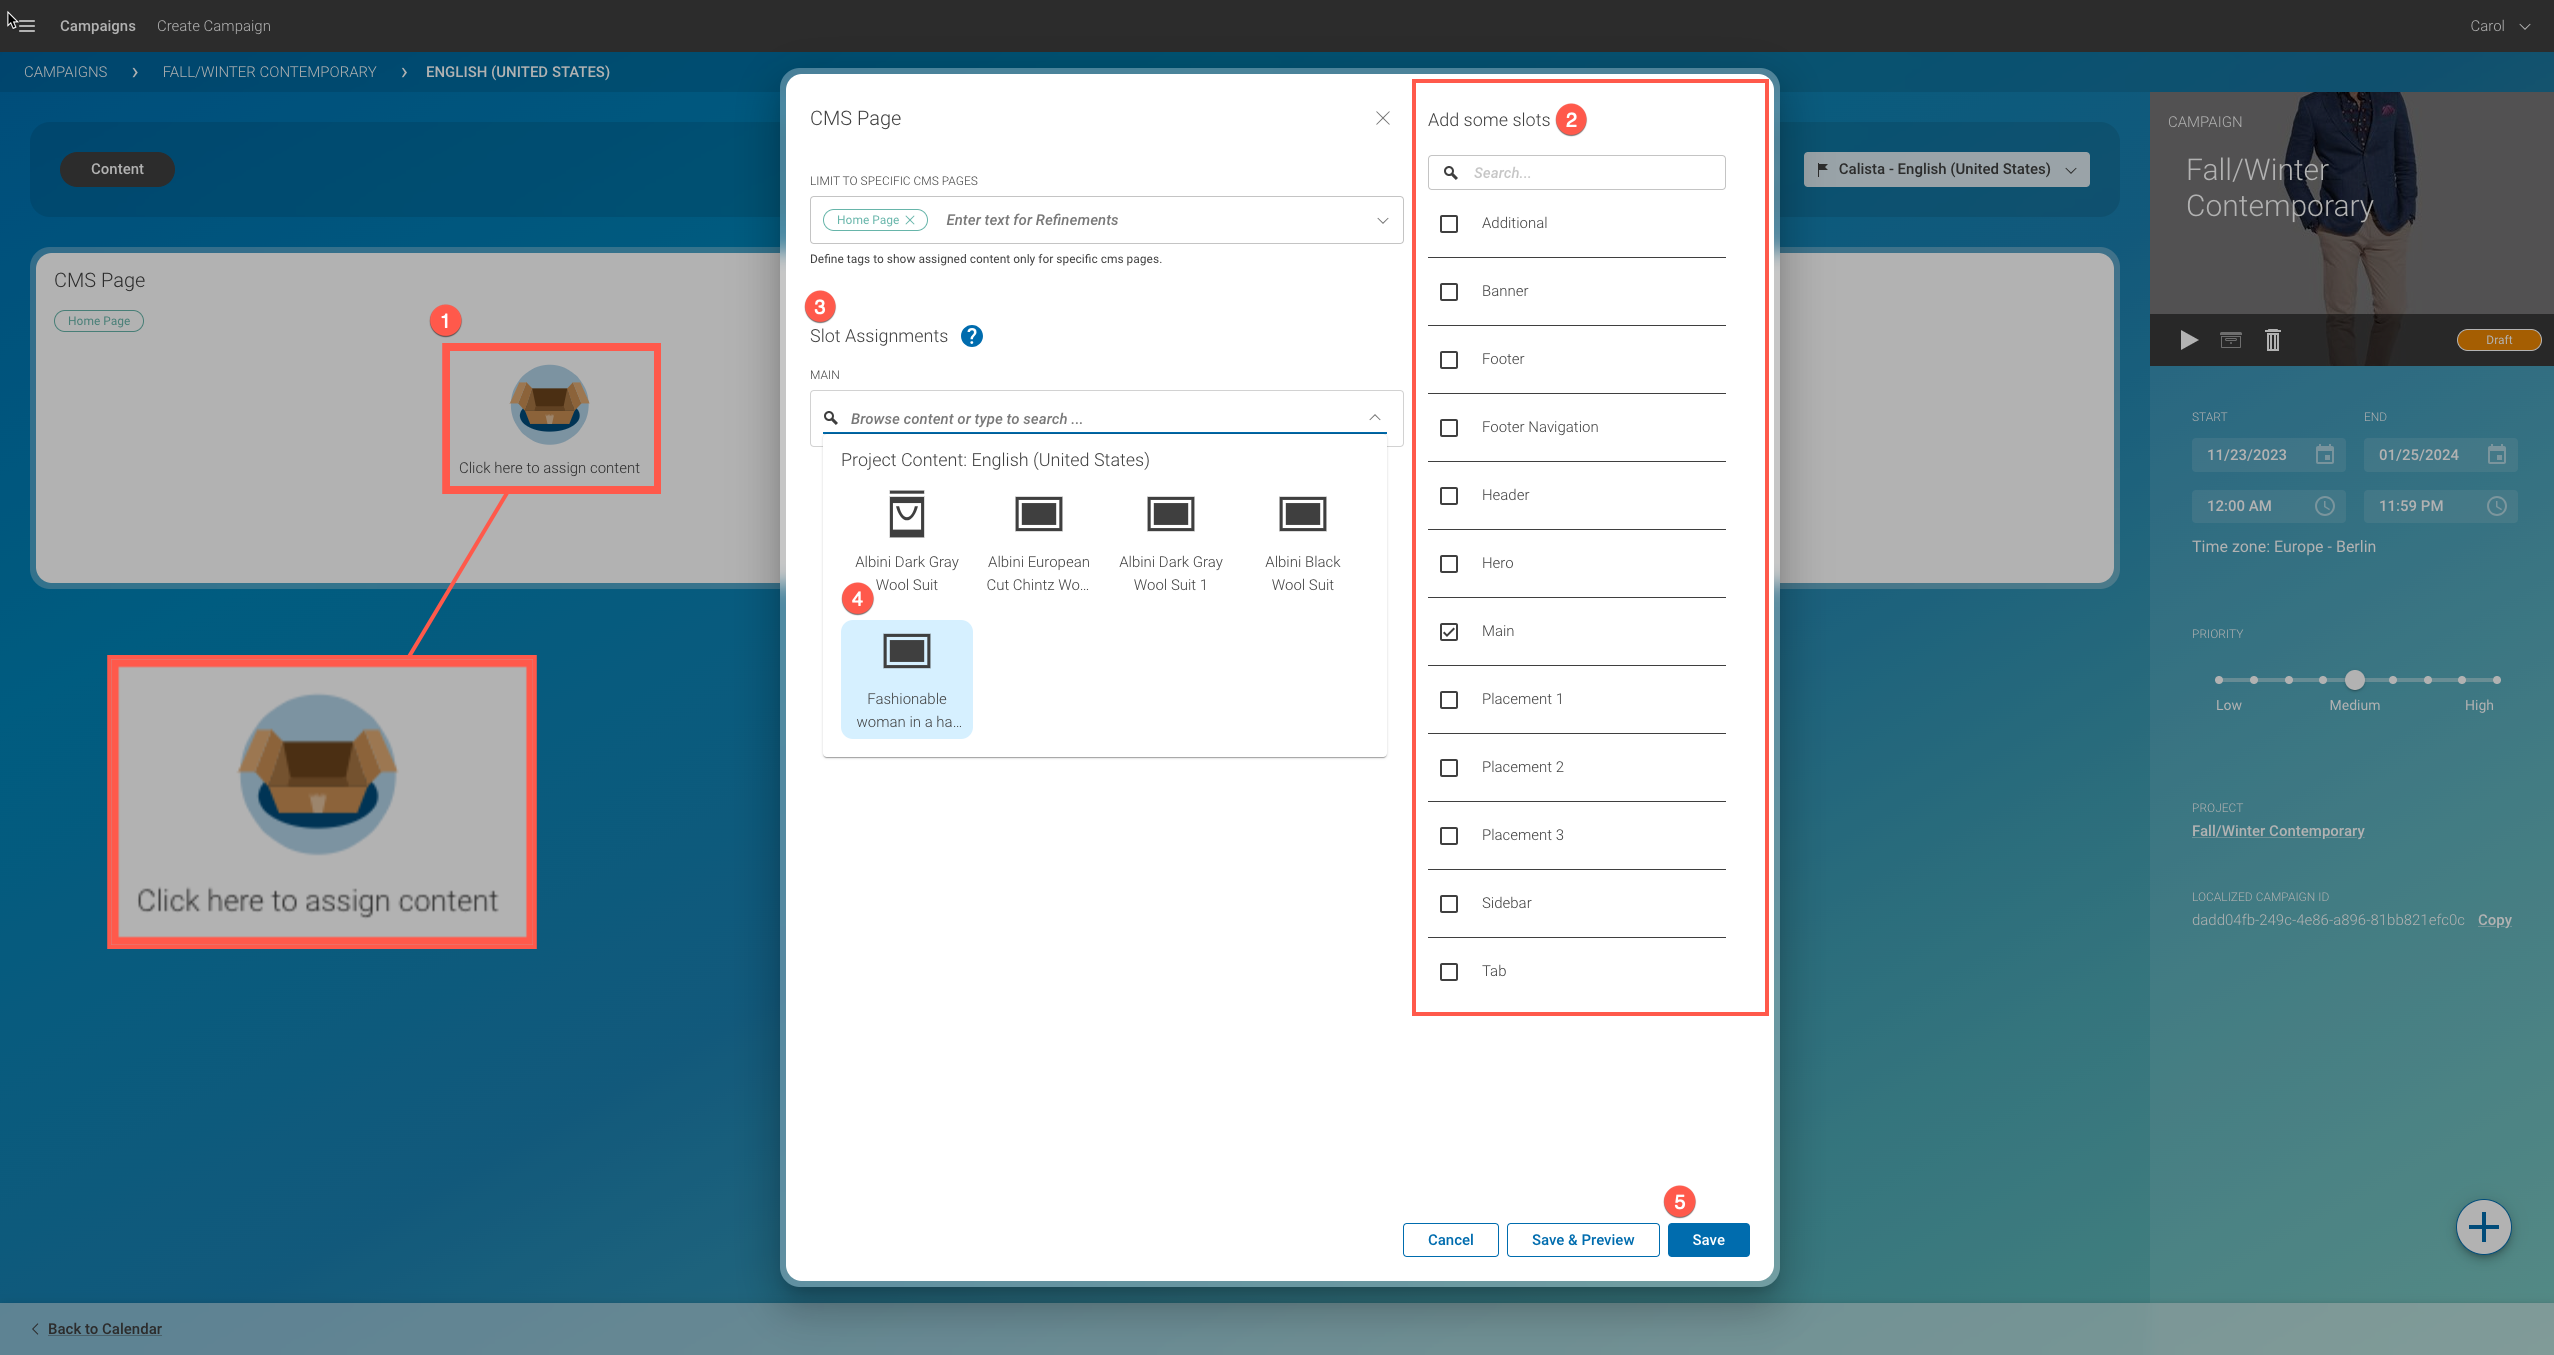
5. Assign Content to a Campaign Slot
Select the channel for which you want to define the content. In this example, you only have the CMS page.
-
In the initial overview, click into the field to assign content. This opens the CMS Page window.
-
First, you can add slots. In this example, we only selected one slot (however, you can add as many slots as you wish).
-
Once you have added a slot, you must fill this slot with content. Clicking on the drop-down menu will show you all content items associated with the project you have chosen.
-
Pick a content item.
-
Finally, click Save.
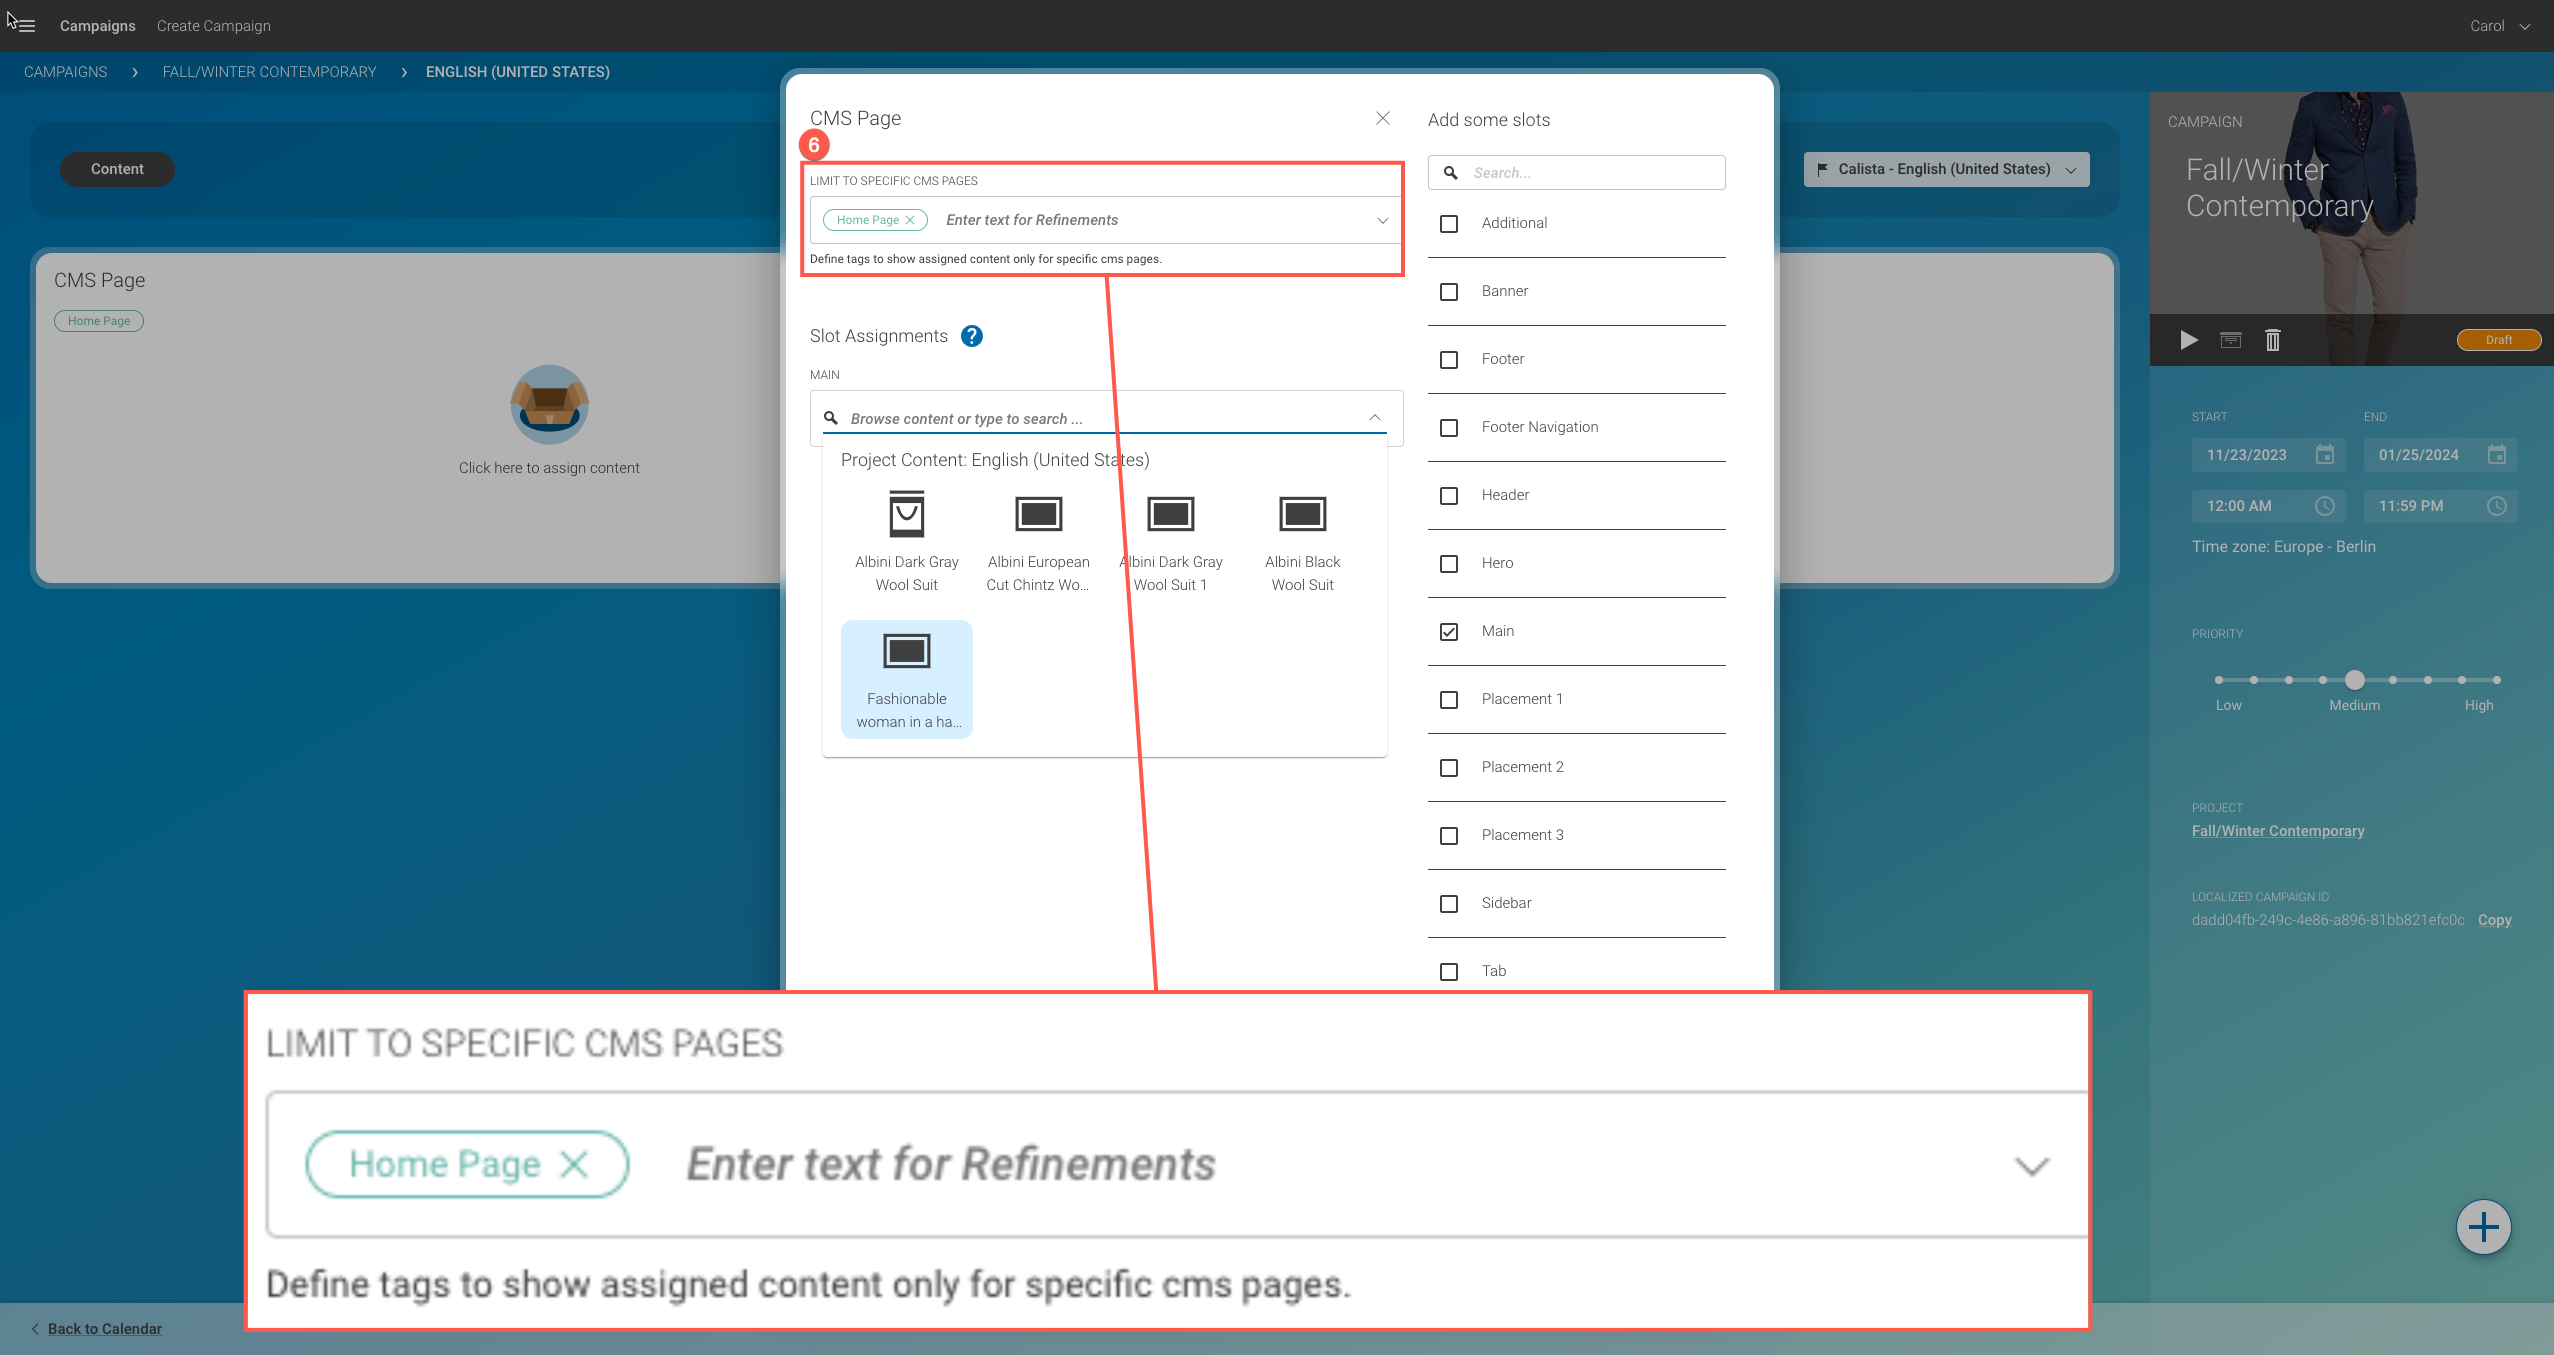
Got More Than One CMS Page?
-
Your CoreMedia installation might contain more than one CMS page. If this is the case, you must click into the field (6) Limit to Specific CMS Pages:
-
You will then get a list of all CMS pages.
-
Mark the checkbox of the pages which should show your campaign content.
-
Each page has several slots in which your campaign content can be shown.
-
Click into the respective slot field. You will see a list of all content that you have added to the project.
-
Select one content for each slot.
-
Proceed in the same way for the other channels of your campaign.
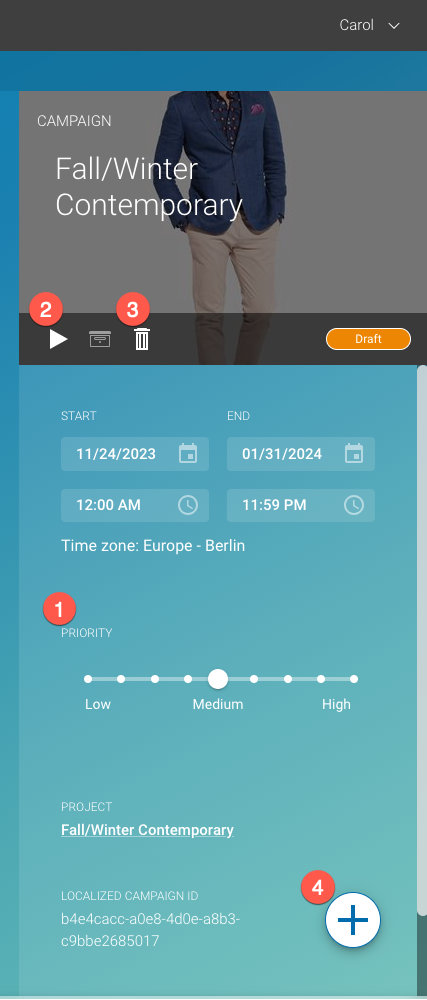
6. Prioritize and Start your Campaign
When you are done with all settings and assignments, you can prioritize and start the campaign:
Prioritize and Start your Campaign
When you have more than one campaign running at the same time, they might share the same channels or slots. In this case, you can prioritize campaigns. Content of campaigns with higher prioritization will be favored in comparison to lower prioritized campaigns depending on the actual delivery implementation.
-
Using the priority chooser (1), you can set the priority.
-
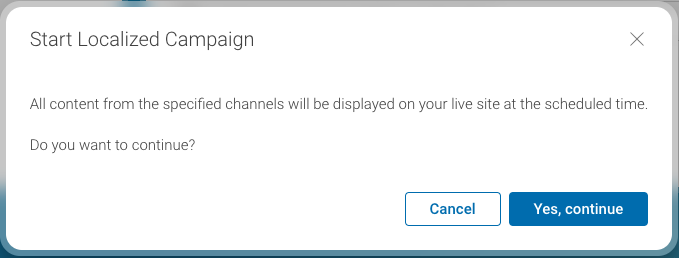
When everything is done, click the Start icon (2) to activate your campaign. This leads to the following confirmation dialog:
-
Another choice you have here is to delete this campaign by clicking on the Delete icon (3). This opens the following confirmation dialog:

-
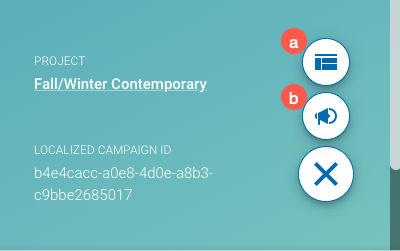
You also can create more channels or add localized campaigns by clicking on the Plus icon (4) in the bottom right corner. If you click on it, you can access the buttons to:
-
a) Create a new channel
-
b) Add a localized campaign
-
7. Your Campaign is Ready!
Once you have chosen to start the campaign, the status of your campaign progresses from Draft to Planned (or Running, in case your start date is now or any time set in the past)
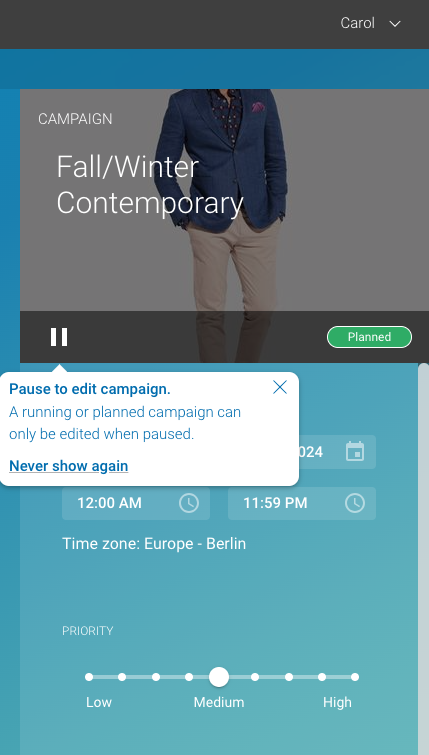
A Planned Campaign
| In this example, you have chosen a start date in the future. Therefore, once you click on Start, the campaign does not immediately go live. By pausing it, you will still be able to edit it. Once the date in the future is reached, the status of your campaign will switch from Planned to Running. |