Configuring an AB Test Campaign
Configure an AB Test campaign to compare two or more versions of elements in your site and to uderstand what elements have a higher number of conversions.
Prerequisites
Before you start:
-
Log in to Engagement Studio with a user that has role
Manager. -
Create an AB Test campaign.
TIP: If you already created the onsite control campaign, duplicate it before you create the AB Test campaign. Later, if you delete the AB Test campaign, all the used campaigns will also be deleted.
Steps
After creating the AB Test campaign, Engagement Studio shows you the Edit Onsite A/B Test window.
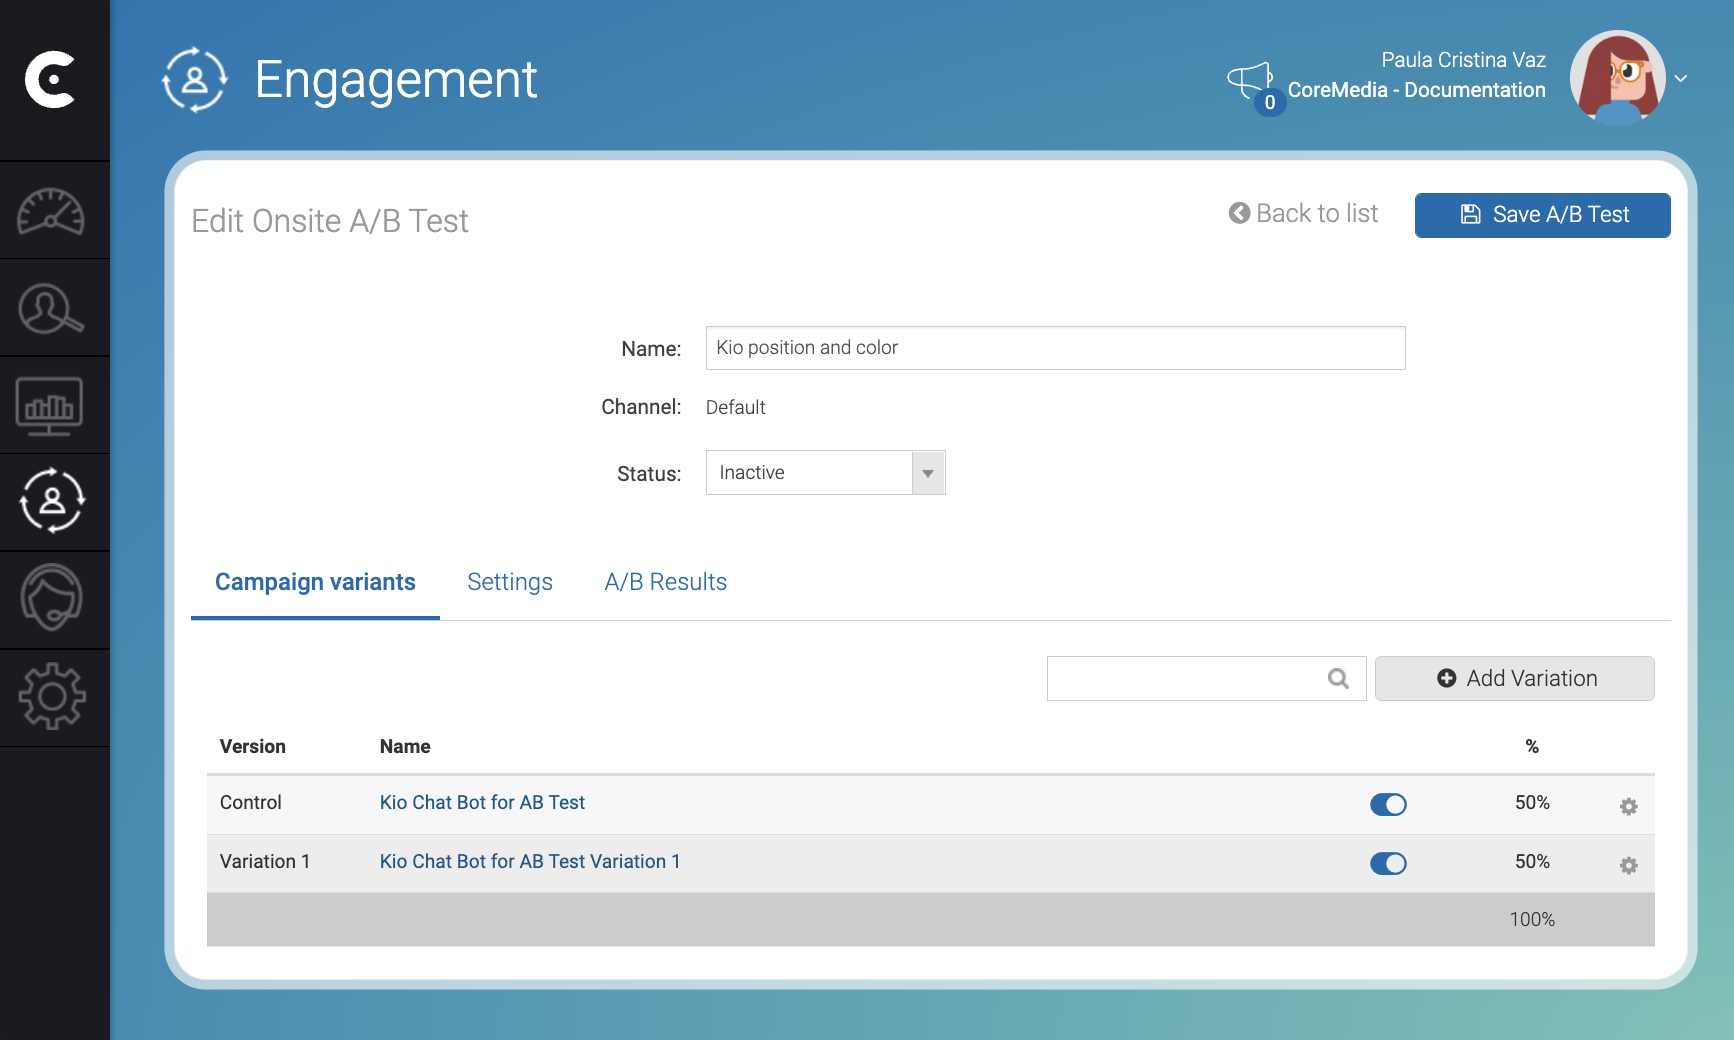
Note that the control onsite campaign with name
Kio Chat Bot for AB Test is a duplication of an onsite campaign with
name Kio Chat Bot that we were using to show the Kio chat bot in the
documentation site.
Reference: AB Test settings
1. Configure the variants
In the Edit Onsite A/B Test window, click on the name of Variation 1 onsite campaign and proceed as follows:
-
Change the Name of the Variation 1 campaign to something meaningful. For example,
Kio Chat Bot pink background. -
Ensure that the status is active.
-
In the Active elements tab, edit the active element that you want to test and make the necessary changes.
-
In the bottom right corner of the active element window, click Accept.
-
In the top right corner of the Edit campaign window, click campaign.
-
Click Back to list.
2. Configure the AB testing
-
In the Engagement page, click the name of the AB test campaign. For example, click
Kio position and color. -
In the Settings tab, configure the AB test onsite campaign according the study that you want to do. For example, to understand which type of Kio chatbot icon has more clicks:
-
Distribute page variation by: Select
Visitor. -
Page distribution mode: Select
Sequential. -
Test conversion goal: Select
Campaign elements accepted.
-
3. (Optional) Configure weights
If Page distribution mode = Random with different weights, adjust
weights as follows:
-
Open the AB Test campaign.
-
In the Edit Onsite A/B Test window, select the Campaign variants tab.
-
In the right side of one of the variants, click ⚙️ to edit the variant.
-
Set the Weight on distribution field. For example, 90%.
-
In the right bottom of Edit variation window, click Accept.
4. Activate the AB test onsite campaign
-
Change Status to active.
-
In the right top corner of the Edit Onsite A/B Test window, click Save A/B Test.
Result
After you click Save A/B Test test the campaign. Open a session in your browser and open another another session using the incognito window.
You should see the elements of the Control campaign in the session of your browser and the elements of the Variation 1 onsite campaign in the incognito window.


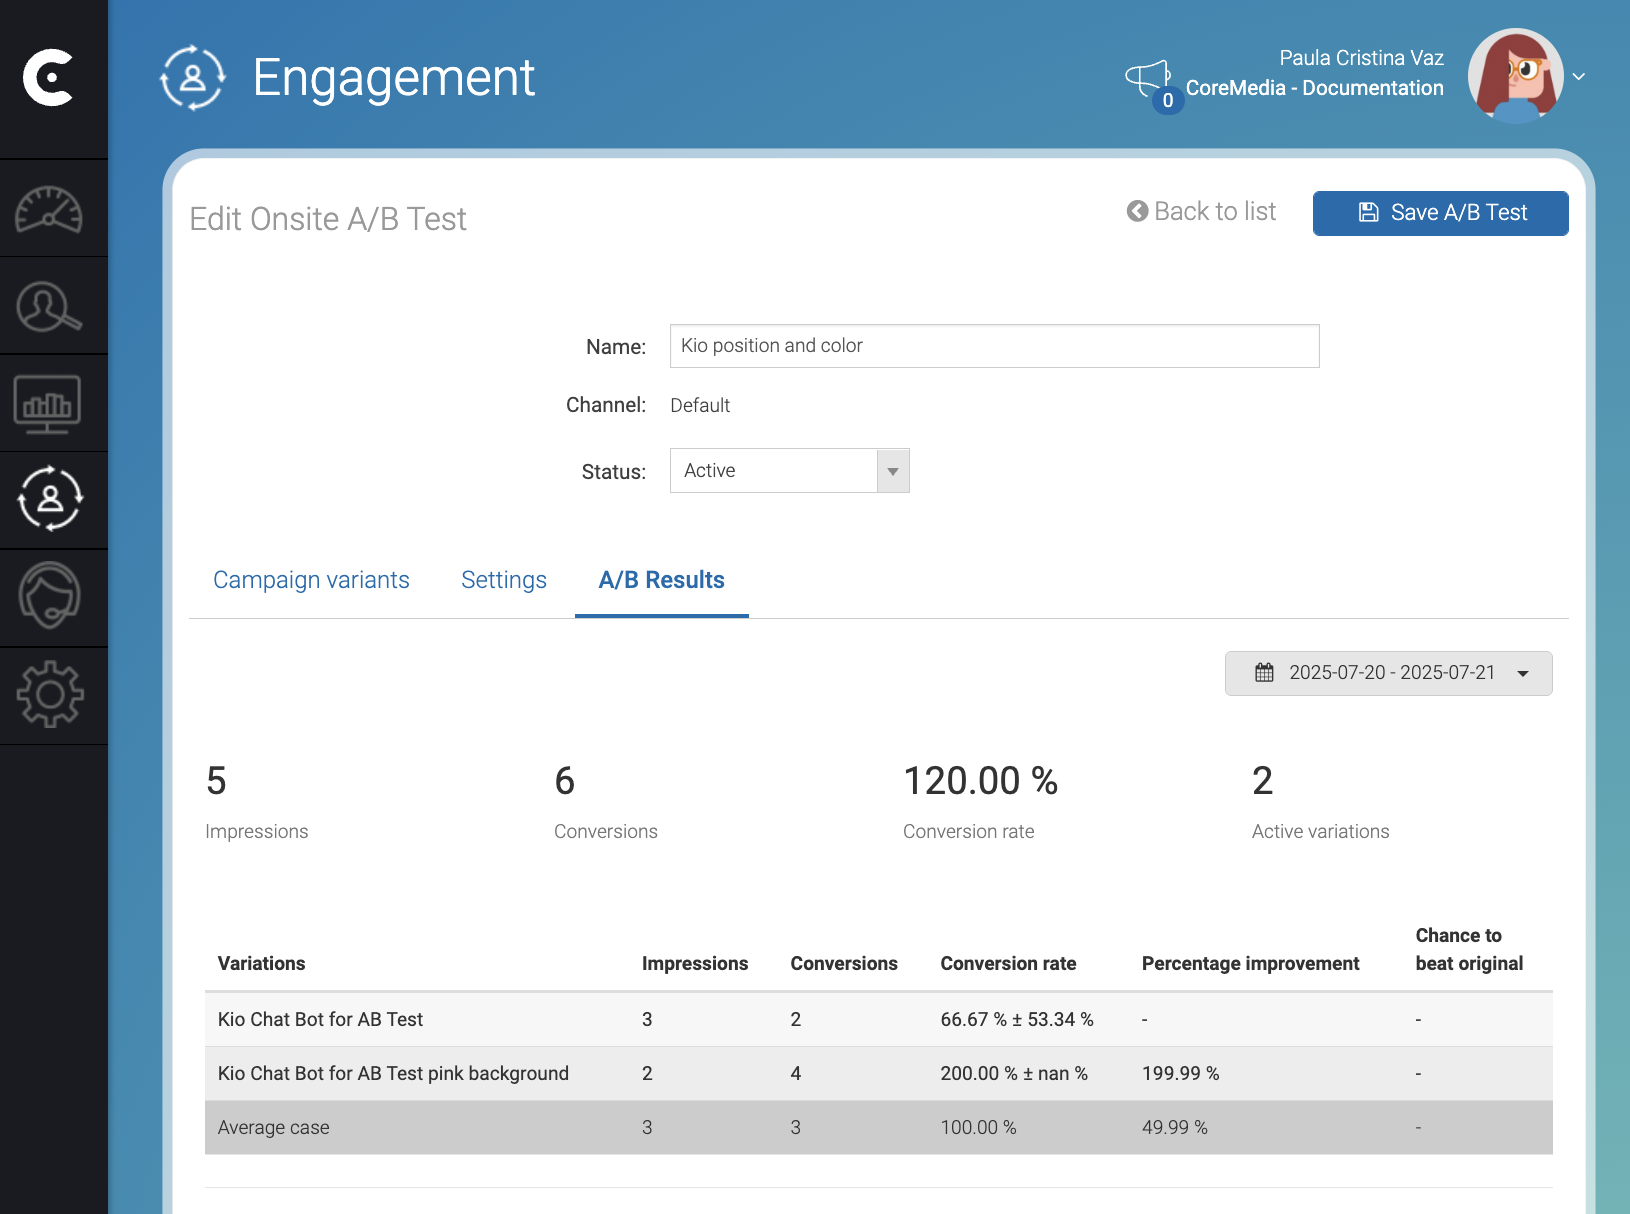
In the A/B Results tab, you can see the acceptance of each variation.