How to Manage Upgrade Tasks
Last updated 16 minutes ago
"Software is a great combination between artistry and engineering"...
 What you will learn
- Familiarize yourself with a possible timeline and the phases for an upgrade
- Be aware of risks and challenges to be optimally prepared
- Learn about the two possible upgrade paths for your CoreMedia workspace
 Prerequisites
- Basic project management knowledge
 Target Audience
This guide is for Developers, Administrators \ Project Managers.
Table of Contents
Introduction
Bill Gates once said: "Software is a great combination between artistry and engineering.” While this is known to be true, even the best software in the world needs upgrading. And to do so, good project managers see the complete picture and keep in mind what their team members need from them.
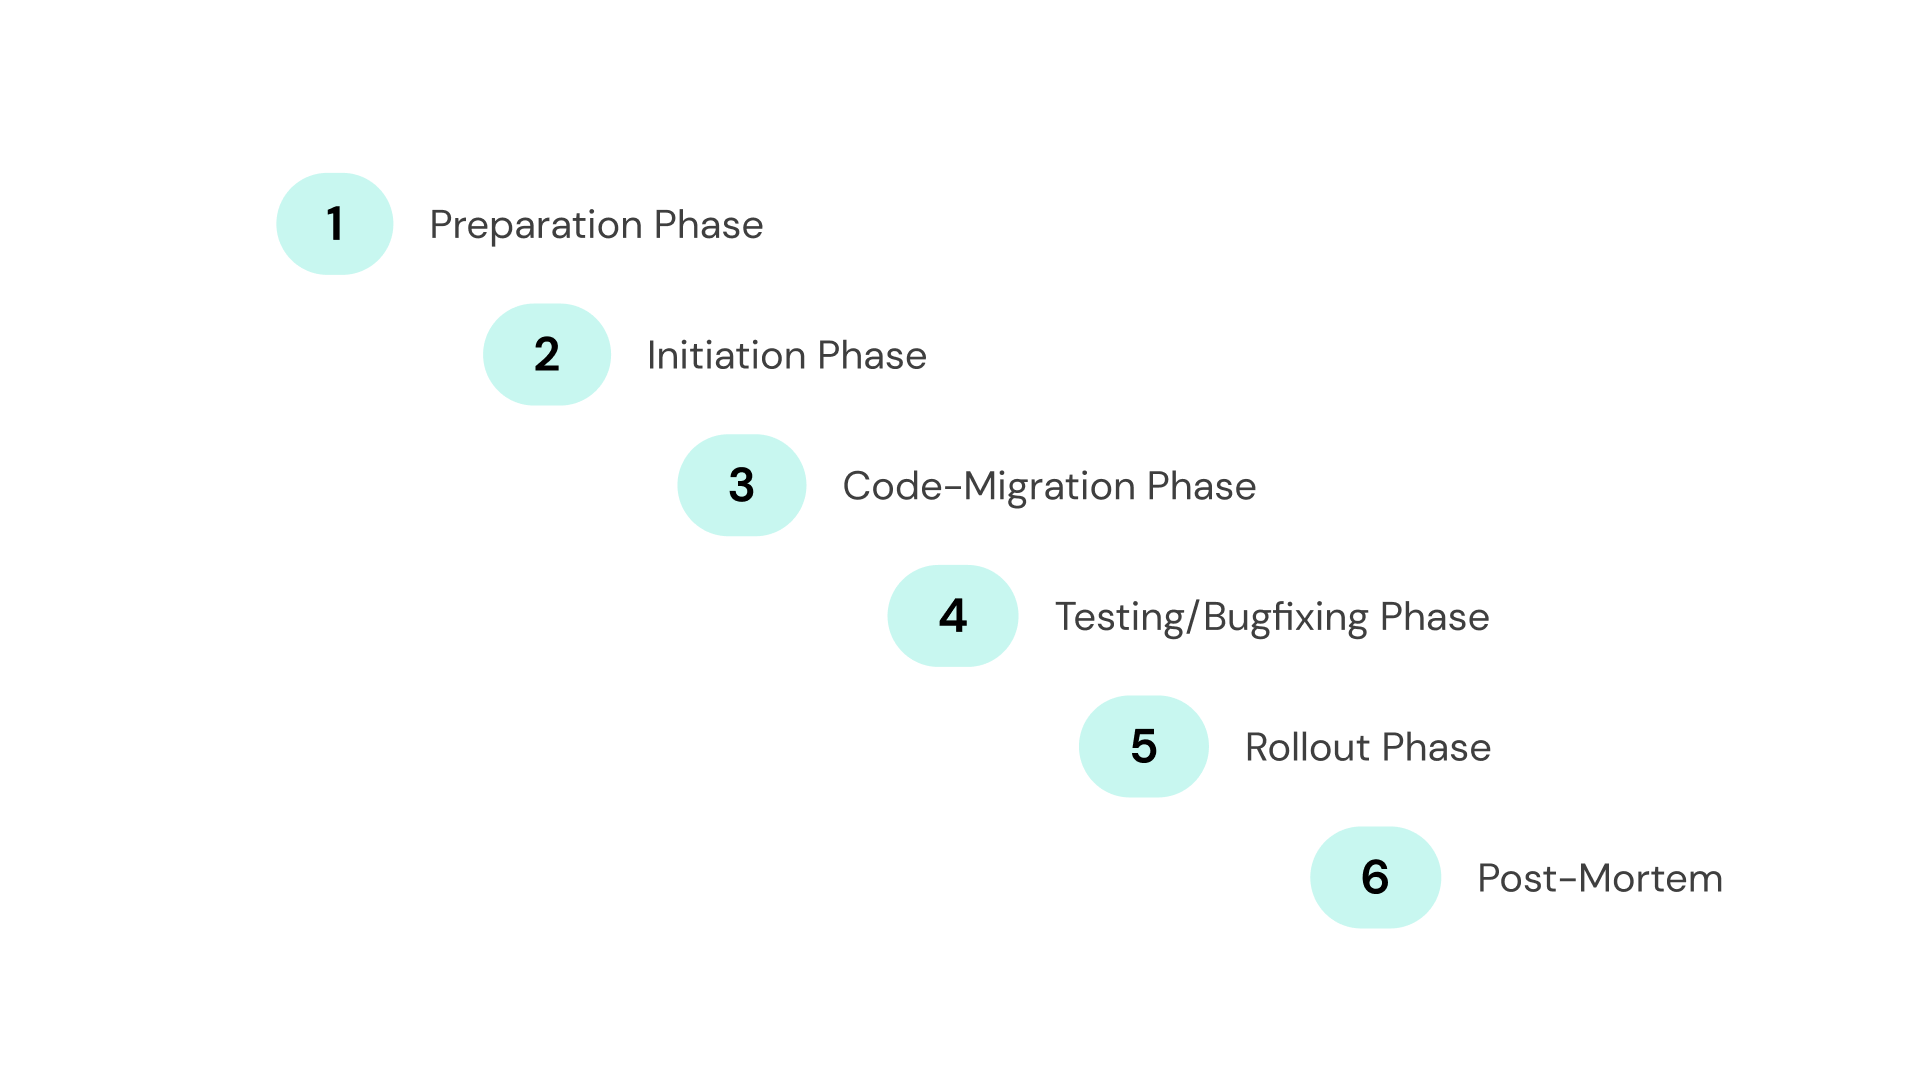
In each software upgrade process, there are different phases involved. All these phases play a crucial role in ensuring a smooth transition from the old to the new version while minimizing disruptions to your workflow.
Figure 1. Upgrade phases
This timeline is a general guideline and may need to be adjusted based on the specific circumstances of the CoreMedia Content Cloud buildout. It is important to allow flexibility for unforeseen challenges and to ensure thorough testing at each stage.
0. Select your upgrade path
Before you start with the upgrade planning, you need to select the upgrade path that best suits your needs and circumstances. This decision will depend on various factors, including the current state of your system, the resources available, and the specific requirements of your organization.
In general, there are two possible strategies for upgrading a CoreMedia workspace:
-
Install the new version of the CoreMedia Blueprint workspace and merge your customizations into the new version.
-
Merge the new version of the CoreMedia Blueprint workspace into your existing workspace and resolve conflicts using Git.
CoreMedia recommends and describes the second approach, as it is less error-prone and less time-consuming. The general way of upgrading your workspace via Git is described in the Upgrading with Git how-to.
| You can only do a direct upgrade from one major version to the next. You can’t skip a major version. |
The technical upgrade process consists of the following steps:
-
Upgrade your old workspace to the version required for upgrading to the new major version. You will find this version in the Upgrade Guide, or you can use the approach described in Upgrading with Git. Follow the instructions in the release notes as usual for the update.
-
Remove all components from your workspace, that are no longer supported in the new major version. This way, you will reduce the number of conflicts when you merge the new workspace. You will find the removed components in the Upgrade Guide of the new major version.
-
Now, merge in the required branch of the new major version. This may result in merge conflicts and issues where the new major release introduced breaking changes. To resolve these issues, consult the Upgrade Guide and all applicable release notes carefully.
-
Adapt your development environment and supported environments as described in the Upgrade Guide.
1. Phases & General Tasks During the Upgrade Process
Now, we will have a look at each phase and the (most common) tasks during each phase.
Preparation Phase
-
Task 1: Define the scope and objectives of the upgrade.
-
Task 2: Communicate with stakeholders to gather requirements and set expectations.
Initiation Phase
-
Task 1: Assemble the project team and assign roles.
-
Task 2: Develop a detailed project plan, including timelines and resources needed.
-
Task 3: Set up the workstream* and sandboxes.
|
Term Definition - "Workstream": In this context, the workstream is a combination of several things. In most cases, it is a dedicated branch in the code repository, which is then typically pulled with a dedicated pipeline from the CI to typically deploy to a dedicated environment (sandbox). You see, it often says "typically". Because it also works without it. But ideally, you isolate the work from the "everyday business". That’s why we chose the term workstream to summarize Git repo, CI pipeline, environment instance and whatever else is necessary. Some customers even build virtual machines for the developers to deploy. Or some developers set up IDE instances specifically for this purpose. |
Code-Migration Phase
-
Tasks 1-5: Merge codebase; Successful build for frontend and backend; Migrate extensions/ customizations; upgrade external APIs
-
Task 6: Prepare deployment.
-
Tasks 7-9: Bug-fixing, documentation, and training.
Testing Phase
-
Tasks 1-2: Perform developer testing to ensure individual components work correctly.
-
Task 3: Execute user acceptance testing (UAT) with a select end-user group.
-
Task 4: Obtain go-live approval.
Rollout Phase
-
Task 1: Create and communicate the cut-over/go-live plan (including the rollback scenario).
-
Task 2: Execute go-live.
-
Task 3: Communicate go-live.
Post-Rollout
-
Task 1: Monitor system performance and user feedback.
-
Tasks 2-3: Conduct a post-implementation review and document lessons learned.
2. Managing Risks
Proactive risk management is key throughout the entire upgrade process!
-
Risk Identification: Start by identifying potential risks that could impact the upgrade process. This includes technical issues, resource constraints, and external factors.
-
Risk Analysis: Assess the likelihood and impact of each identified risk. This helps prioritize which risks need more attention and resources.
-
Risk Mitigation Planning: Develop strategies to reduce the probability of risks occurring or to lessen their impact. This could involve contingency plans, alternative strategies, or preventive measures.
-
Implementation of Controls: Put in place the necessary controls to manage the risks. This could include technical safeguards, process changes, or additional training for staff.
-
Monitoring and Review: Continuously monitor the upgrade process to identify new risks and to ensure that the risk management strategies are effective. Adjust plans as necessary based on this ongoing review.
-
Communication: Keep all stakeholders informed about potential risks and the measures taken to mitigate them. Transparency is key to managing expectations and ensuring collaborative risk management.
-
Documentation: Keep detailed records of all risk management activities. This documentation can be invaluable for future upgrades and for understanding the risk landscape of the project.
3. Common Challenges
Being aware of the challenges can help to maneuver through the upgrade process as smoothly as possible.
-
Legacy System Constraints: Older systems may be difficult to integrate with new software, leading to compatibility issues – consider this for all 3rd party applications connected with CoreMedia.
-
User Training: Employees need to be trained on the new system, which can be time-consuming and relies on good documentation.
-
Insufficient Testing: User Acceptance Testing is often cut short, and Performance Testing is skipped altogether. Which leads to unnecessary issues in production.
-
Deployment and Downtime Management: Upgrades can result in system downtime (as it is normal for any CMS), affecting business operations. Schedule deployments accordingly.
-
Budget Overruns: Unforeseen complications can lead to costs that exceed initial budget projections.
-
Change Management: Resistance to change can hinder the adoption of new software and processes.
-
Quality Assurance: Ensuring the new system meets quality standards requires extensive testing.
-
Security Risks: New vulnerabilities may be introduced during the upgrade process.
Is this page useful?