Creating a Listing Panel
Learn how to create and configure a listing panel inside a dashboard in the Contact Center and Analytics Studio (CCAS).
Prerequisites
-
Have a user with permissions to use CCAS.
-
Have created, at least, a dashboard.
Steps
1. Add a new panel to the dashboard

-
In bottom right corner of a dashboard, click button plus
 .
. -
In window Add Panel, select Listing Panel.
2. Configure the listing panel
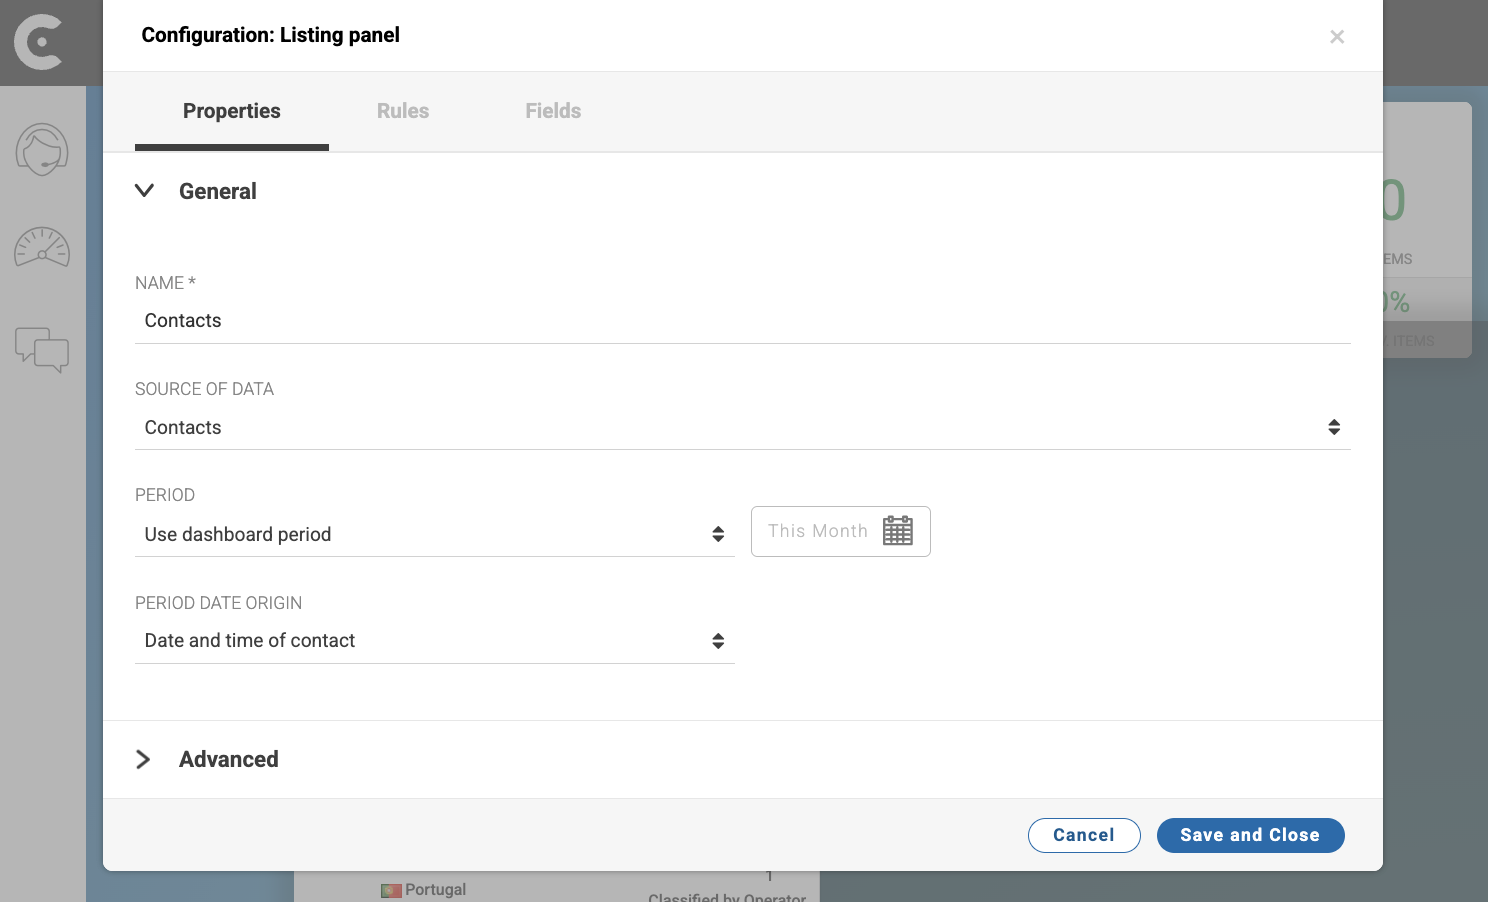
In tab Properties of window Configuration: Listing panel, configure the panel:
-
NAME: Name for the panel. For example,
Contacts Monthly. -
SOURCE DATA: Select the data source that you want to view in the panel. For example,
Contacts. -
PERIOD: Define the period for the data.
Note that:
By default, the panel inherits the period defined in the dashboard.
For each data source, CCAS creates panels with a default set of fields in the data source. To view more information, you should add extra fields and arrange fields in the order that better fits your needs.
3. Configure the fields of the panel
-
In window Configuration: Listing panel, select tab Fields.
-
In tab Fields, you can:
-
Click
 to use the field to sort data in the panel. You can use only one field to sort data in the panel. By default, CCAS uses the first field to sort data.
 -
Click
 to show the field personalized in the panel. When you personalize a field, changes color.
 -
Click
 to hide fields in the panel. When you hide a field, changes color.
 -
Click
 to delete fields. Deleted fields disappear from the panel and the from tab fields.
 -
Drag the fields to change the order of the fields in the panel.
-
Add more fields to the panel.
-
-
Click button Save and Close.
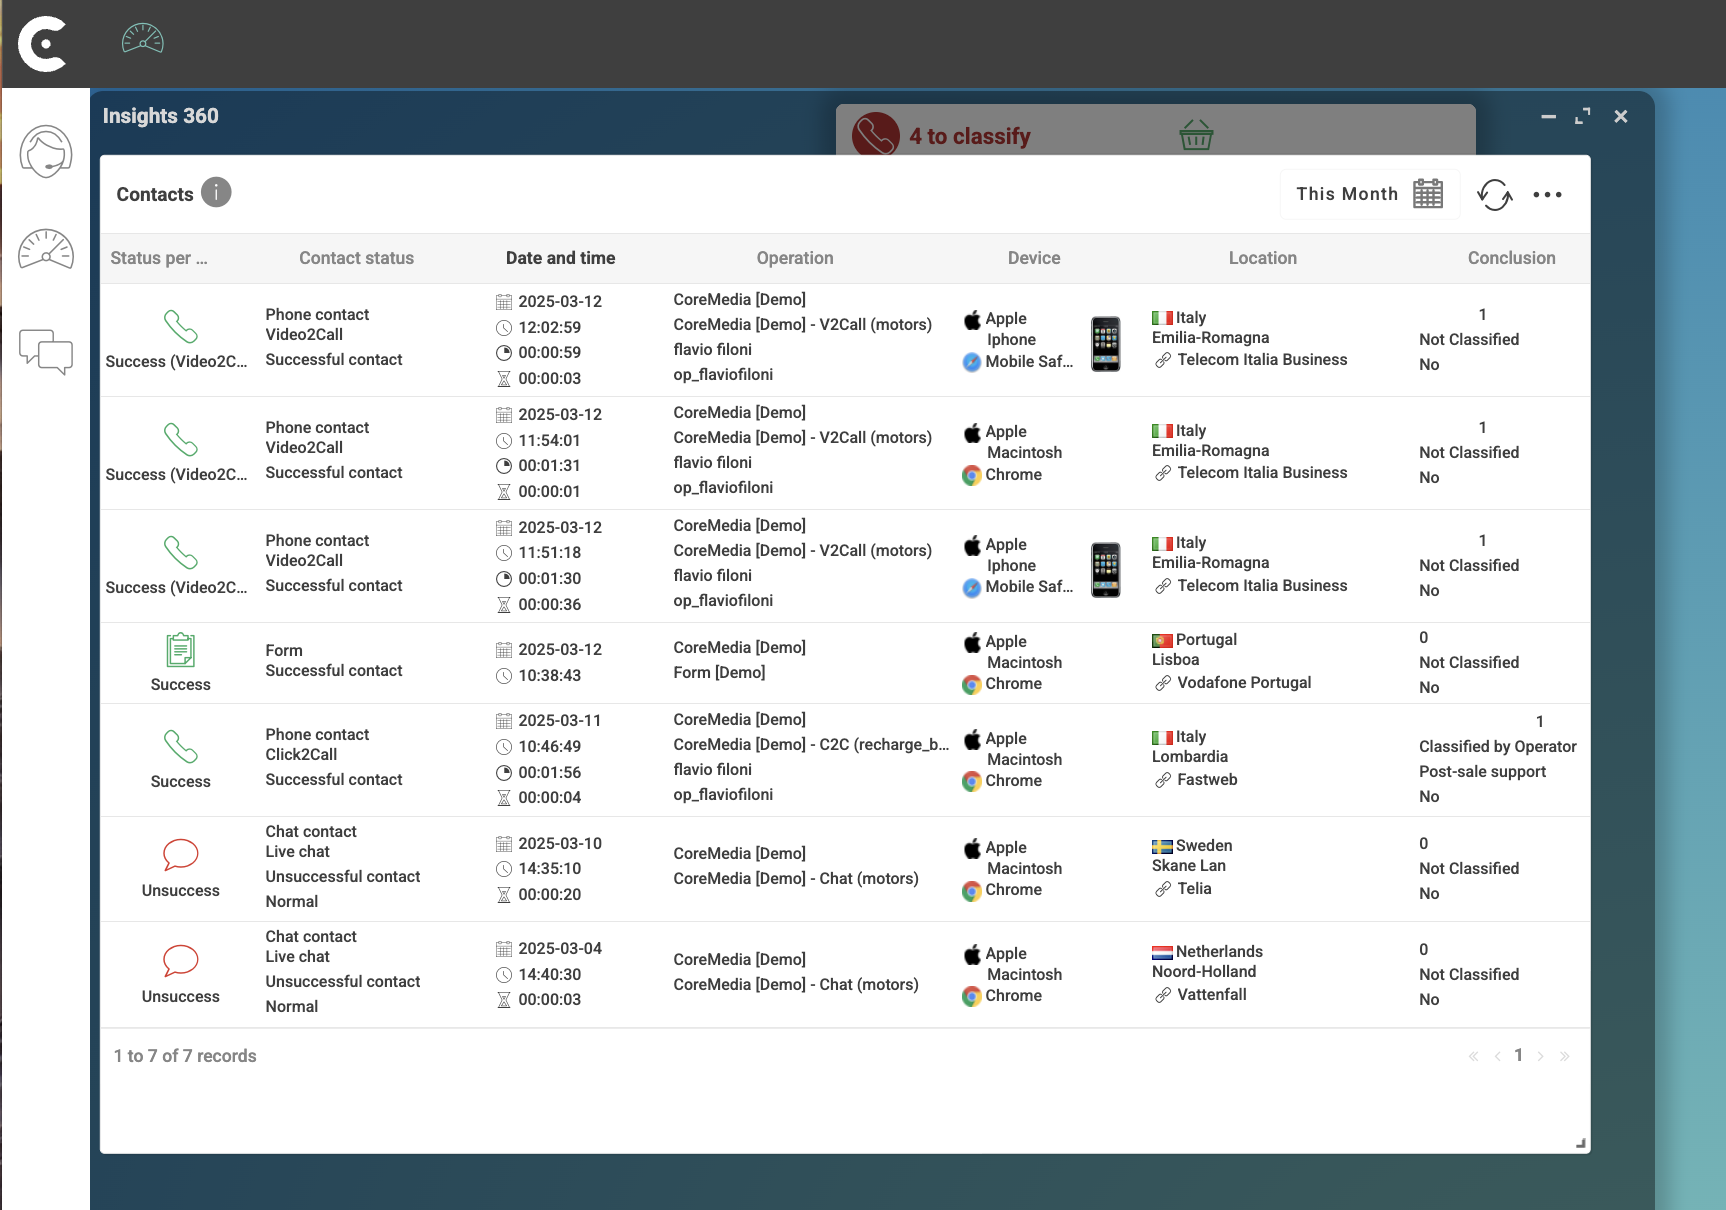
Result
After you finish the previous steps, the created panel appears in your dashboard.