When and How to Withdraw Content from the Live System - CMCC 10
Last updated 16 minutes ago
Learn how and when to withdraw (unpublish) content
This guide applies to CMCC 10
This how-to guide has yet to be updated for the most recent product release. Some of the elements in this guide might not work as described, if you are on the latest version.
Thank you for your patience!
 What you will learn
- Learn to decide when to withdraw content and when to remove links
- Learn how to remove conflicting links from content
- Learn how to withdraw content with conflicting links with a withdrawal project
 Prerequisites
- Access to Studio Version 2107.1 or newer
- Common Studio usage knowledge
 Target Audience
This guide is for Editors, Marketeers, Project or Team Managers.
Table of Contents
Withdrawing content (also known as unpublishing content) means to remove content from the live site of your system. Therefore, a user of your website or any other output channel will not see or find this content anymore.
When you withdraw content, no other published content may link to this content. Otherwise, it would link to non-existing content. This might lead to dead links or other inconsistencies on your website.
Automatic consistency checks in the CoreMedia system
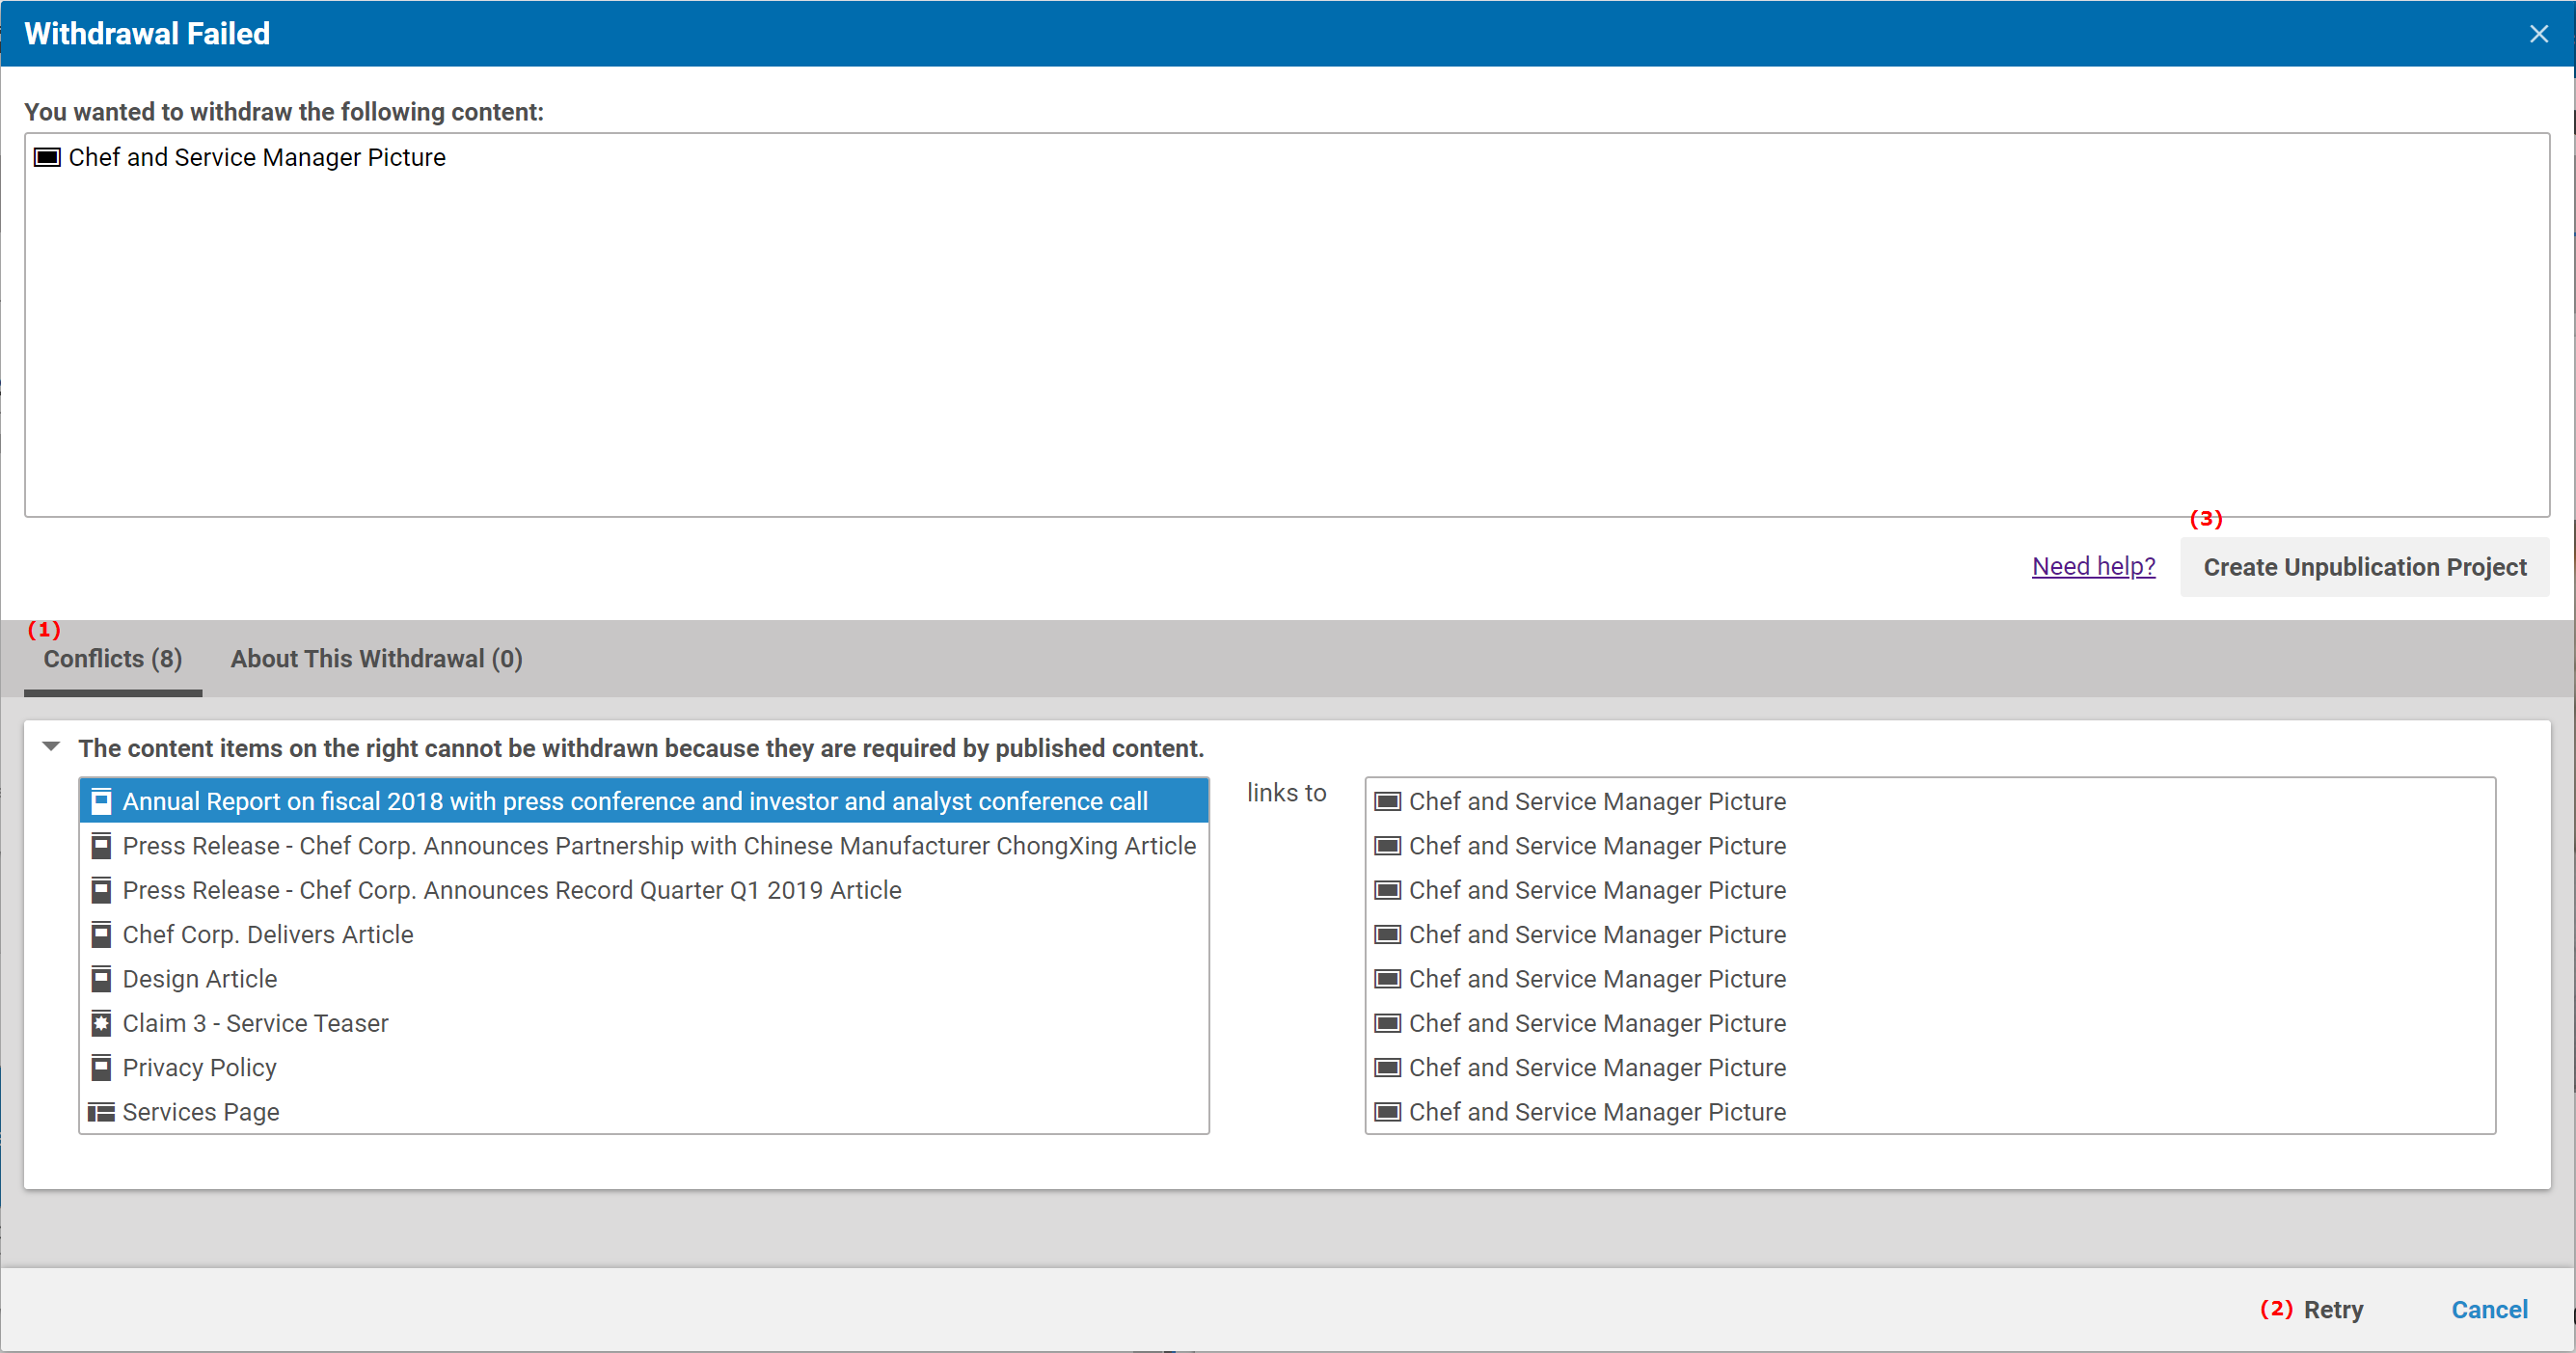
To avoid this, the CoreMedia system automatically checks for such inconsistencies during withdrawal and enforces link consistency. Studio gives you a warning when such links exist and shows the content items which link to the content in the Conflicts (1) field of the Withdrawal Failed window. Each content in the left list links to the corresponding content in the right list in the same row.
This check runs for one link level at a time. This means, when you withdraw one content item, all content items which directly link to this content will be found. When you add these content items to the withdrawal, the system checks again for content items linking to these items. So, finding all content that links to the content to be withdrawn is a process with multiple steps.
There are three ways to solve these issues:
-
Remove the conflicting links from the content items
-
Withdraw the content with conflicting links
-
Combine both methods. For example, when you withdraw a Picture you might want to withdraw an Article which links to the picture, but want to remove the link from a Collection which links to the Article.
In addition, if you want to remove the conflicting links from the content, you might either do this directly in the Withdrawal Failed window or open a withdrawal project. This depends on the number of content items that link.
If you only have a few content items which link to the content to be withdrawn, use the direct way. When there are more, we recommend creating a withdrawal project. This allows you to pause the work and continue later, because a project is persistent.
|
Usually, since content items in a site managed by CoreMedia get frequently linked (for example, a Page which links to a Page, which links to a Collection, which links to an Article, which links to a Picture) you might end up, removing all content items when you remove the linking items (see Content and Site Model for an overview of the CoreMedia site structure and see the image below). Therefore, removing the link will in most cases be the preferred solution to avoid accidentally unpublishing content that should have stayed live. |

Removing the Links directly from the Withdrawal Window
If you want to remove all conflicting links and do not want to withdraw any other content, perform the following steps for the content on the left side of the Conflicts field (1)
-
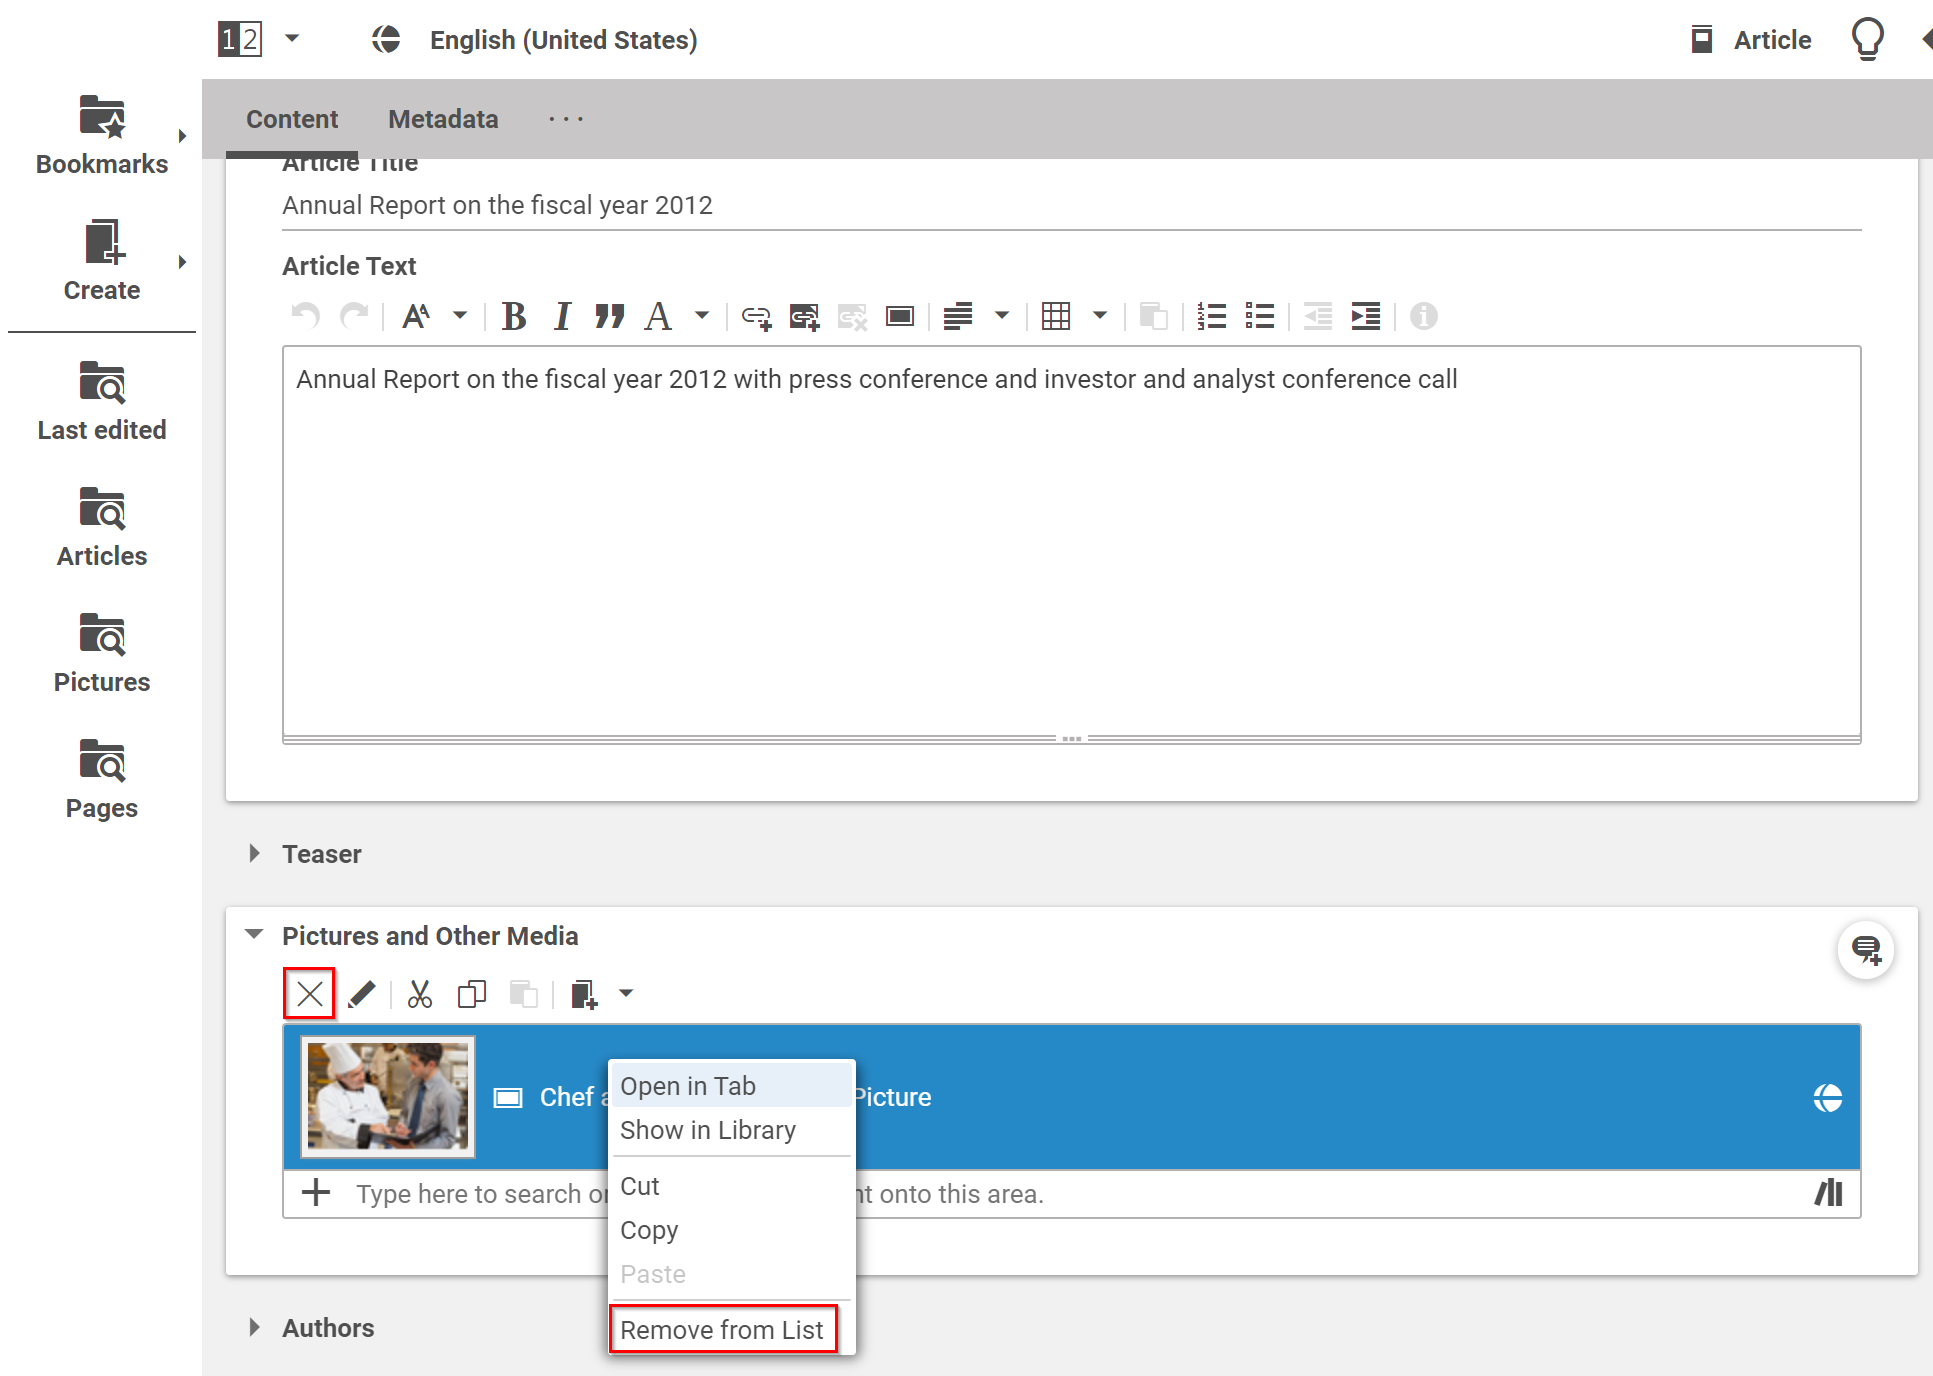
Double-click the content in order to open it in Studio. In the Withdrawal Failed window above, for example, click the first article in the list.
-
Find the link to the content to be withdrawn (see image below) and remove the link by either clicking the x icon or by selecting Remove From List from the context menu.
-
Publish the content by clicking the Publish icon in the right Action Bar.
-
If you want to remove the link from more content, continue with step 1.
-
Now, no other published content links to the content you want to withdraw anymore. Click Retry (3) in order to start the withdrawal of the content once more.


You did it! The content is withdrawn from the live site.
Perform the Withdrawal with a Project
If you want to withdraw content with conflicting links, or you want to remove links from more than a few content items, you should work with a withdrawal project.
The process consists of the following steps:
-
Create and populate a withdrawal project
-
Remove conflicting links from content and remove this content from the project
-
Withdraw the remaining content and check if more content with conflicting links exists
If you only want to withdraw all the content you can skip step 2.
1. Creating and Populating a Withdrawal Project
First you have to create the withdrawal project and add all content that links to the content you want to withdraw:
-
In the Withdrawal Failed window, click the [Create Unpublication] Project button. A Project tab opens up, which contains the content you wanted to withdraw.
-
With CTRL + A select all the content from the Withdrawal Failed window (left side of the Conflicts field) and drag and drop them in the Content field of the Project tab.
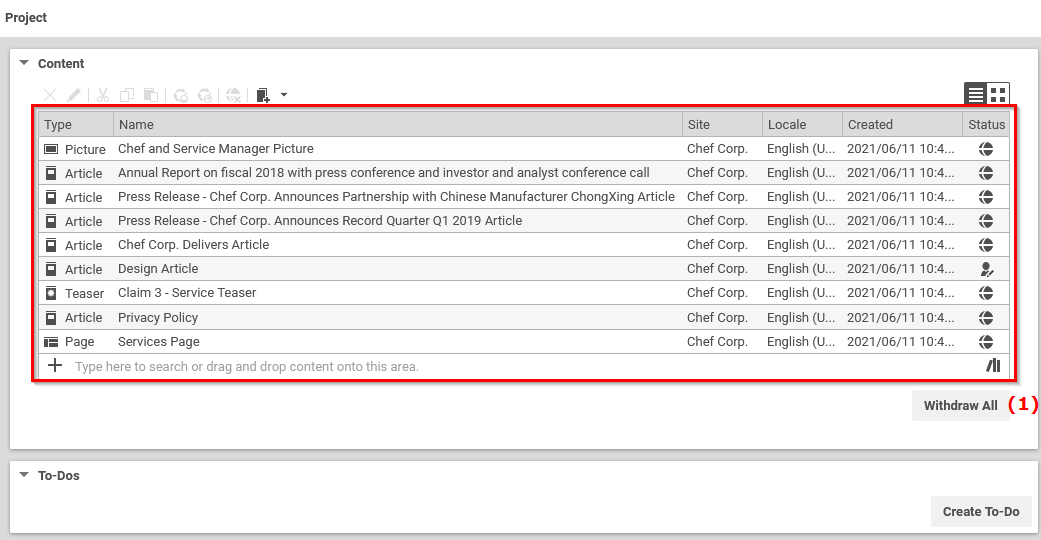
-
Click [Cancel] in the Withdrawal Failed window. You don’t need it anymore.


Now you have added all content items that directly link to the content you want to withdraw.
2. Removing Conflicting Links from Content in the Project
This step is similar to the steps described in Removing the Links directly from the Withdrawal Window. There are only two differences in step 1 and step 4:
-
Double-click the content in the project in order to open the form in Studio. In the Project window above, for example, click the first article in the list.
-
Find the link to the to be withdrawn content and remove the link by either clicking the x icon or by selecting Remove From List from the context menu.
-
Publish the content by clicking the Publish icon in the right Action Bar.
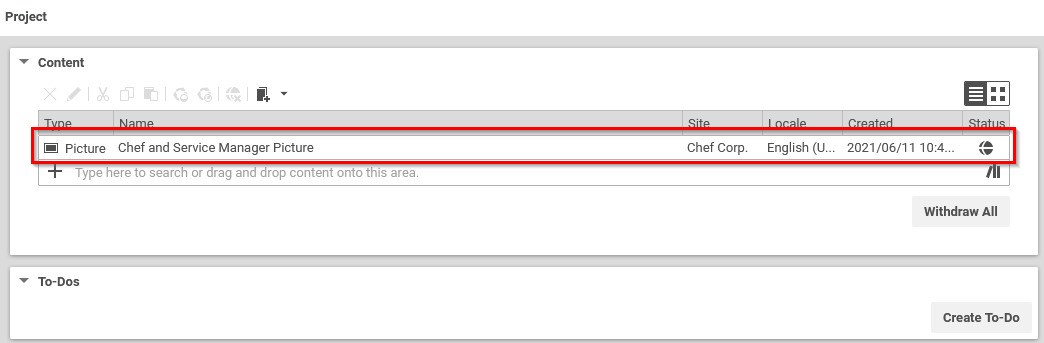
-
Remove the published content item from the withdrawal project. To do so, select the content item in the Content field and either click the X icon or select Remove from the context menu.
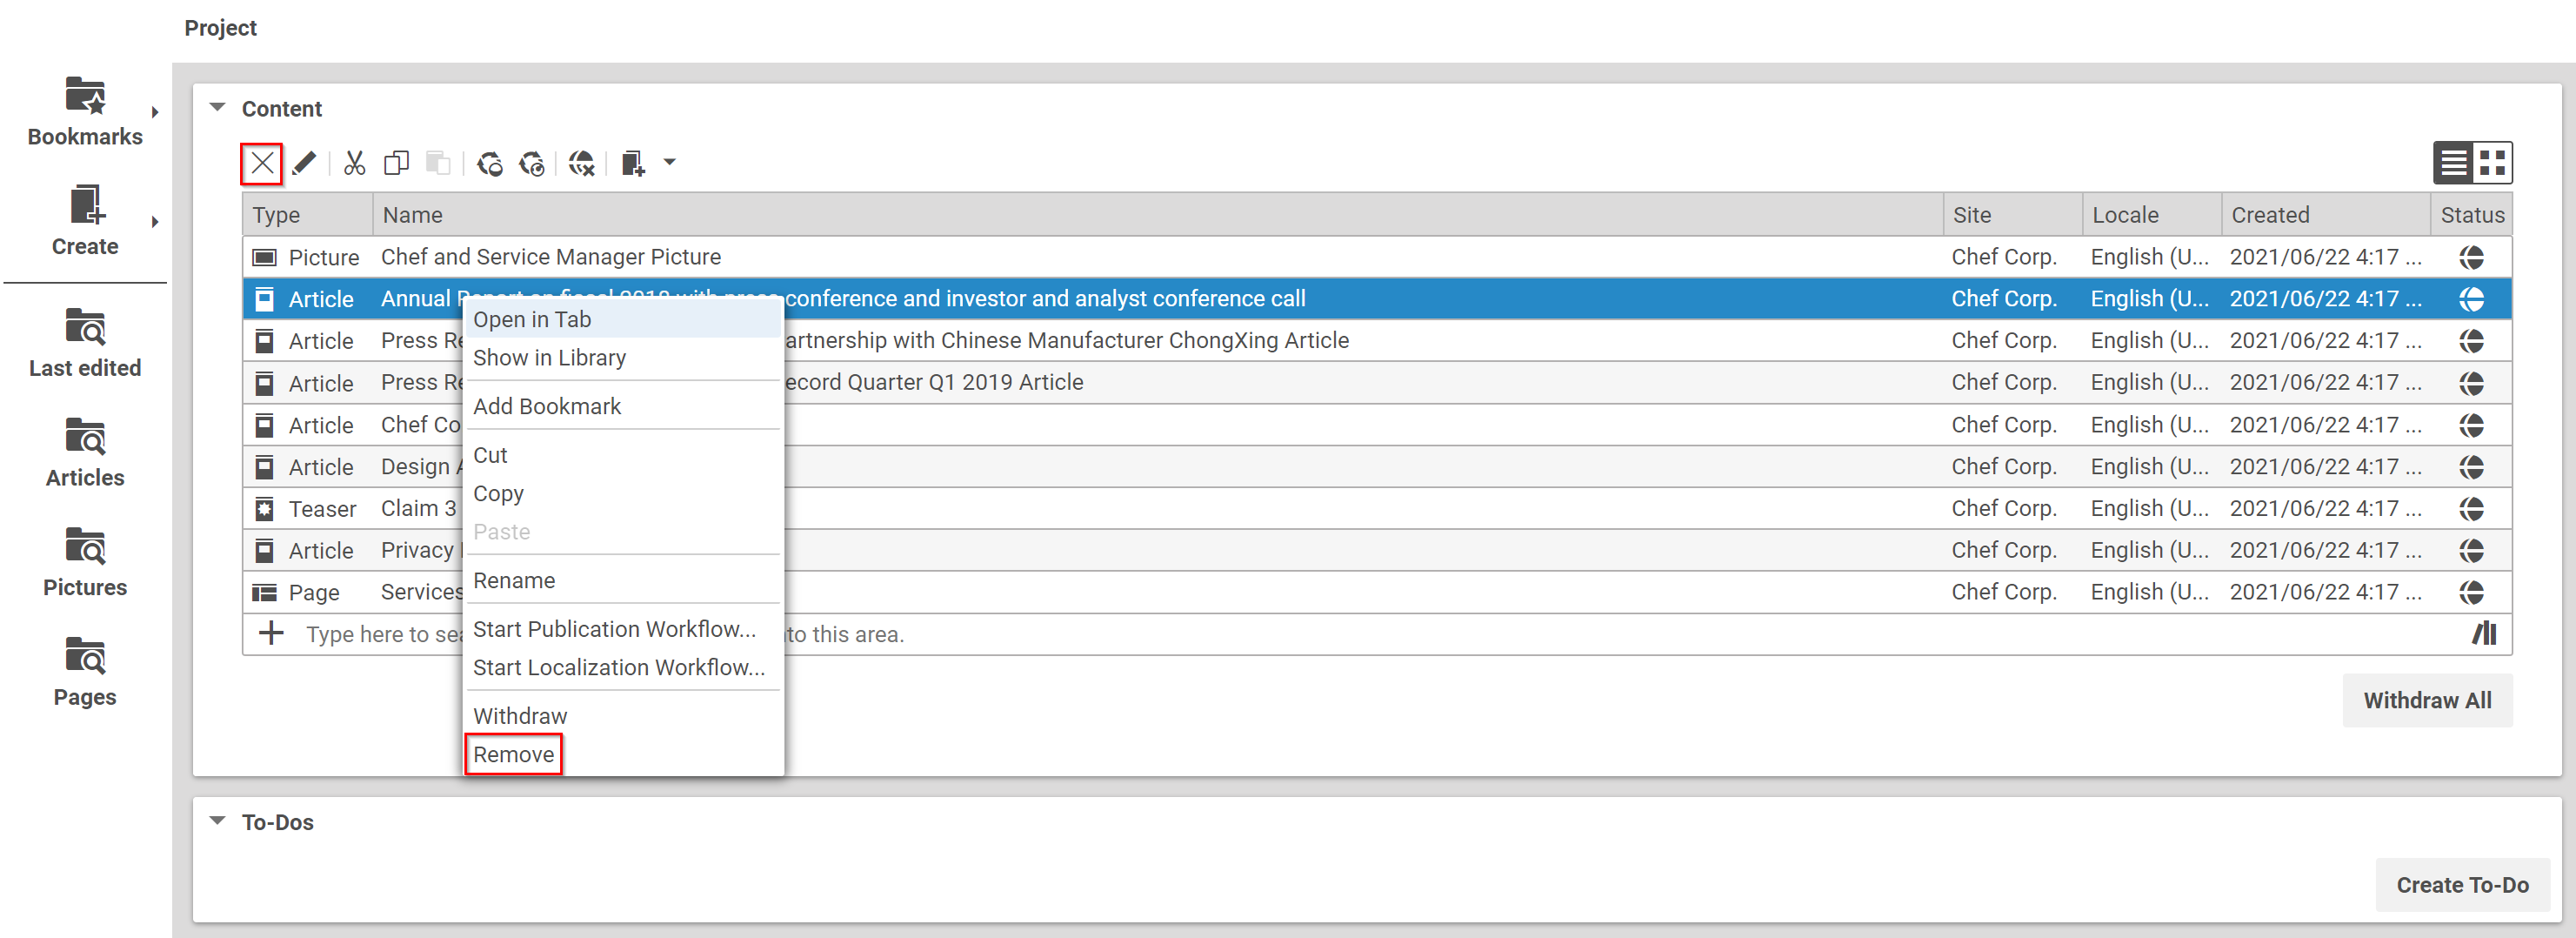
Repeat the steps for all content items for which you want to remove the link.

3. Withdrawing Conflicting Content
When you are sure that you want to withdraw all the remaining content that links to the content to be withdrawn, follow these steps:
-
Click the [Withdrawal All] button. This starts a new withdrawal process for all content contained in the project.
-
Either there is no more conflicting content, and you will get a success message and are done, or there are other content items which link to the items in your project, and a new Withdrawal Failed window opens up.
In the second case you must add the new conflicting content, shown in the Withdrawal Failed window, to your existing project and proceed with steps 2. Removing Conflicting Links from Content in the Project and 3. Withdrawing Conflicting Content.
Excellent, you have now learned how to withdraw content while ensuring link consistency!
Is this page useful?