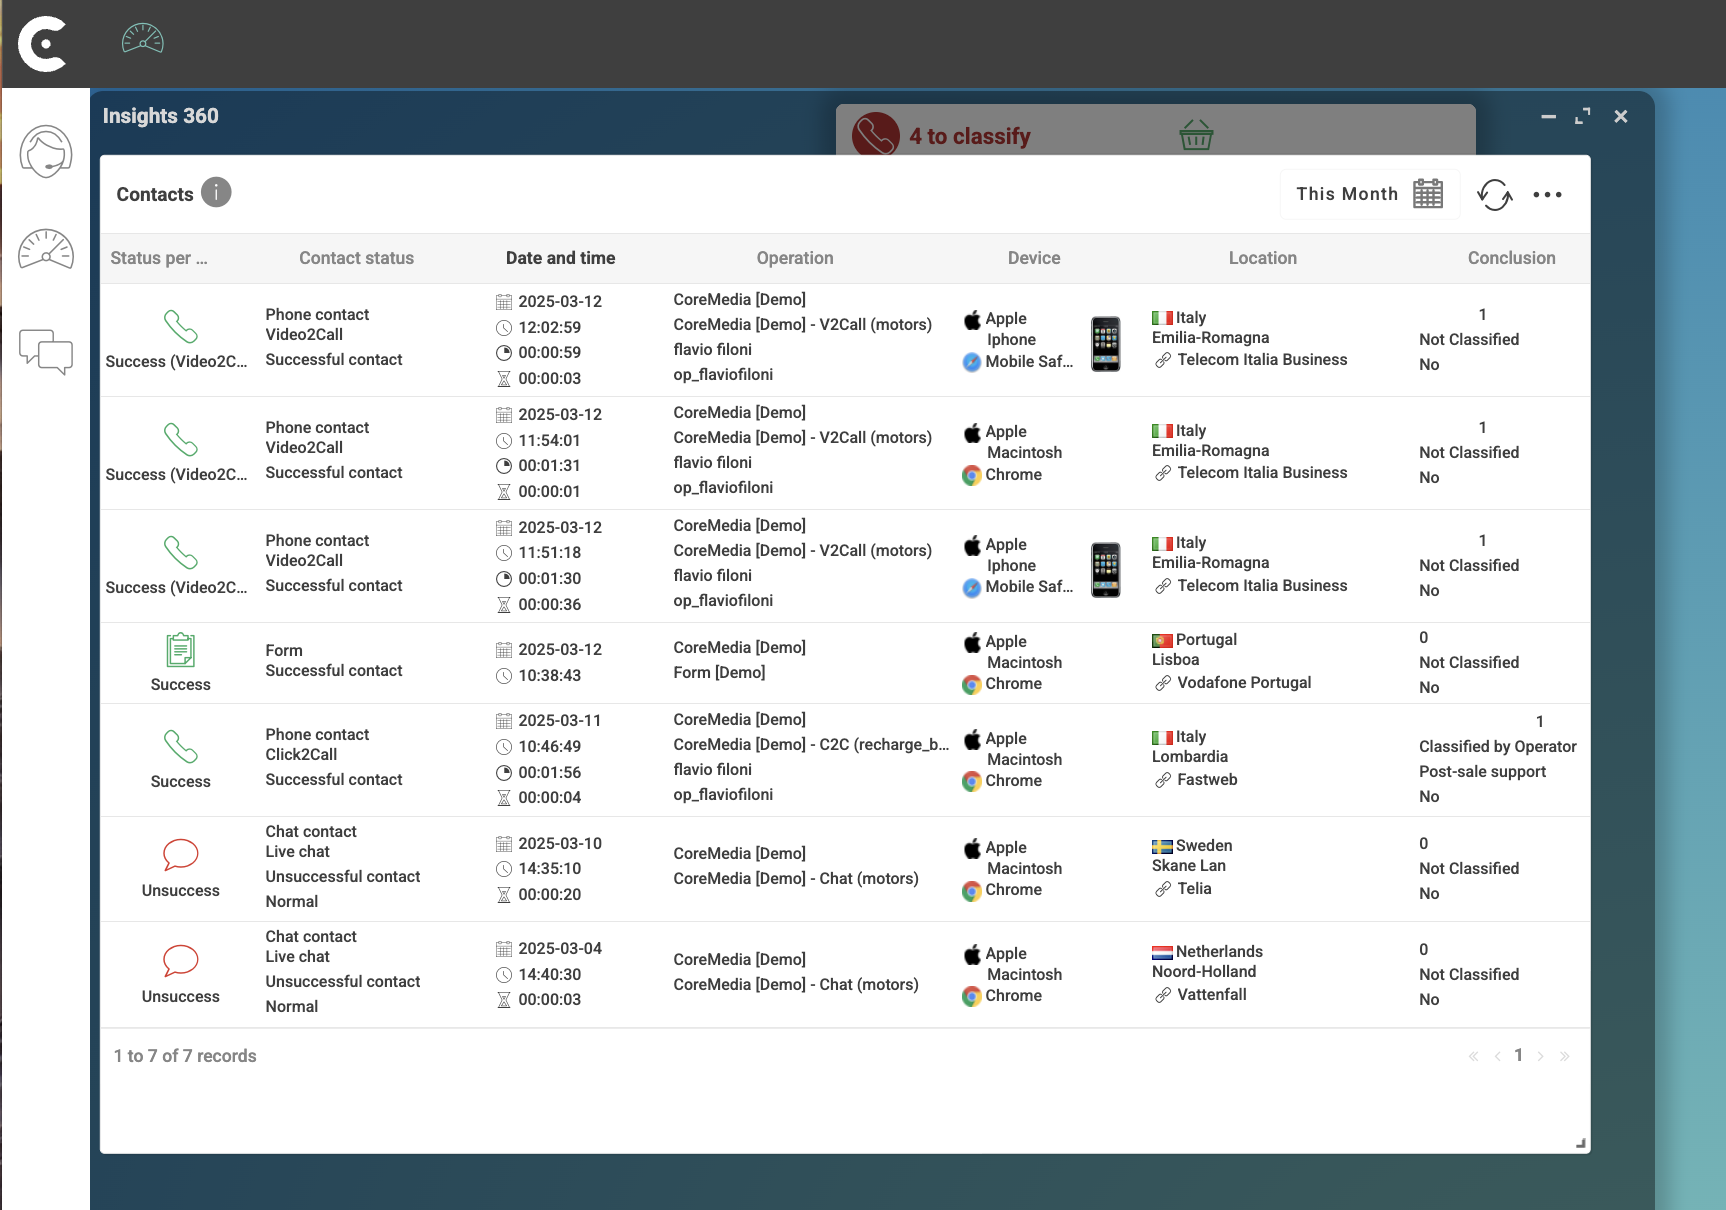
Adding Fields to a Listing Panel
Add more fields to your listing panels to view relevant information.
Prerequisites
-
Have a user with permissions to use Contact Center and Analytic Studio (CCAS).
-
Have created, at least, a dashboard and a listing panel.
Steps
1. Edit the listing panel
-
In the top right corner of the listing panel, click menu …
-
In the dropdown menu, select EDIT.
-
In the Configuration: Listing panel window, select tab Fields.
2. Select the field
-
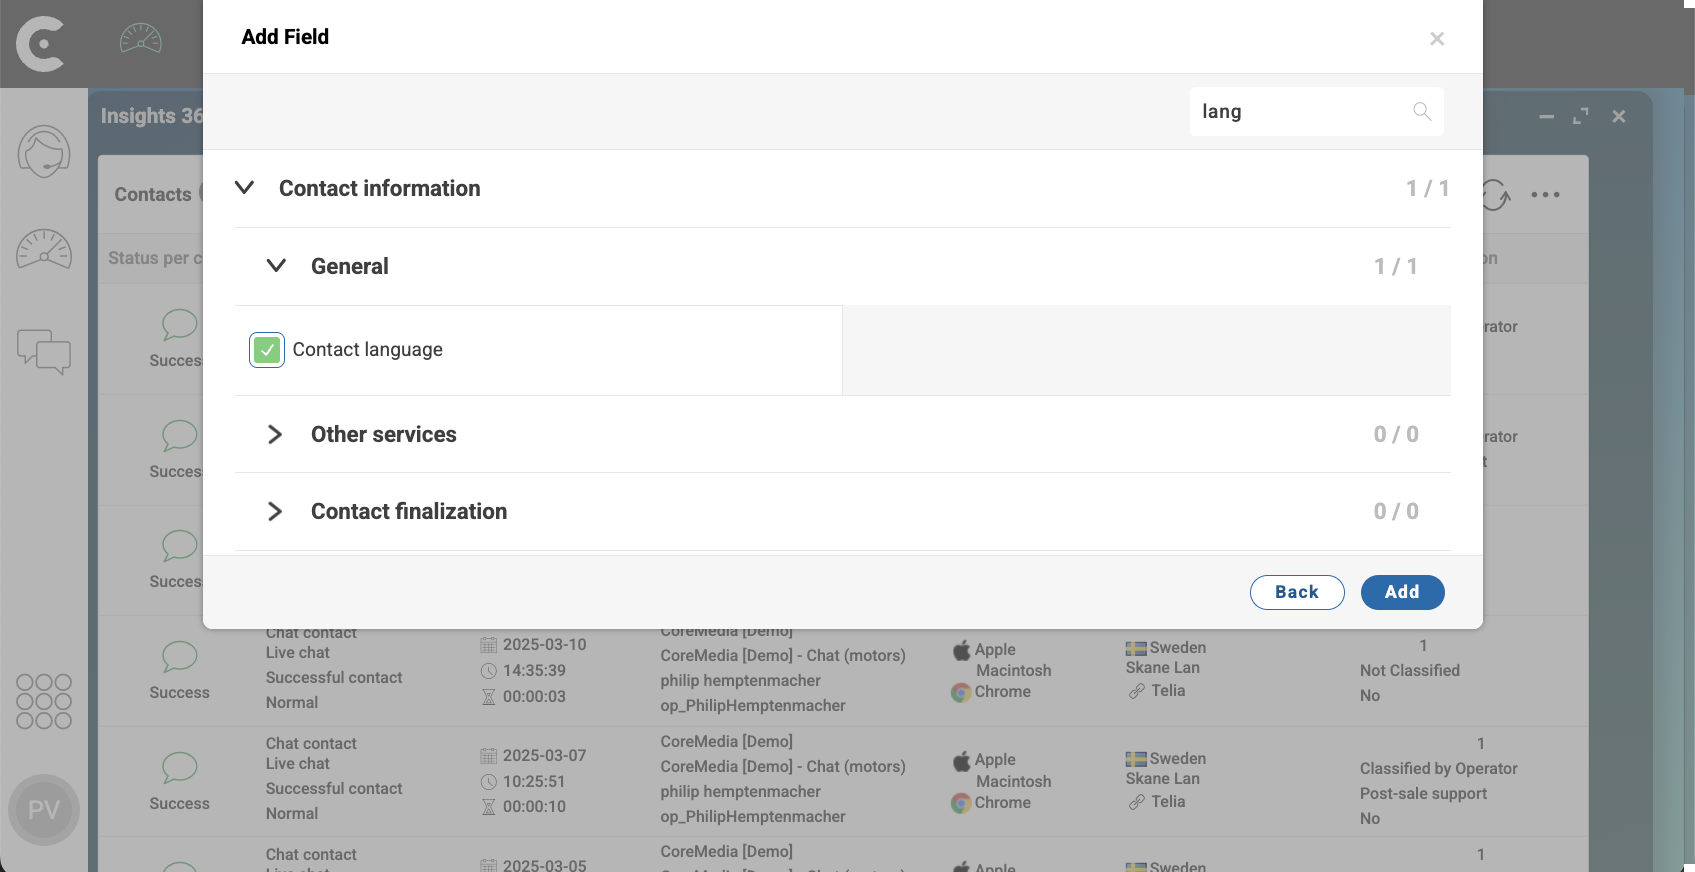
In the top right corner of tab Fields, click button Add to open window Add fields.
-
In the top right corner of window Add fields, use the search box to start writing the name of the field that you want to add. For example,
lang
CCAS starts filtering the name of the fields using the characters that you wrote in the search box.
-
Select the fields that you want to add. For example,
Contact language. -
Click button Add.
Note that you can expand categories to browse for fields.
3. Position the field
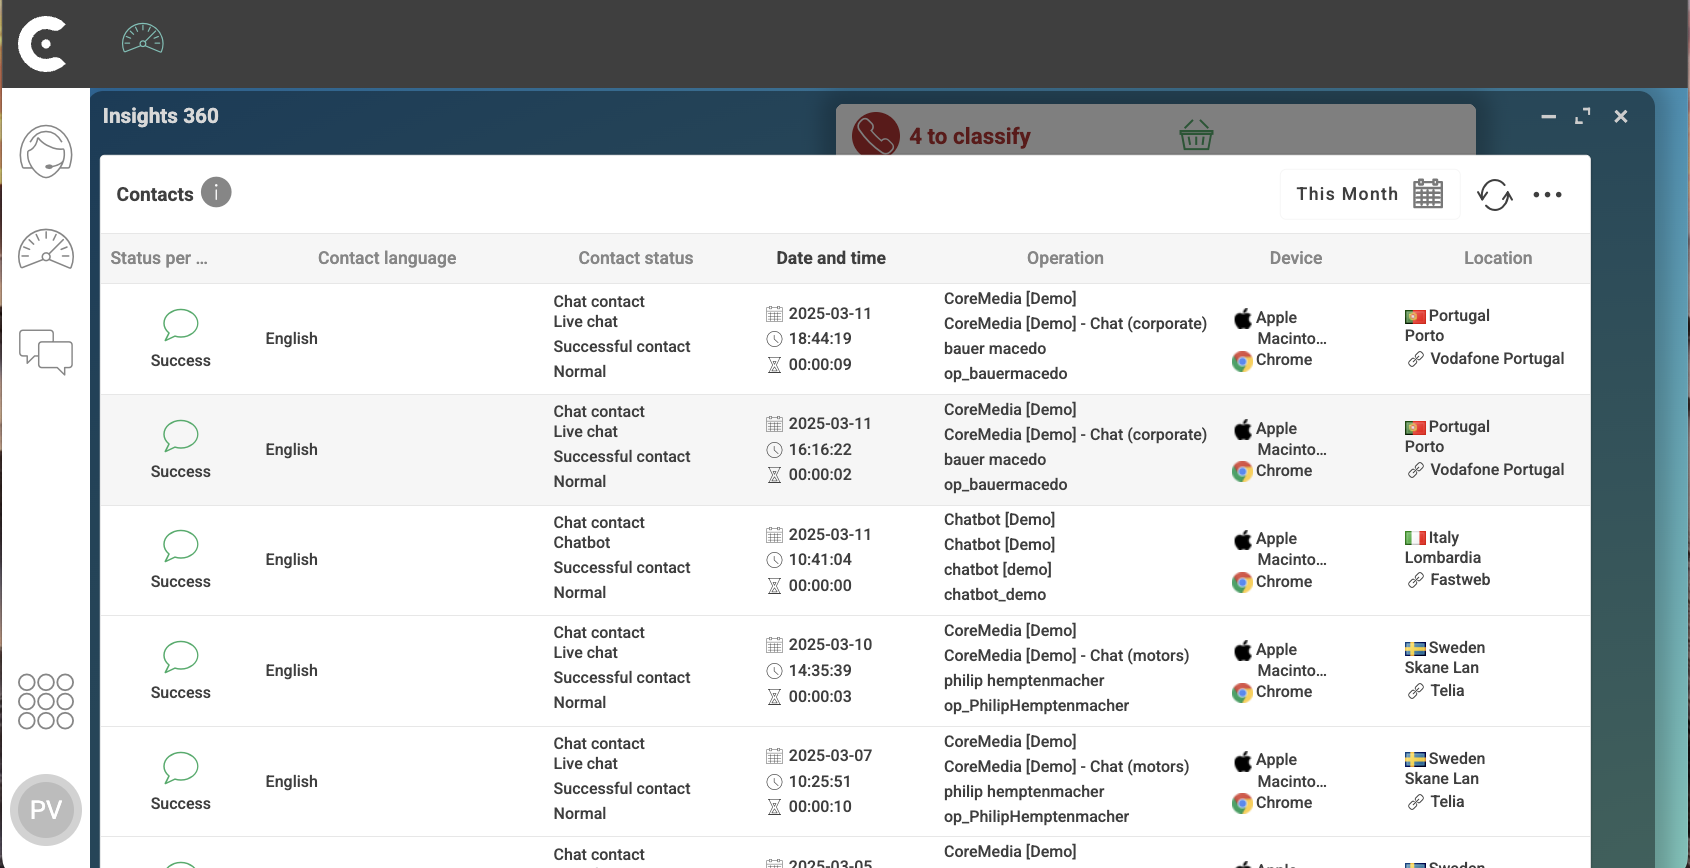
After clicking button Add, the added field appears at the end of the field list.
-
With your mouse, grab the three horizontal lines (
 ) at the left of the field name.
 -
Drag and drop the field to the position where you want it to appear in the panel. For example, drag
Contact languageand place it between fieldsStatus per contact typeandContact status. -
Click button Save and Close.
Note that you can position the new field inside a group field.
If you get an error when trying to save and close, verify if you don’t have any group field empty. Group fields must have at least one field.
Result
After you click button Save and Close, CCAS shows the field recently added field in the chosen position.
Note that you can also add GROUP fieldS. Grouped fields are fields that aggregate more than one value. For example, you can group fields Team, Skill, Operator, and Operator ID in field Operation.