Studio User Manual / Version 2010
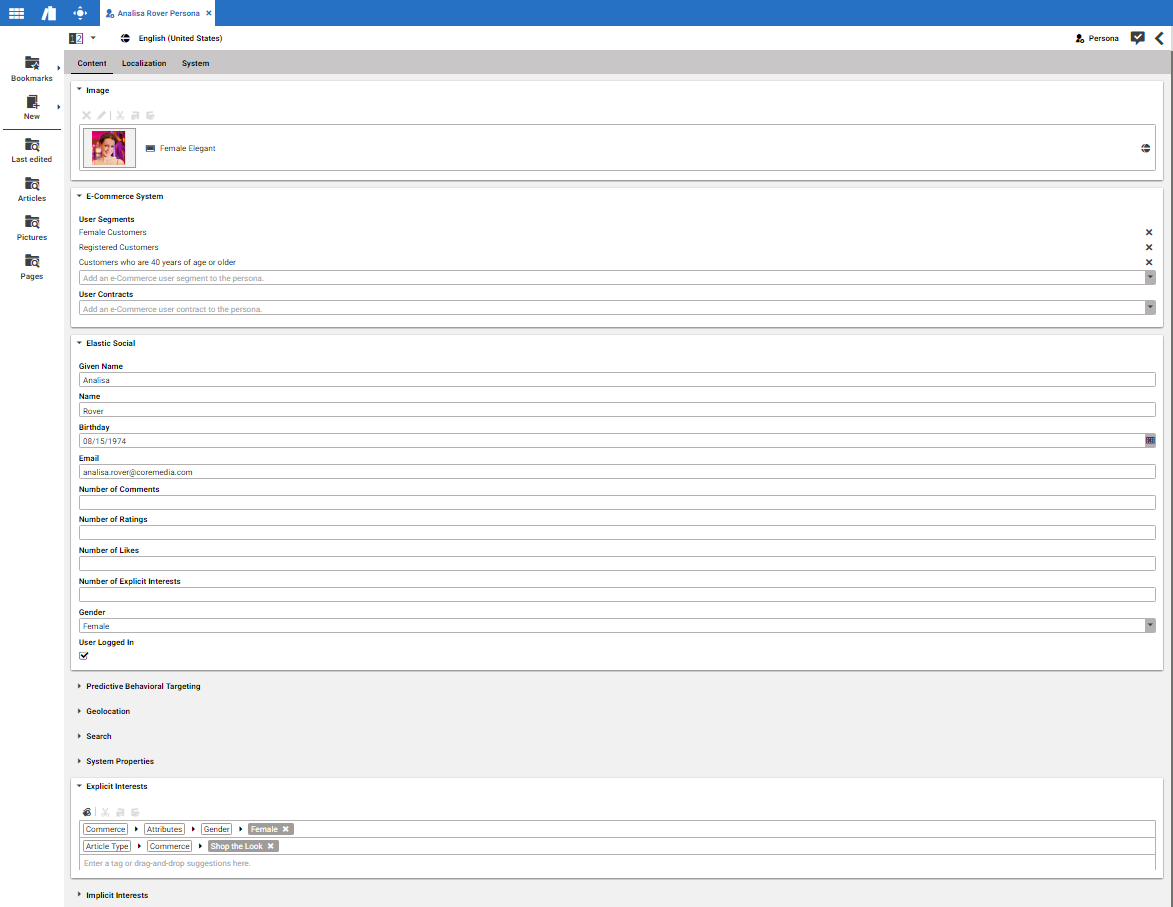
Table Of ContentsYou can use a graphical user interface in CoreMedia Studio to create and edit Customer Personas. You can modify and add new properties without the need to know how data is persisted in a Customer Persona.
There are two different kinds of properties in this graphical user interface:
Static properties (for example name and birthday) have a fixed position and are predefined inside the
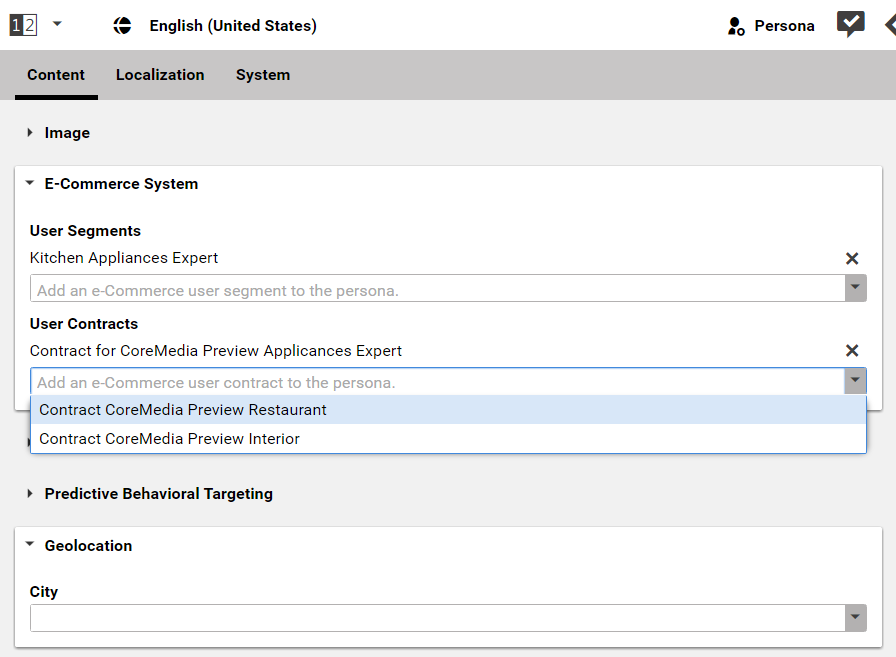
Customer Personacontent type.The Commerce System property is special in this way, that you can add more than one Customer Segment.
Dynamic properties are used to add custom context data without modifying the content item type. You can add and remove dynamic properties using the GUI. In this example, the "Explicit Interests" section and the Base settings tab encloses the dynamic properties.
By convention global Customer Personas are located in the
/Settings/Options/Personalization/Profiles folder and site specific ones
are located in the /Sites/'site name'/Options/Personalization/Profiles.
Hence, global Customer Personas are available for all defined sites. Site specific ones appear only in
the Customer Persona selector if the according site is displayed in the preview of
CoreMedia Studio.

Note
Customer Personas are only intended for use in the preview CAE. Therefore, they do not need to be published. If you have published one by mistake, you can simply withdraw it.
Creating a new Customer Persona
To create a new Customer Persona in CoreMedia Studio, create a new
content item of type Customer Persona in the above mentioned folders for global or site
specific Customer Personas. Afterwards, you can edit the profile with the graphical user interface.
Adding and removing new dynamic properties
In order to add a dynamic property proceed as follows:
Click the [Choose keyword] icon.
Select a property name from the taxonomy chooser.
or
Enter your keyword directly in the "Enter keyword" line.
or
Select the Base settings tab and enter your property with a value into the Context Data field.
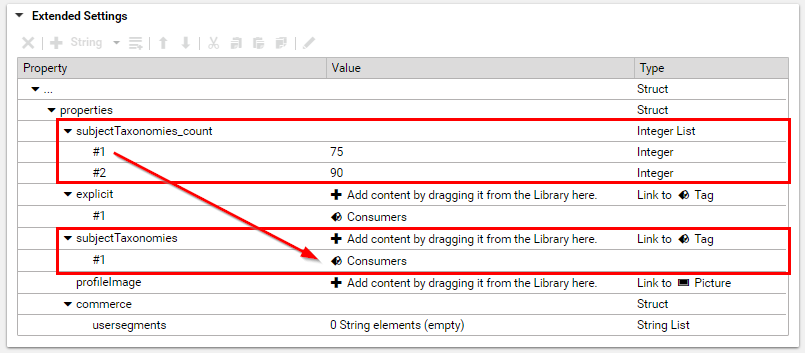
The Explicit Interests have a value of 100%, by default. If you want to assign another value to the tag, proceed as follows:
Open teh System tab.
In the Extended Settings field create a new Integer list with the name
subjectTaxonomies_count.In the new list, create an Integer element with a value between 0 and 100. The values of the Integer list are automatically assigned by position, to the values of the subjectTaxonomies list.
In order to remove a dynamic property from the context, click the remove icon.
Adding and removing SFMC Journeys

Note
eCommerce Blueprint feature
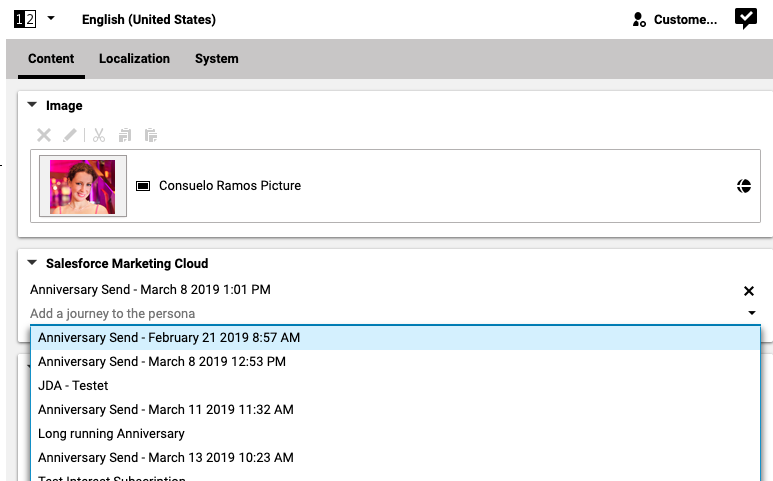
In order to add a new SFMC Journey, open the dropdown box and select a new journey from the list (1).
In order to remove a journey, click the x icon behind the existing entry (2).
Adding and removing Commerce Customer Segments

eCommerce Connector feature
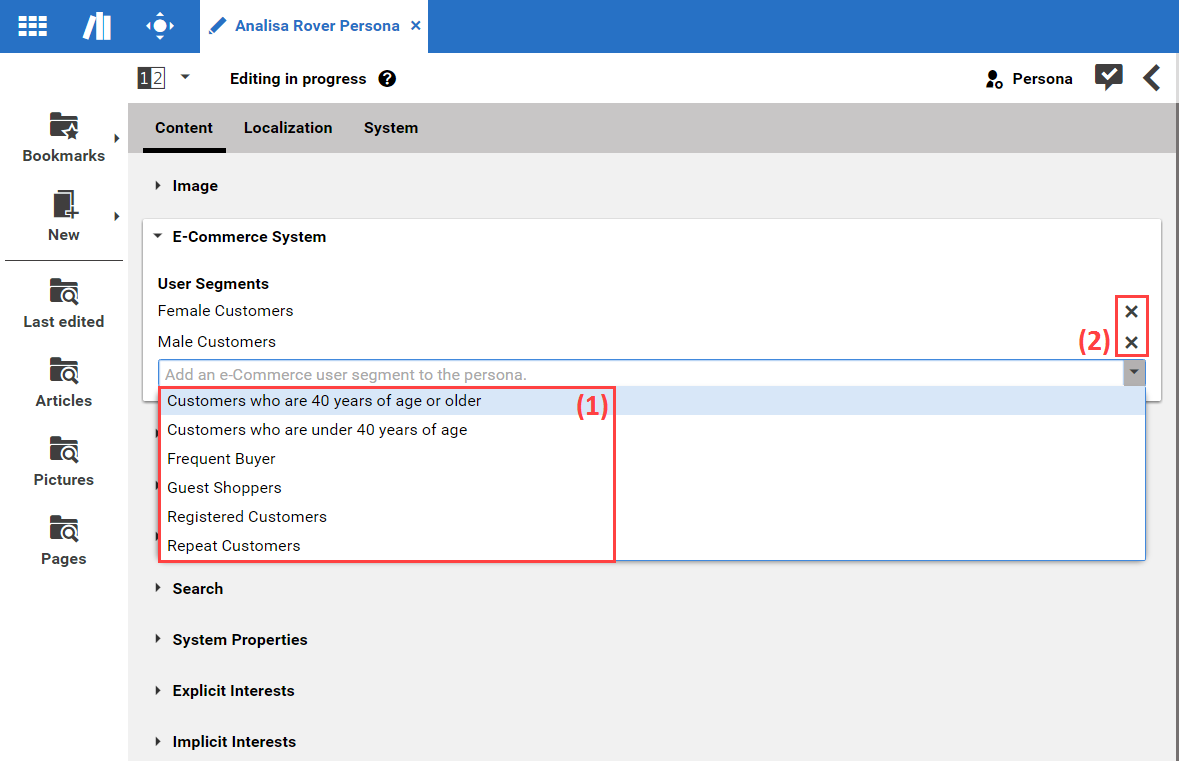
In order to add a new Customer Segment, open the dropdown box and select a new segment from the list (1).
In order to remove a segment, click the x icon behind the existing entry (2).
Adding and removing B2B user contracts

Connector for HCL Commerce feature
For contract based preview of shop pages in Studio, you can add contracts to the personas of a B2B enabled site.
In order to add a new User Contract, open the dropdown box and select a new segment from the list (1).
In order to remove a contract, click the x icon behind the existing entry (2).
Removing a Customer Persona content item
If you want to remove a Customer Persona from the Customer Persona selector you can either delete the content item or move it into another folder.


