


Studio User Manual / Version 2201
Table Of ContentsYou can insert and edit tables in a formatted text field.
You can make use of the following functions:
Creating and deleting tables
Inserting and deleting rows and columns
| Icon | Name |
|---|---|
| Table menu | |
| Delete table | |
| Insert row above | |
| Insert row below | |
| Delete row | |
| Insert column to the left (before) | |
| Insert column to the right (after) | |
| Delete column |
Table 4.13. Table editing icons
Creating a table
Position the cursor at the location where you want to insert a table.
Click the Create table icon (1) and select Insert table.
A window opens in which you can specify the size of the table.
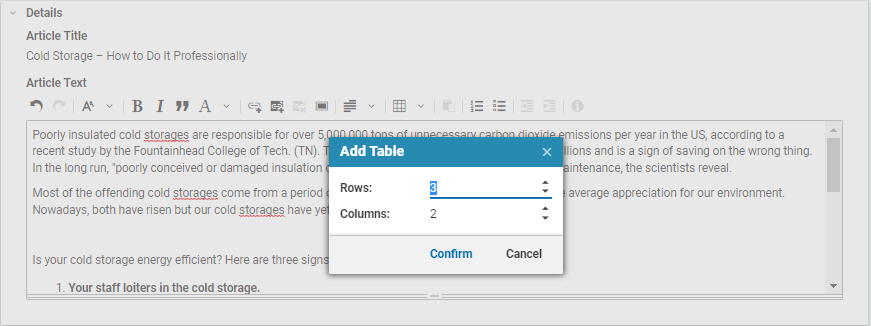
Specify the size of the table and click [Confirm] .
The table now appears in your formatted text field.
Deleting a table
Position the cursor in the table.
Click the Delete table icon.
The table and its contents are deleted without further confirmation but you can restore the table with undo.
Inserting rows and columns
Position the cursor within a cell in your chosen column or row.
Click the Table menu icon.
You now have the following options:
Insert row above
Insert row below
Insert column to the left (before)
Insert column to the right (after)
Select the corresponding command from the menu.
The new column or row has been inserted.
Deleting rows and columns
Position the cursor within a cell in your chosen column or row.
Click the Table menu icon.
Select Delete row or Delete column from the menu.
The row or column has been deleted without further notice.
