


Studio User Manual / Version 2201
Table Of Contents
CoreMedia Blueprint feature
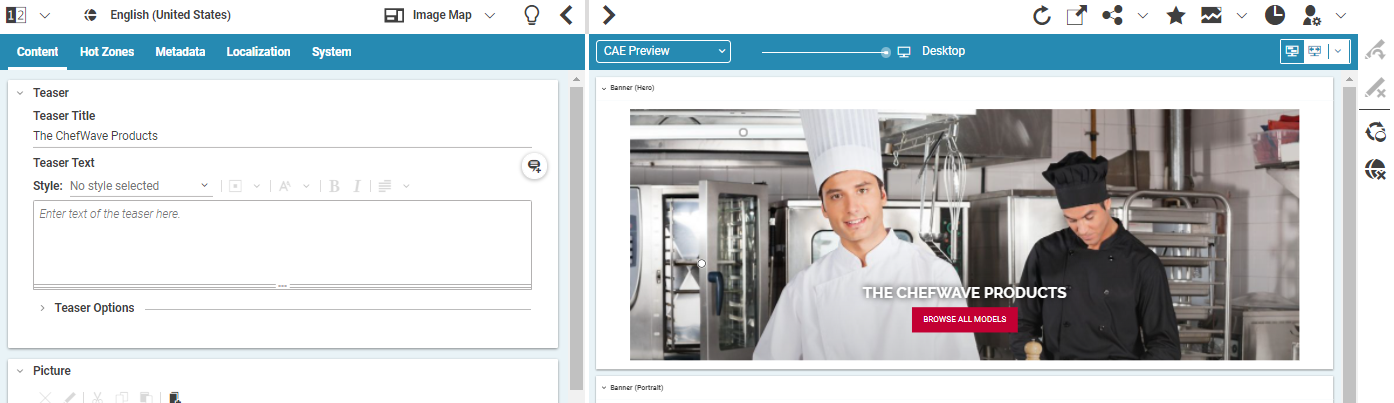
CoreMedia Studio enables you to create and edit interactive image maps. Interactive image maps are made up of hot zones (image map areas) that are drawn on a picture and link to some target content. Depending on the hot zone configuration, the linked content is displayed in a pop-up close to the hot zone whenever a website visitor clicks on the hot zone or it is displayed as inline overlay which is always visible but only shows title and price information. You can configure several content properties, for example title or price that are shown in the overlay.
Image shows an image map with two hot zone configured as inline overlay. For hot zones displayed as inline overlay, a theme can be configured per hot zone.
In addition to the common properties inherited from CMTeasable you can configure
how the hot zones' overlays are displayed.
Image shows the configuration options for image maps.
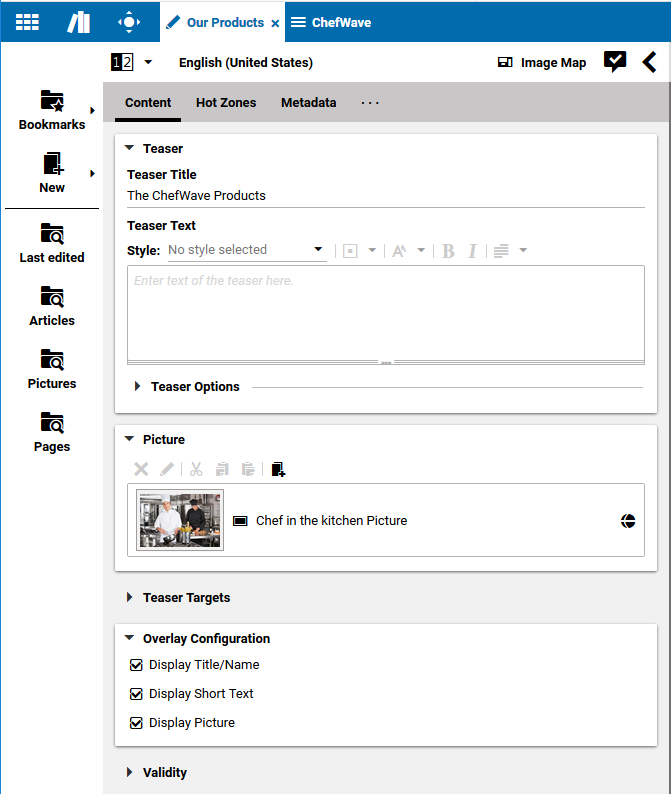
The hot zone overlay configuration is defined per image map and applies to all hot zones. For Inline Overlays the overlay configuration options Display Short Text and Display Picture are ignored.
Creating an Image Map
In order to create a new image map proceed as follows:
Create a new content item of type
Image Map.Drag the image which you want to enhance with hot zones on the Picture field of the Content tab.
Add a title and text to the Teaser Title and Teaser Text fields of the same tab. This text is shown when you use the image map in a teaser position.
You can add teaser targets to the image map. See Section 4.6.9, “Advanced Teaser Management” for details.
Define the information that should be shown in the pop-up by selecting the appropriate options in the Overlay Configuration field as shown in .
Now, you can start defining the hot zones as described in the next subsection.
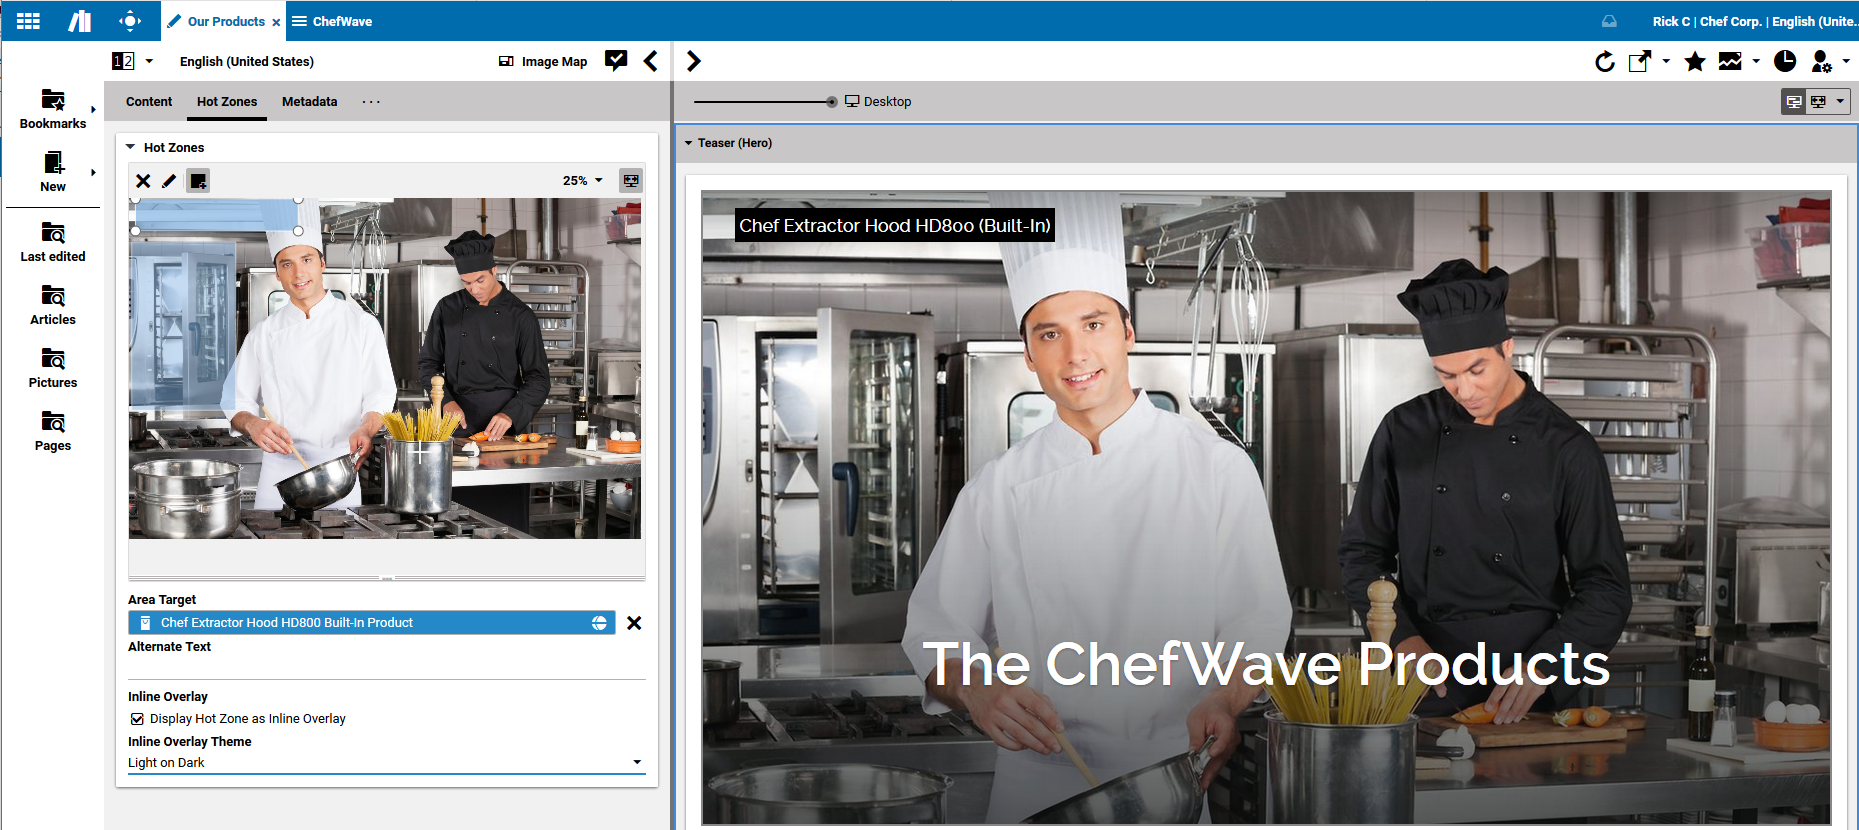
Defining Hot Zones

Click with the mouse at the position where you want to add a hot zone, keep the button clicked and move the cursor in order to open the hot zone rectangle.
The rectangle appears in red, because you haven't added a target content yet. You can resize the hot zone by dragging one of the four handles of the hot zone. In order to move a hot zone, click inside the rectangle, keep the button pressed and move the mouse.
Drag a content item onto the hot zone or on the Area Target field to add the target content.
The rectangle is now colored in blue and the position of the hot zone is shown in the preview with a plus sign or as an inline overlay. The linked document is displayed as a pop-up when you click on the hot zone in the document's preview panel. Note that hot zones that are not yet linked to a document are not visible in the document's preview.
Configure the hot zone as Inline Overlay if it should be displayed inline. For inline overlays you can select an Inline Overlay Theme per hot zone to define the style.
Add more hot zones to the image.
Removing Hot Zones
Select the hot zone that you want to remove and click the Remove selected area icon in the toolbar of the hot zone editor.
Opening Linked Content
Select the hot zone for which you want to open the linked target content and click the Open linked content in tab icon in the toolbar of the hot zone editor or double-click the content item in the Area Target field.

Caution
In the CAE hot zones do not make sense for all view variants. If it is used as
teaser - as it is the default for main and sidebar placements, for example - no hot zones will be rendered.
