Studio User Manual / Version 2204
Table Of ContentsThere are two workflow types available in CoreMedia Studio, Direct Publication and Reviewed Publication.
The Direct Publication Workflow approves and publishes all content items included in the workflow in one step.
The Reviewed Publication Workflow is a workflow that requires interaction between two content editors. One editor starts the workflow while the second editor has to approve the publication. Compared to Direct Publication this workflow is more secure because two persons are verifying the publication set.

Caution
When publishing content with the Reviewed Publication workflow, you will get warnings or error messages when assigned users do not have the appropriate rights. These messages might reveal sensitive information about users' rights, users' entitlement or maybe your organizational structure. Therefore, take care that only authorized users get access to CoreMedia Studio.
Starting a Publication Workflow
Open a publication workflow window as described in Section “Starting Workflows”. In addition to the standard ways of starting a workflow, the Action Toolbar offers a button to start a publication workflow with the currently selected content item. This behavior can be changed, see Section 3.3.4, “Configuring the Behavior of the Publish Button” for details.
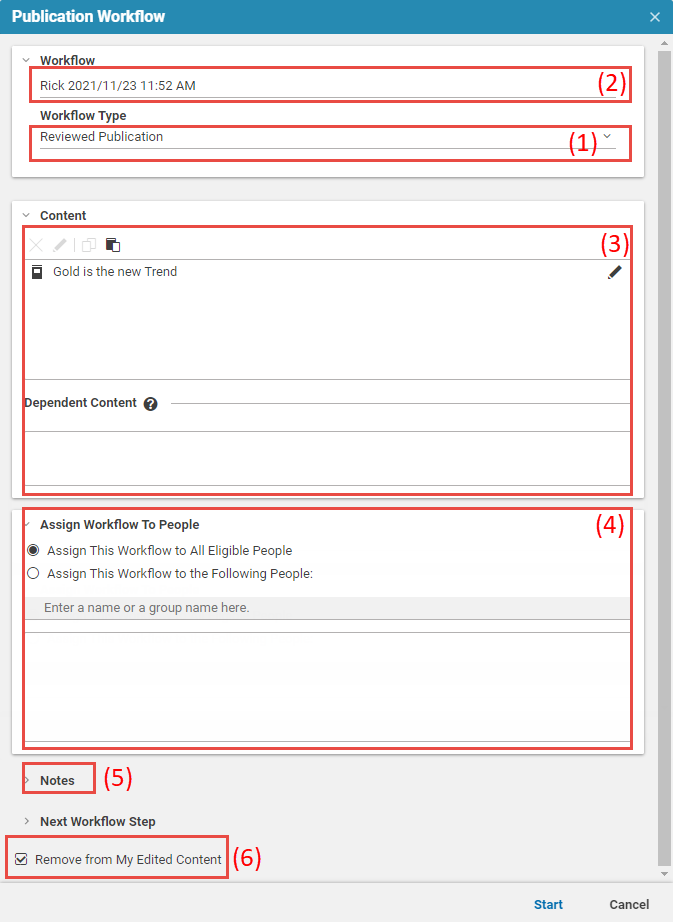
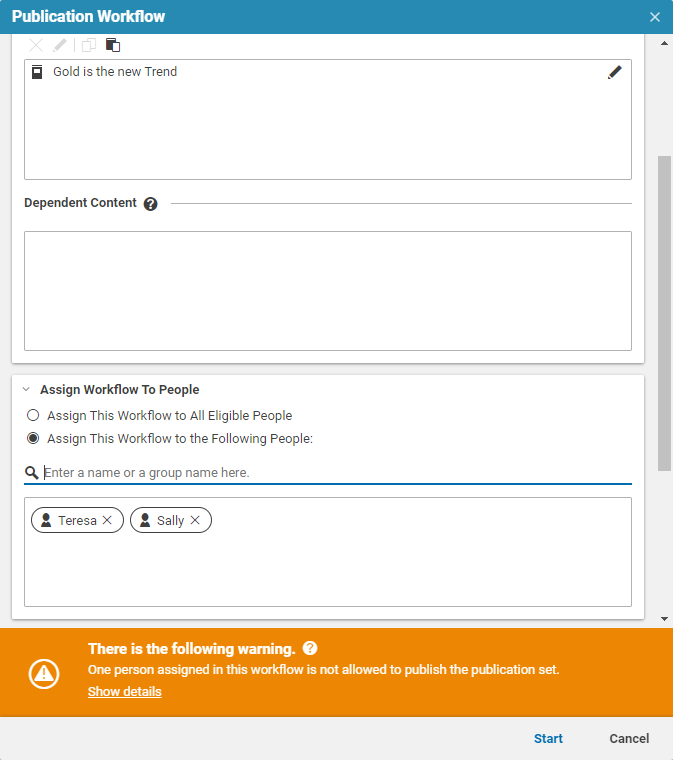
From the Workflow Type dropdown box (1) select the workflow type you want to start.
You might change the workflow name (2) and add, remove or edit content items from the publication set (3).
The Extended Publication Set field is automatically filled with additional dependent content items which also must be published in order to avoid dead links. For example, images that are linked from articles in the project.
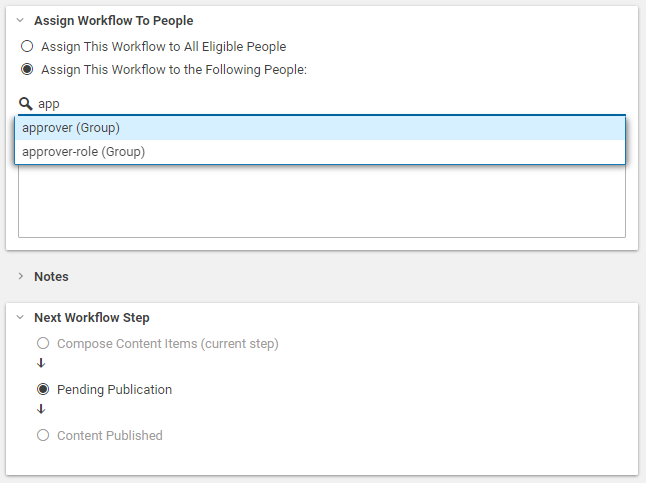
Either assign the workflow to all users with sufficient rights or to specific users (4). This area is only shown for the Reviewed Publication workflow.
When you want to assign the workflow to specific users, select the Assign this Workflow to the Following People option and start typing in the text field. You will get recommendations for users and groups. You can expand a selected group in order to remove users from the selection. The assigned users (with appropriate rights) will get a notification.
Users need appropriate rights to publish content. When no one of the assigned users has these rights you will get an error message and you cannot start the workflow. If at least one of the selected users has the appropriate rights, then you will get only warnings and you can start the workflow.
Add notes in the Notes area (5) to provide more information to your coworkers concerning the content included in your publication workflow.
When you want to remove the published contents from My Edited Content, select the Remove from My Edited Content checkbox (6). This setting will be saved in the user preferences.
Click [Start] in order to start the publication workflow.
The further steps depend on the chosen publication workflow.
Direct Publication Workflow
The content will automatically be published and the workflow appears in your Finished workflow list.
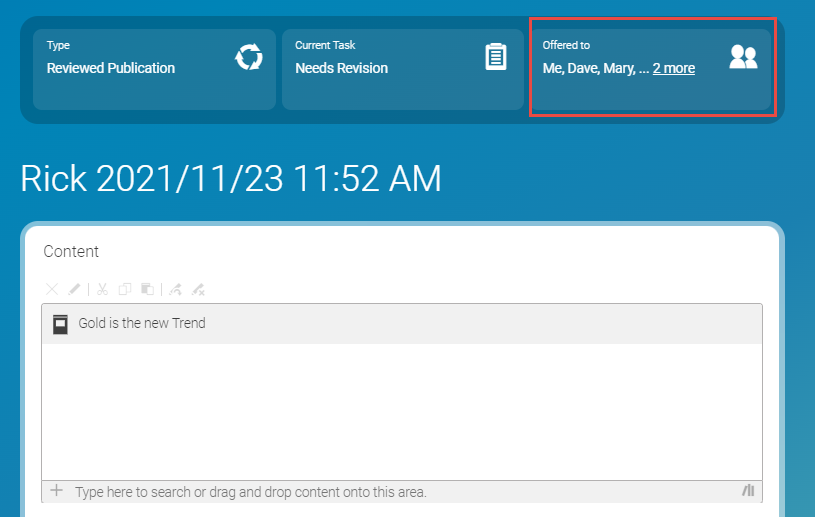
Reviewed Publication
Once the Reviewed Publication has been started, the content items included in the workflow are checked in automatically. The content items are also locked for all users except for the editor, who accepts the workflow, and the administrators.
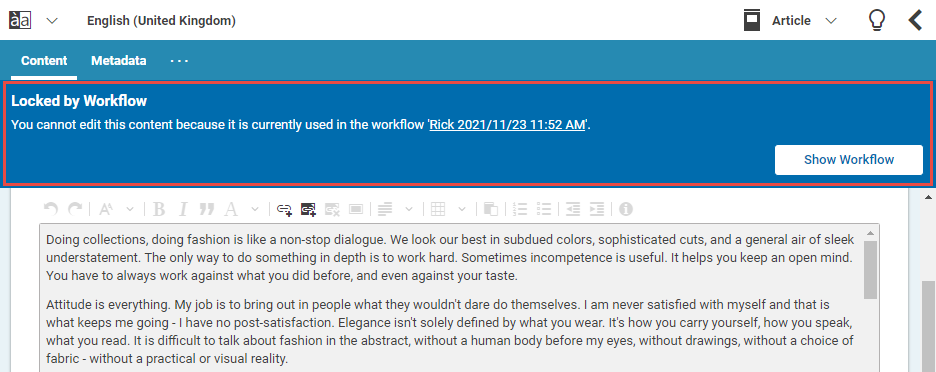
A locked content item has state Locked by workflow in the status panel. You can click on the [Show Workflow] button to open the Workflow App containing workflow details.
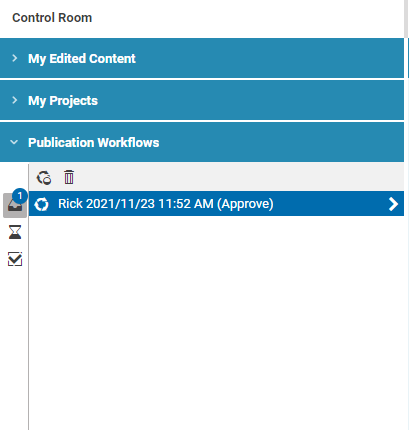
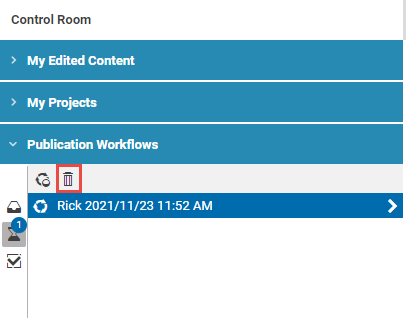
The workflow appears in your Pending workflow list in the Control Room and is offered to other editors who have the rights to accept and finish the workflow. Here, you can also abort the workflow by clicking on the 'Abort and destroy workflows' icon. Workflows can be aborted only by the users who have started them, or by administrators. If another user views the workflow while it is aborted, the user will see a warning pop-up.
Further processing of the workflow:
Another editor has to open the workflow from the Inbox by clicking on it. That opens the workflow in the Workflow App. Here, the editor has to click the [Accept Task] button in order to accept the task. If the editor has administration rights, the editor can also click the [Abort] button in the Control Room to abort the workflow.
The workflow disappears from all other inboxes.
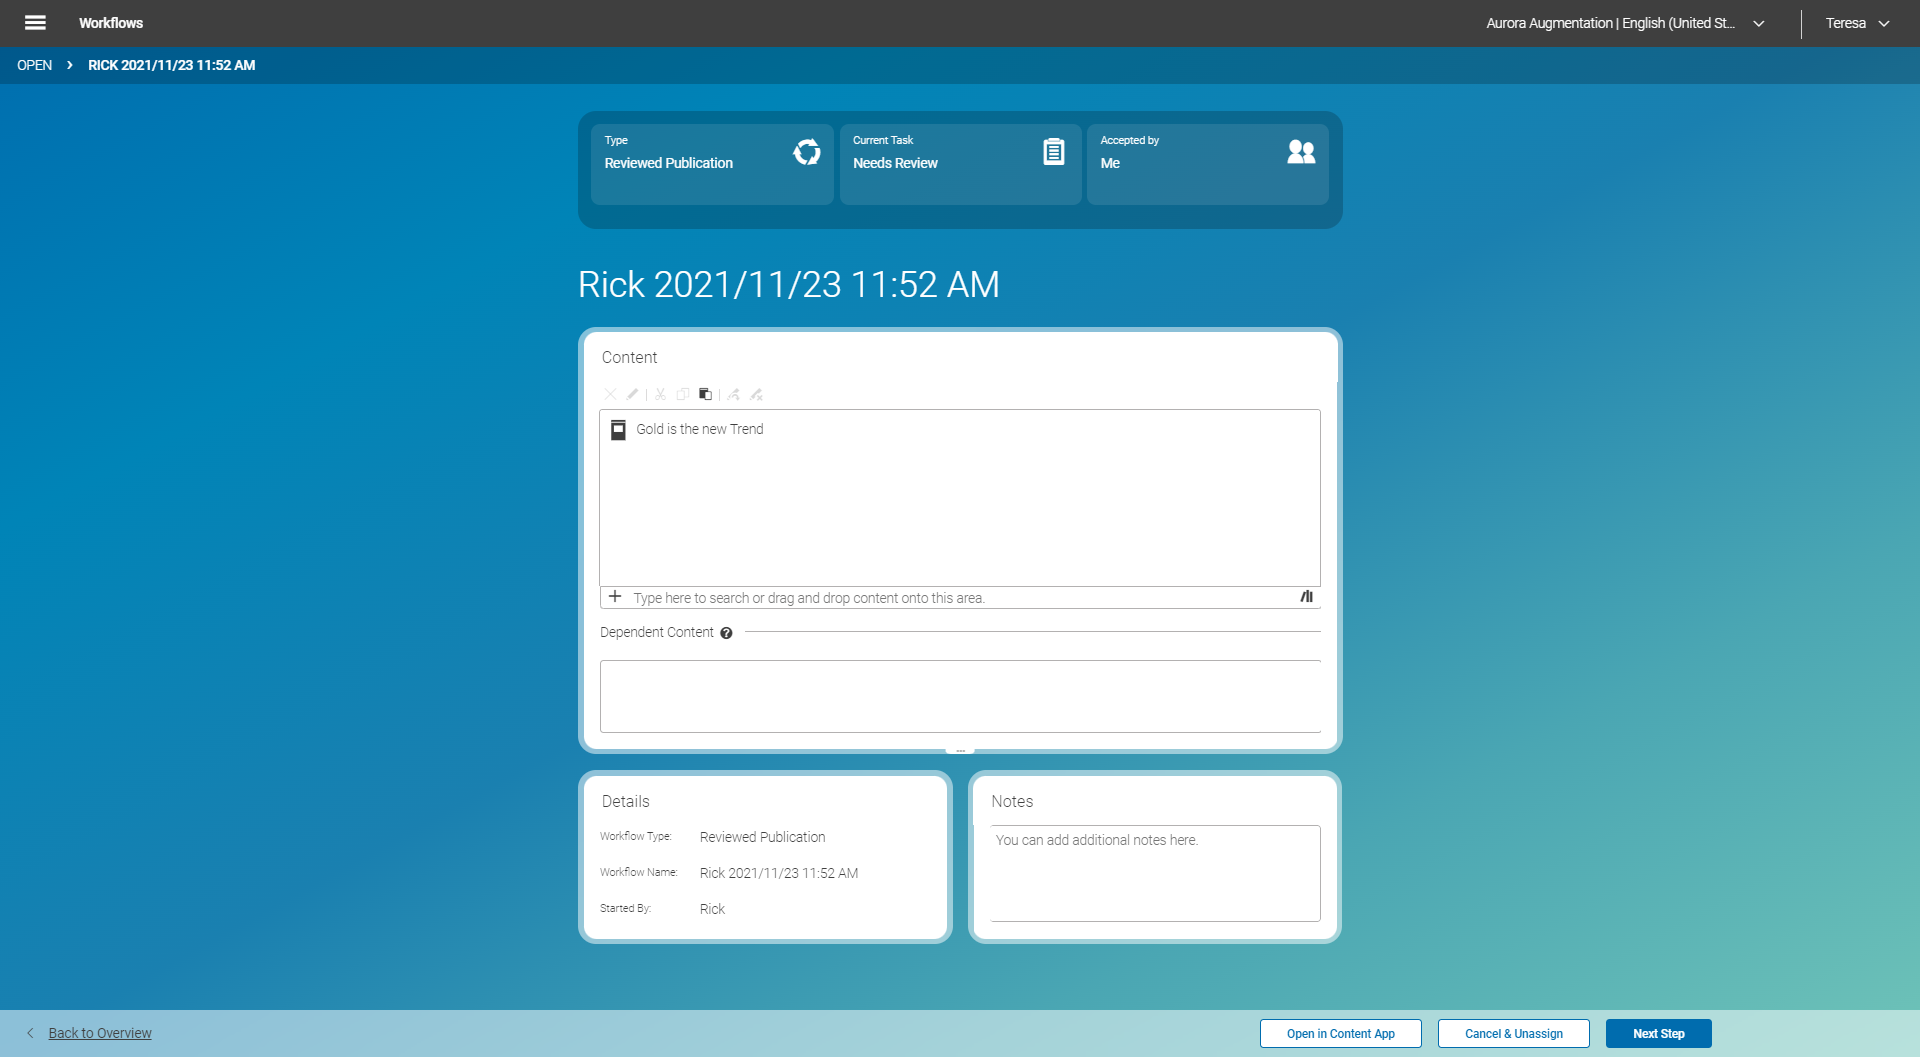
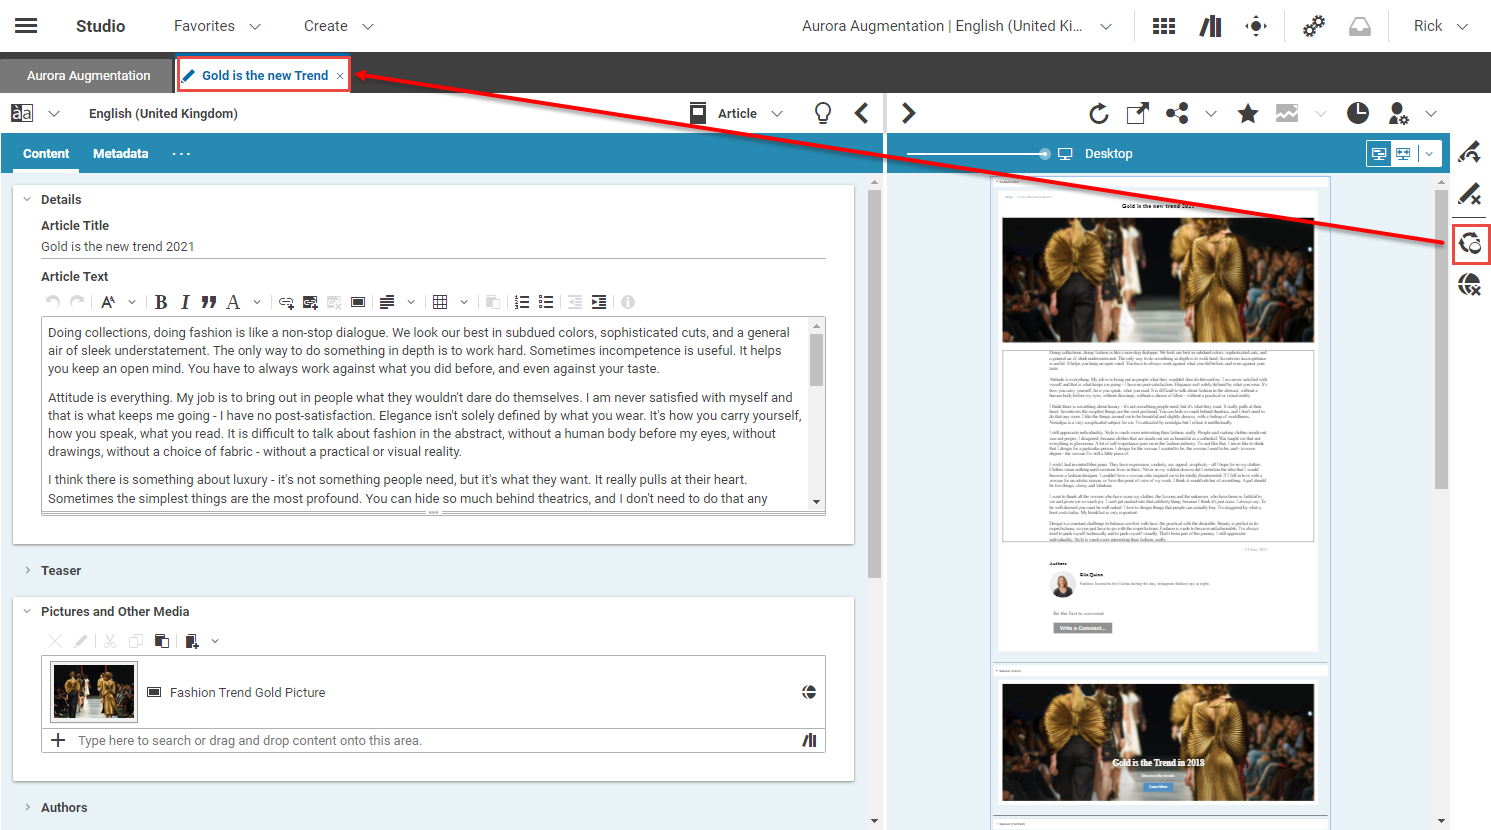
The editor can now add, remove and edit content items in the publication set of the newly accepted workflow if required. When the editor clicks the Open in Content App, then the workflow opens in an attached window in the Content App of Studio.
The editor has now two options:
Option Description Hit the [Cancel & Unassign] button The editor does not want to approve and publish the changes. The workflow appears again in the Inbox of the other authorized users and they can accept the workflow. Hit the Next Step button. A window opens up from which the editor can select the next step of the workflow. Select the [Abort Workflow] menu item This button is only visible, if the user has administration rights. When clicked, the workflow is aborted, if the user affirms the following confirmation dialog. Table 4.27. Options to finish a workflow
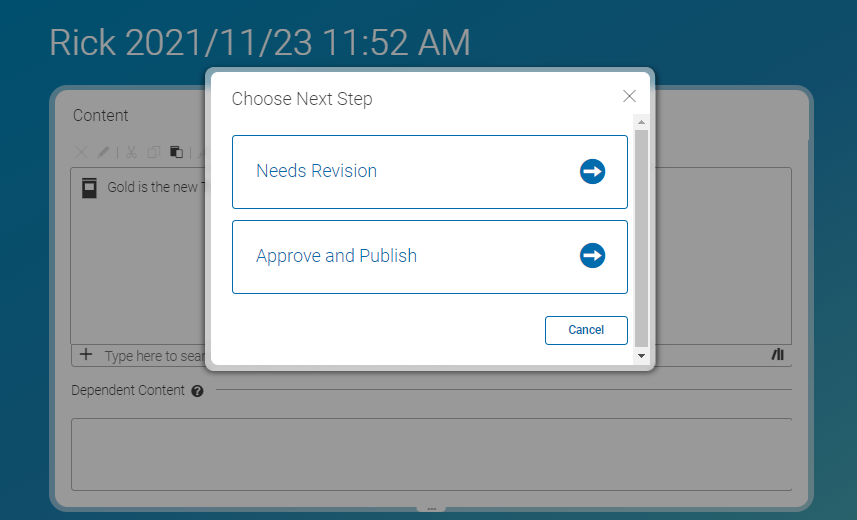
When the editor clicks the Next Step button, the following window opens up:
The options have the following meanings:
Option Description Choose the [Approve and Publish] step All content in the workflow will be published. You can now see the finished workflow in the Finished view. Choose the Needs Revision workflow step The editor does not want to approve and publish the changes because the editor thinks that the creator of the workflow has to do some changes. The workflow appears in your Inbox, as the creator of the workflow, and you can make changes and start the publication workflow again. Table 4.28. Options to finish a workflow
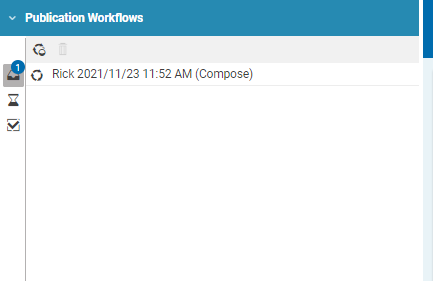
If the editor chooses the Needs Revision workflow step, the workflow will appear as Compose task in the Inbox of all editors, who are assigned to the composer-role.
An editor can open the workflow needing revision in his Inbox and sees immediately to which of his coworkers the workflow was also offered.
- After the editor accepts the task, he can work on included content, modify the assignee list and comment the workflow.