Studio User Manual / Version 2204
Table Of Contents
Prerequisite
You have to be a member of the administration group in order to create or edit groups.
A group contains rules on CoreMedia resources. In order to create a new group, proceed as follows:
Open the User Manager.
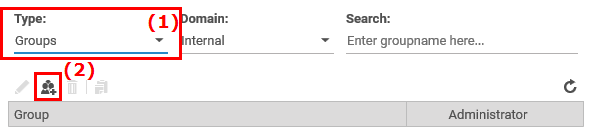
In the list view of the User Manager select "Groups" from the Type dropdown field (1).
Click the [Create a new User] button (2). A window opens up.
Enter the group name in the corresponding field. If the group should have administrator rights, check the corresponding check box (see Section 3.15.3, “Administrator Groups” in Content Server Manual for details on the administrator group).
Your administrators might have configured the use of Live Server groups (a deprecated feature). In this case, you will see the two options in field (1). Live Server groups can be used to manage access rights to content on the live side of CoreMedia Content Cloud (see Section 3.15.5, “Live Server Groups and Users” in Content Server Manual for more details on live server groups). Content Management Server group is the default setting, which is also used when no Live Server groups are activated. Select the checkbox of the group type you want to use.
Click [Confirm] to start the creation. The detail view of the group opens up.
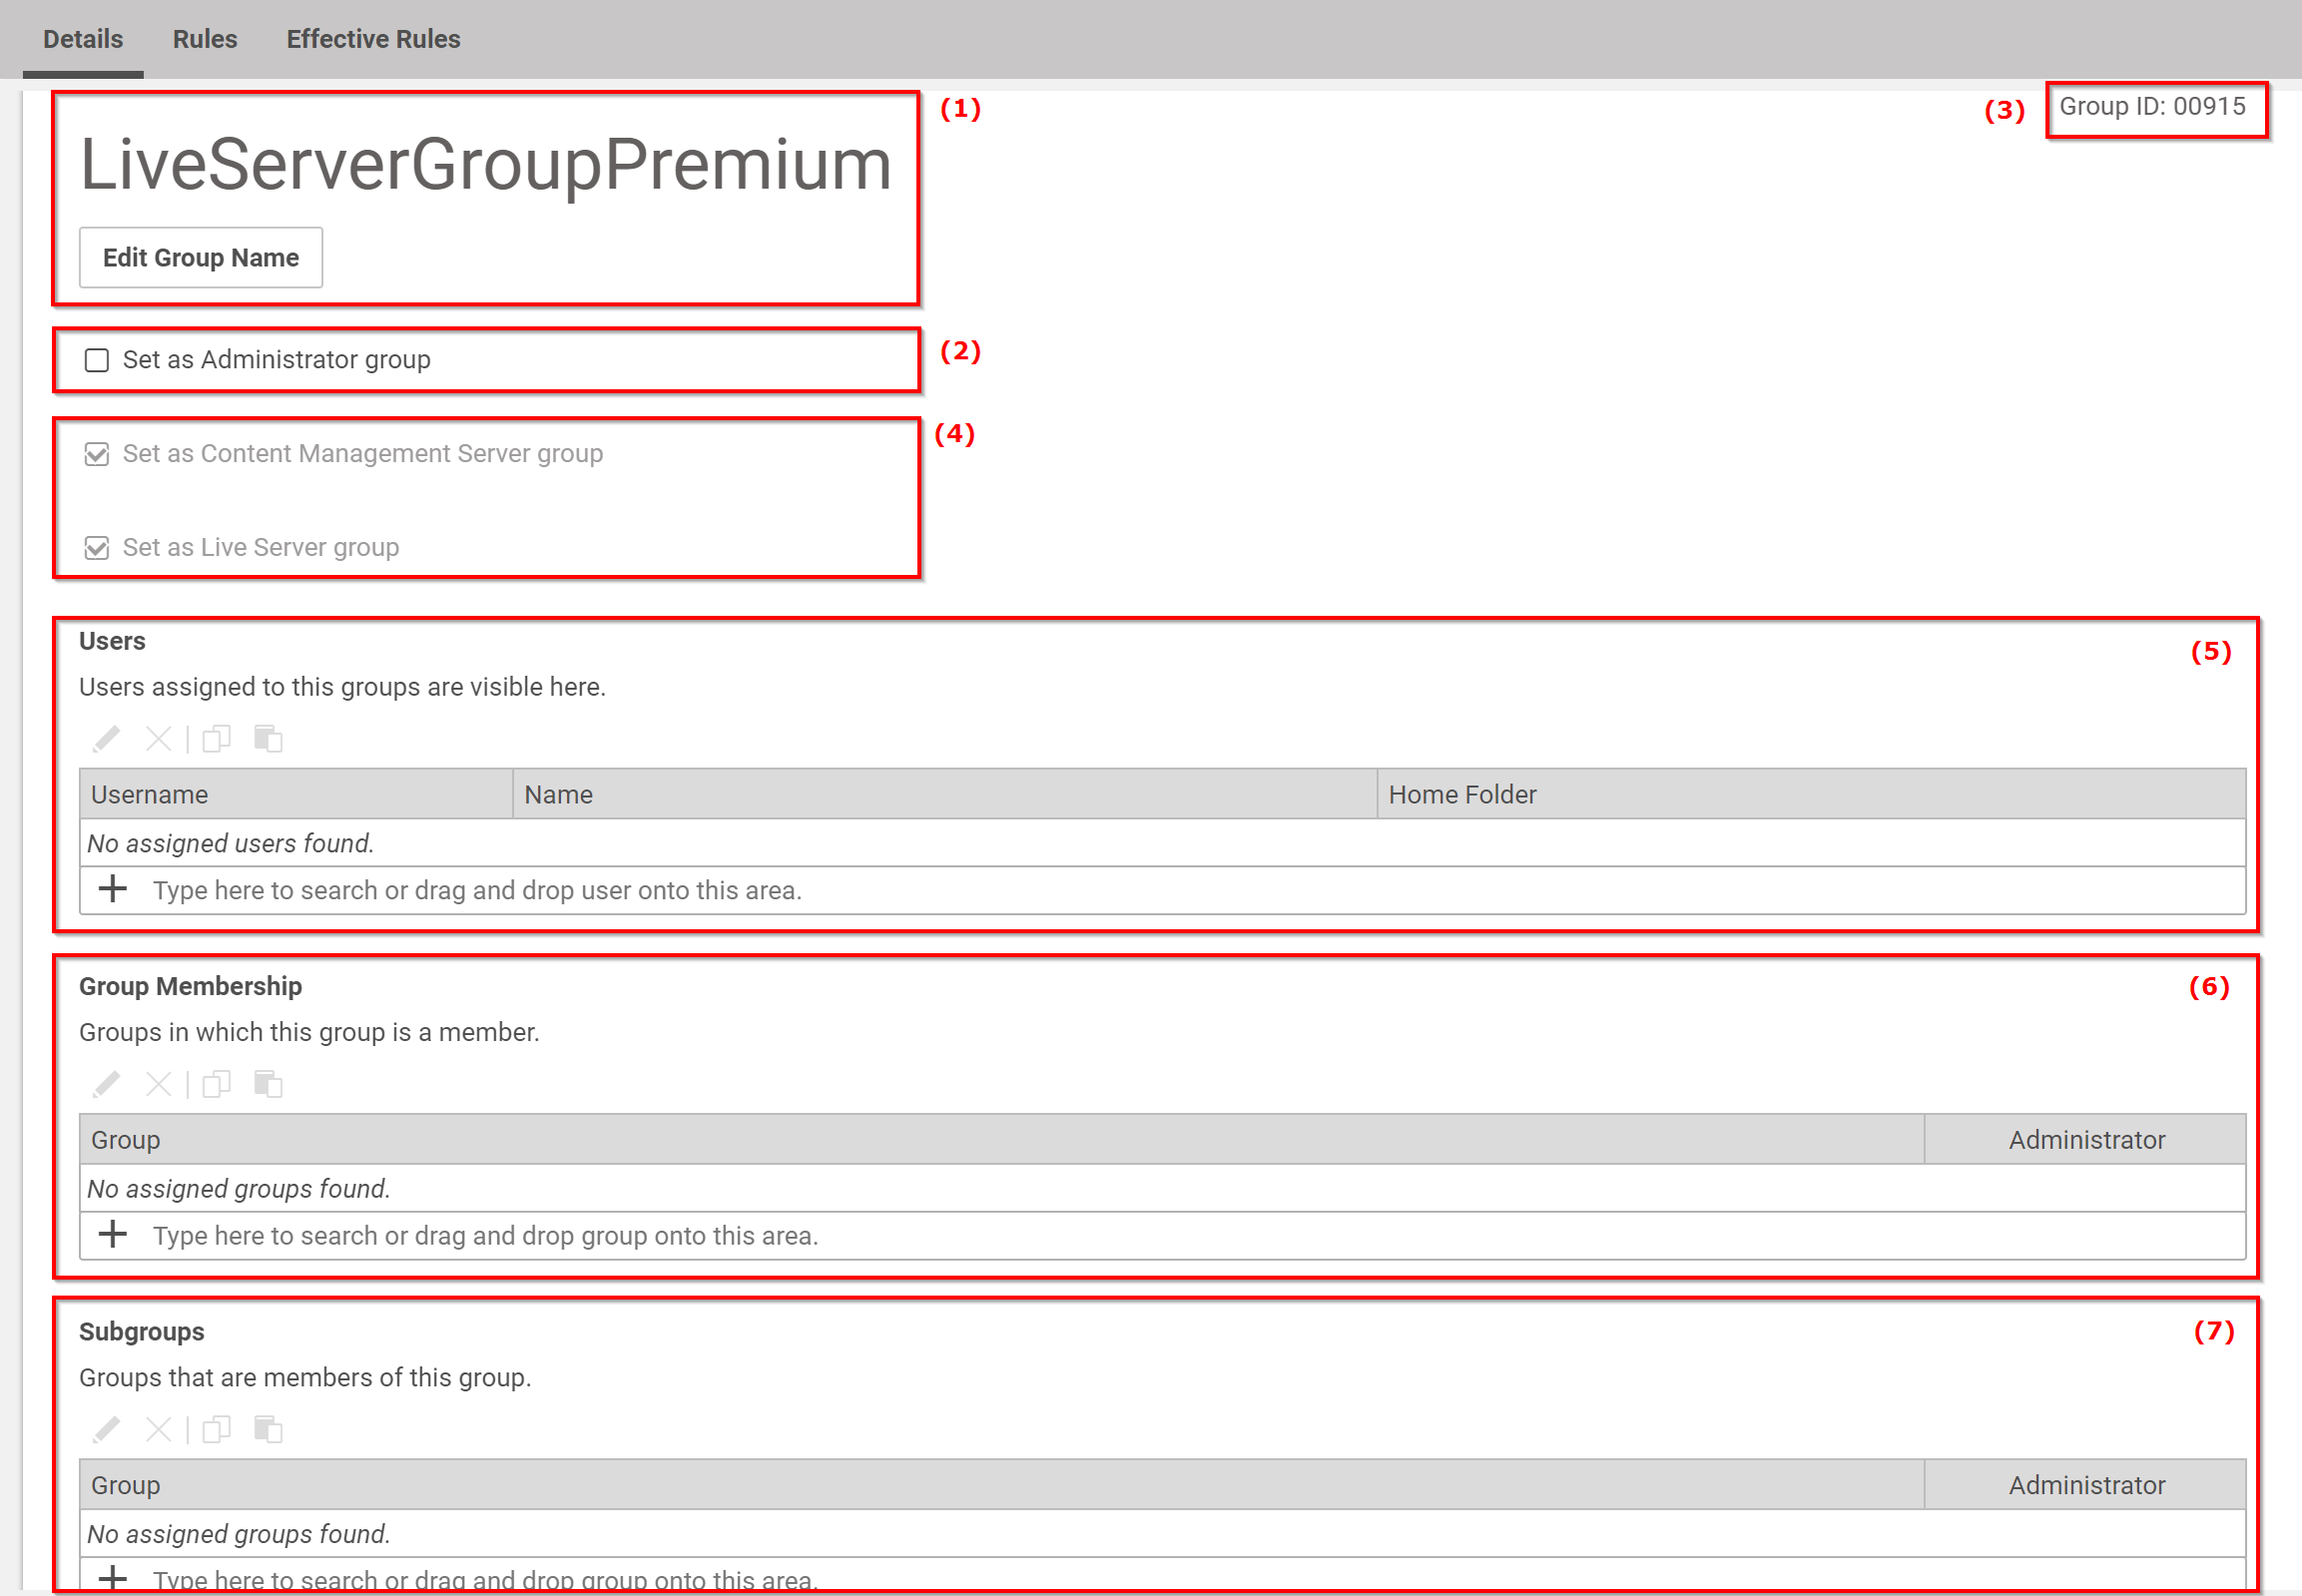
If you made errors during the creation of the group, then you can edit the name (1) and add or remove the administration rights (2). You can also see the ID of the group (3). The group type in field (4) is only shown when Live Server groups are activated. They can not be changed in this window.
A group can be a member of another group, where a subgroup inherits the rules of its parent group (see Section 2.5, “Permissions and Rights” for details). In addition, a group can have assigned users.
In order to add groups and users, proceed as follows:
Click in the link list Group Membership (6) and select groups from the dropdown list from which the new group should be a subgroup.
Click in the link list Subgroups (7) and select groups from the dropdown list which should be subgroups of the new group.
Click in the link list Users (5) and select users from the dropdown list which should be members of the new group.
Open the Rules tab and add new rules. See Section 3.5.5, “Adding, Deleting and Editing Rules” for adding rules.
If you want, you can check the effective rules of the group by opening the Effective Rules tab (see Section 2.5, “Permissions and Rights” for details on rules). You will see all the rights of the group on folders and content types due to the defined rules and the membership in other groups.
Click [Save] in order to save the changes to the newly created group.
If you want to discard changes, click [Revert] .