 What you will learn
- Learn how to create a new page
- Learn how new pages are added to the navigation
- Learn how to create a new page from a predefined template
 Prerequisites
- A working Login to CoreMedia Studio
 Target Audience
This guide is for Editors, Newbies.
Table of Contents
Introduction
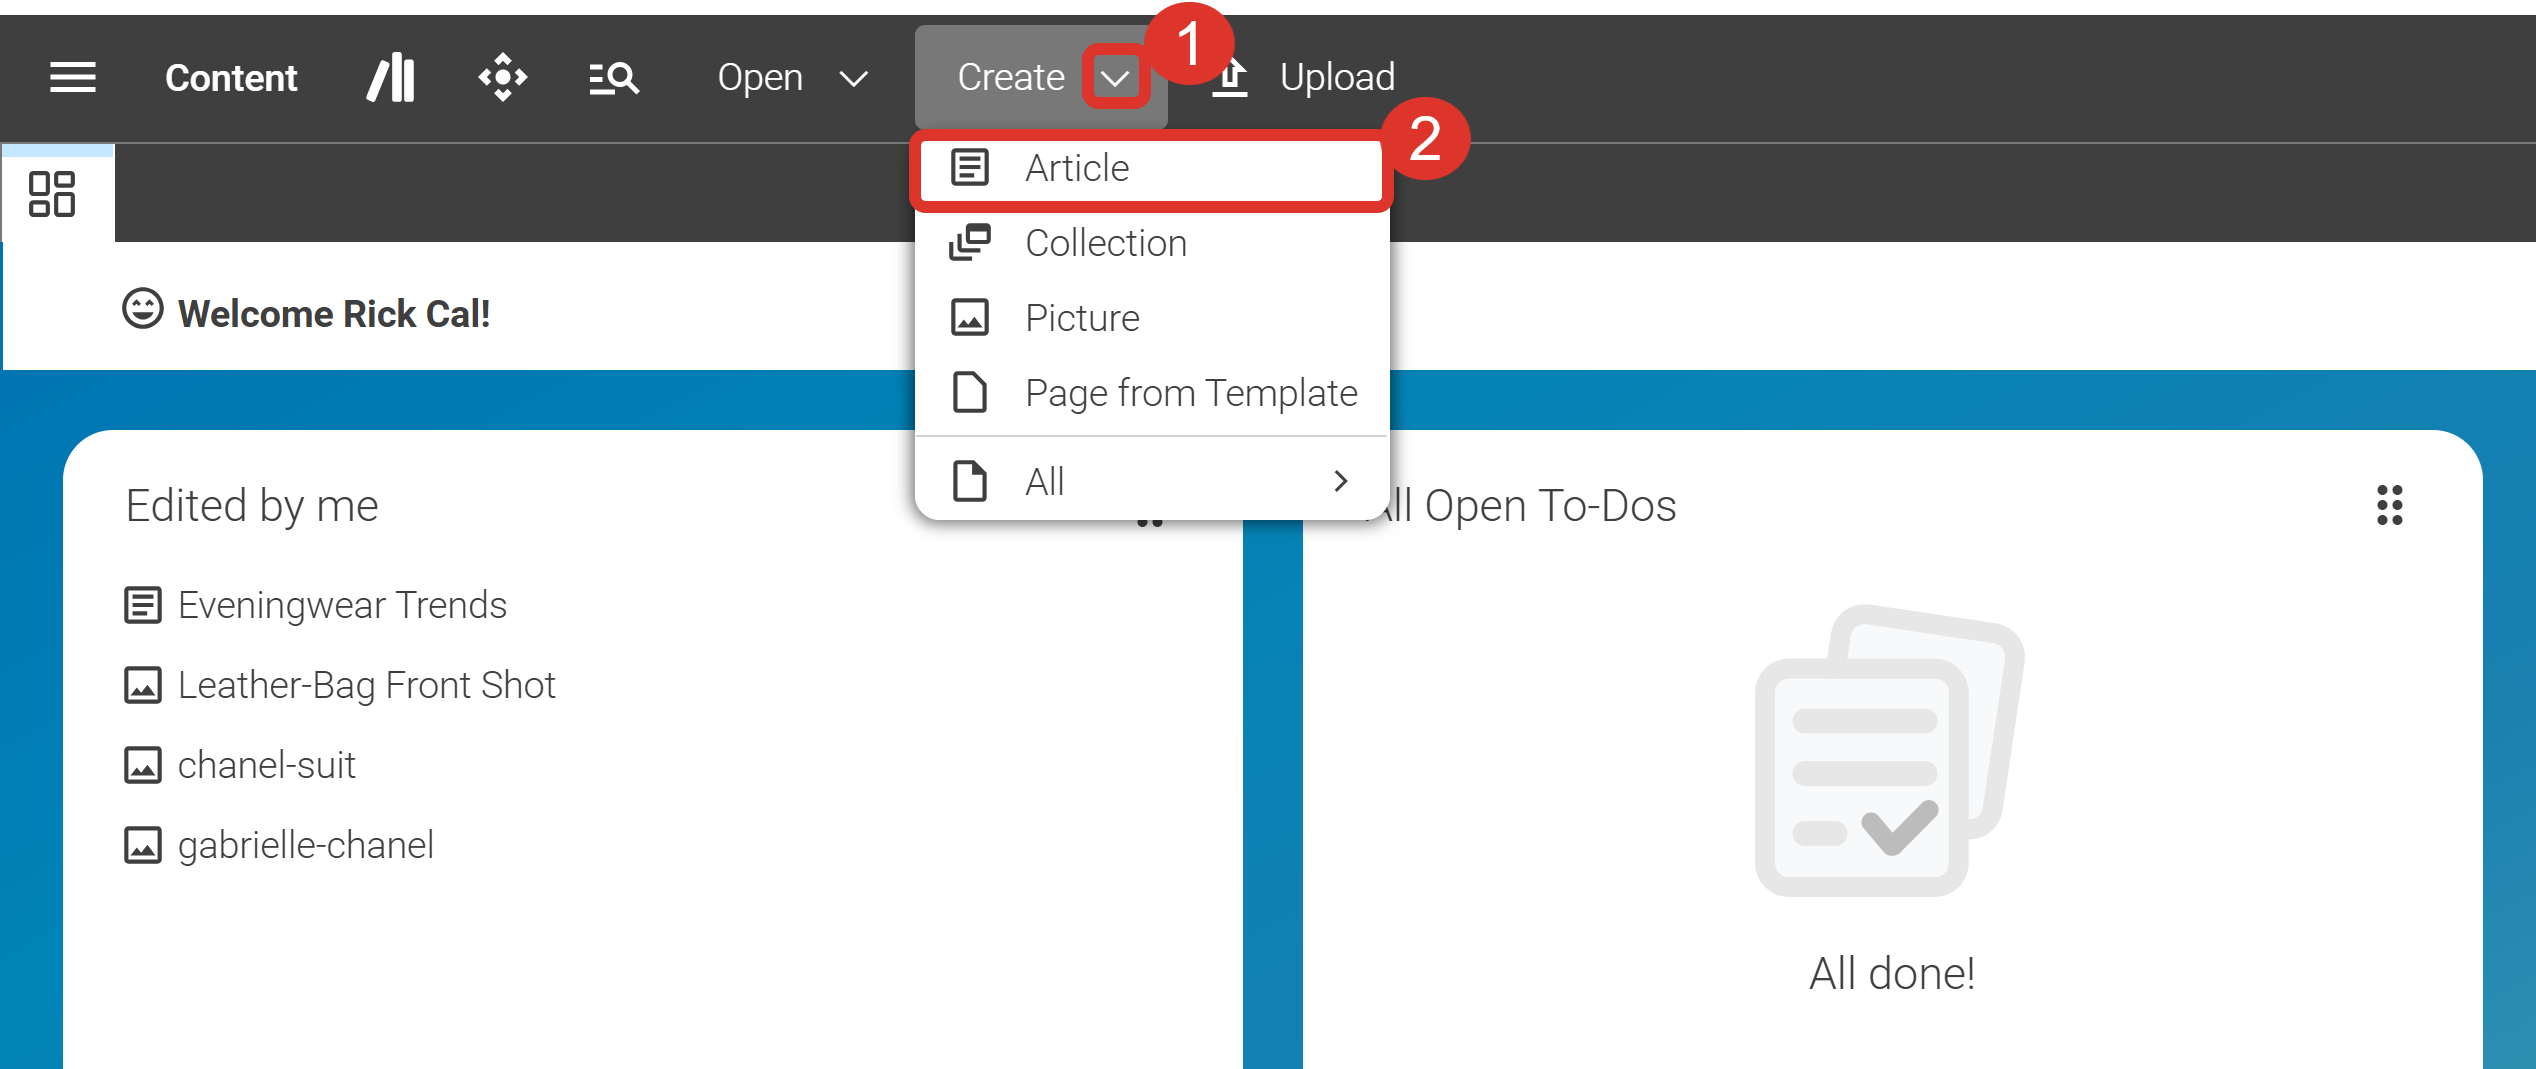
In CoreMedia Studio, an Article is a type of content item. Other examples of content items include images, videos, and similar media.
To create a new article from scratch, click on Create (1) and choose Article (2) from the drop-down menu.
Figure 1. Create Article
Next Steps
-
In the New Article dialog, enter a title in the Name field (3), then click Create (4).
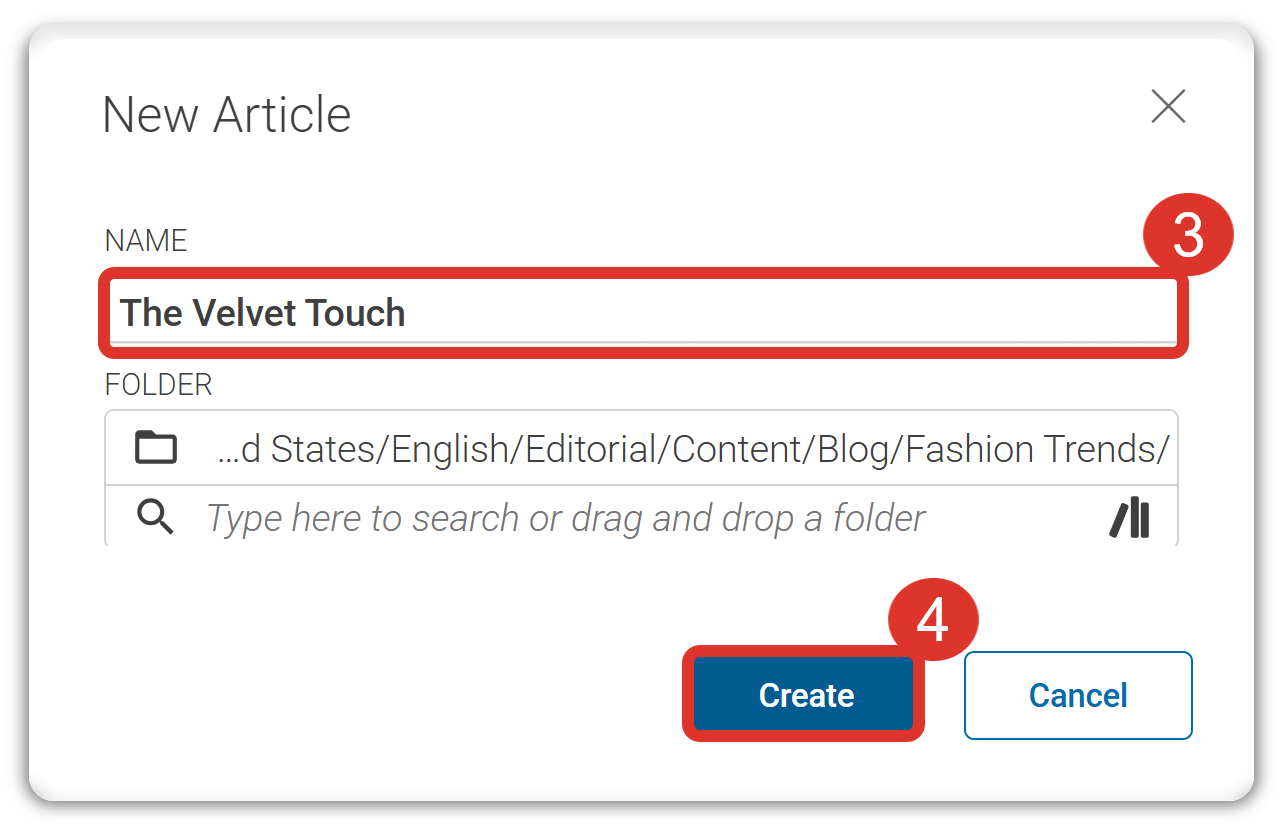 Figure 2. New Article
 -
Next, edit the basic elements required for most articles:
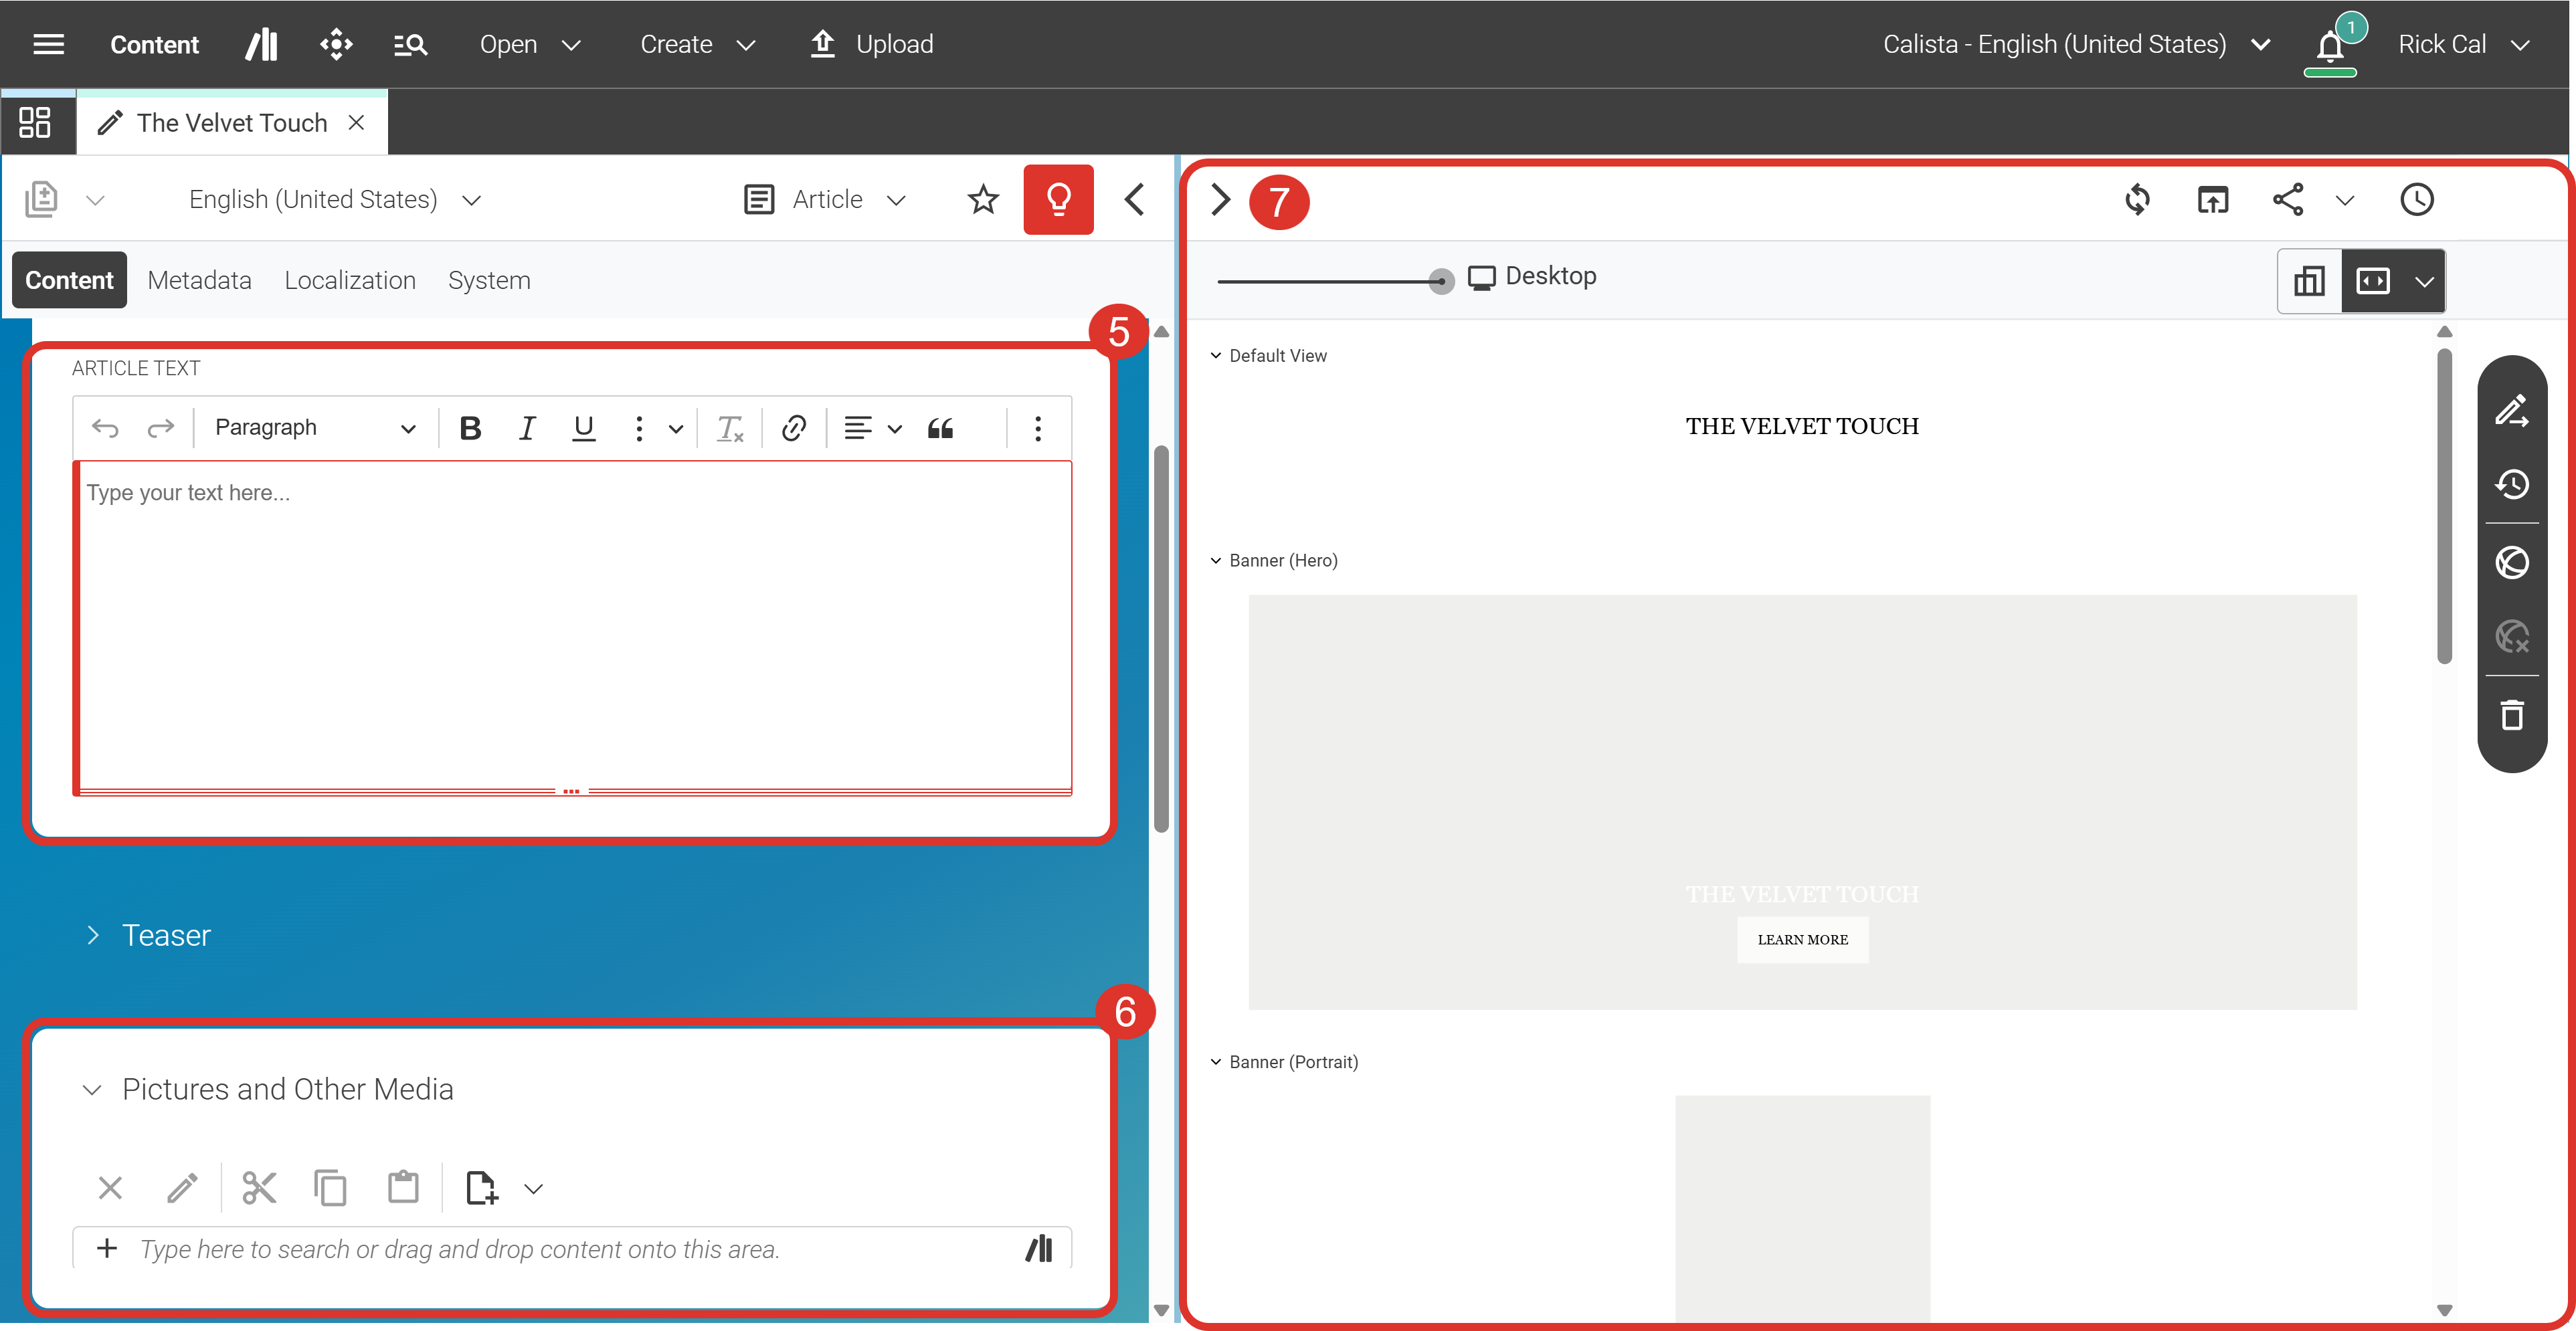 Figure 3. Create Article
-
Article Title: Short text used for headings or subtitles. This field is required.
-
Article Text: A rich text field for longer content sections, which may include formatting, links, or images (5). This field is required.
-
Pictures and Other Media: Where you add images and videos (6).
Once you have added content, it appears in the Preview (7) on the right.
For details about editing text in Studio, see the Rich Text Editing chapter in the Studio User Manual.
-
-
To continue, choose one of the available actions.
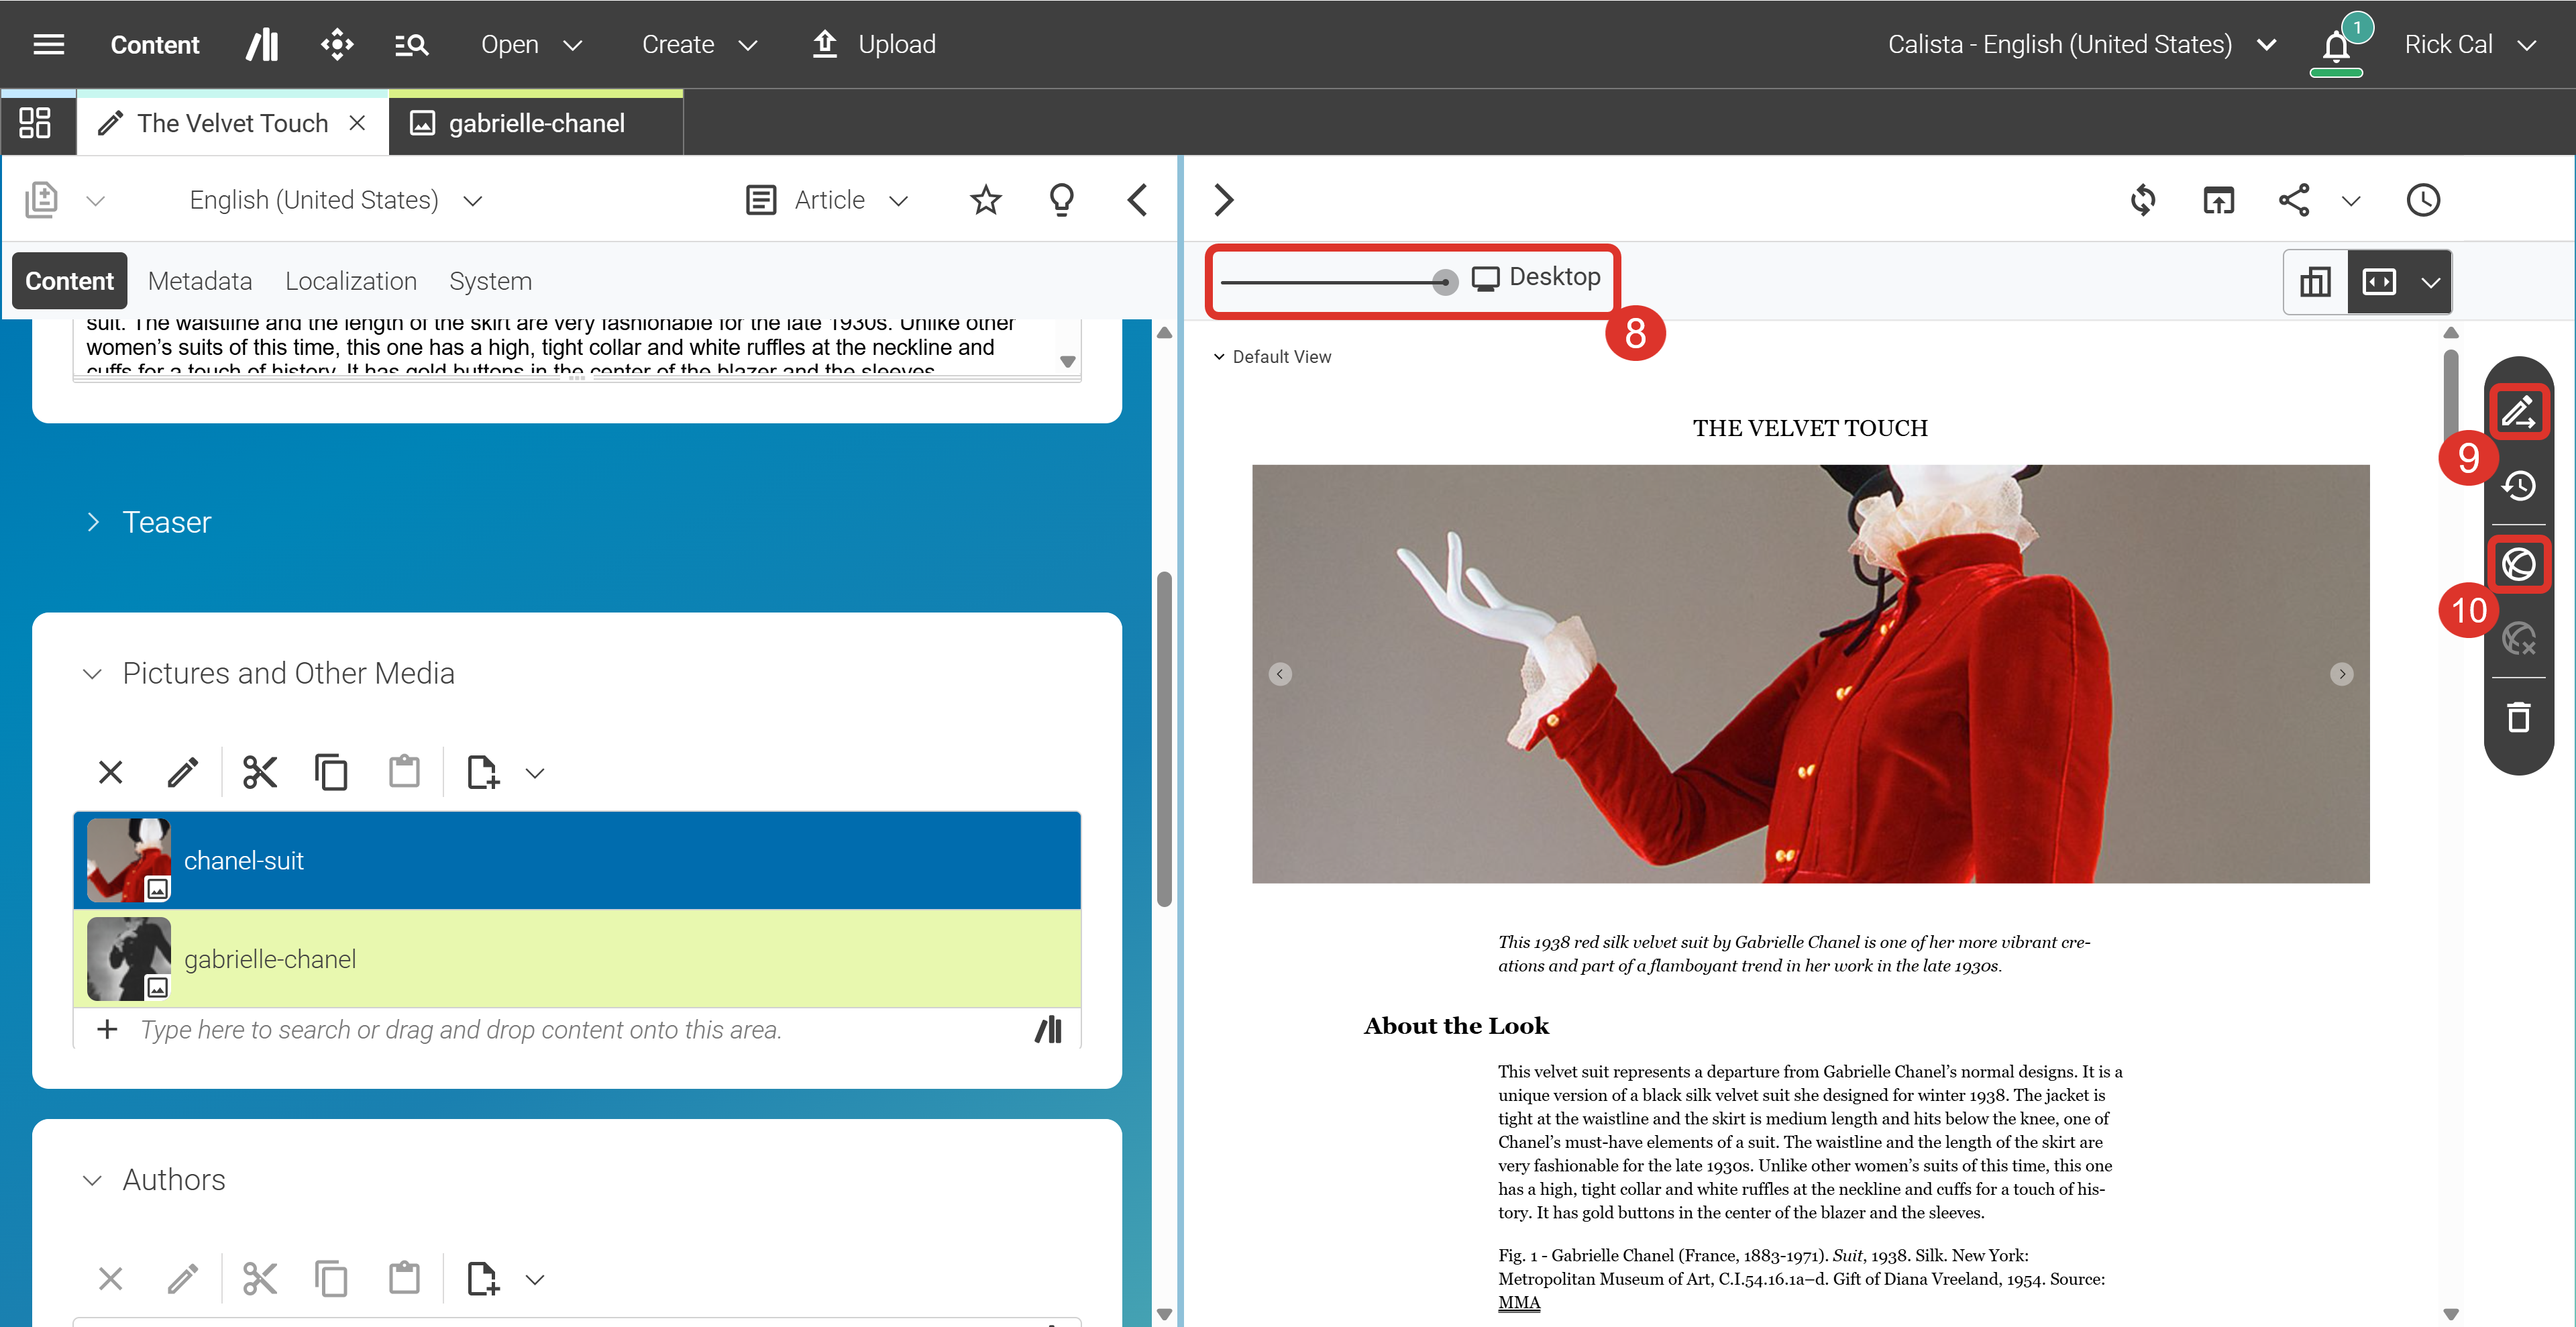 Figure 4. Create Article
-
Finish editing and apply changes: Click the pen-and-arrow icon (9) in the Action toolbar on the right.
-
Revert changes: Click the Revert Changes button to undo edits.
-
Start a Publication Workflow: Click this icon (10) to hand the article off to a colleague — for review, approval, or final publishing.
CoreMedia Studio’s preview includes a device-size slider (8). Use it to preview how the page looks on different screen sizes (for example, mobile vs. desktop).
-


Inserting and Editing Images
You can drag and drop images from the Library or from other locations into a rich text field, then edit them in place.
Inserting an image
-
Drag the image (for example, from the Library) with the left mouse button held down to the spot in the rich text field where you want the image.
-
Release the mouse button. The image is inserted at that location.
Deleting an image
-
Click the image to select it.
-
Press Delete on your keyboard. The image is removed from the rich text field.
Editing an image
When you select an image, a contextual toolbar appears. Use the toolbar to change the image behavior and properties.
You now know how to create an article, fill in its basic content fields, and work with images in CoreMedia Studio. For more advanced editing options, refer to the Studio User Manual.
Is this page useful?