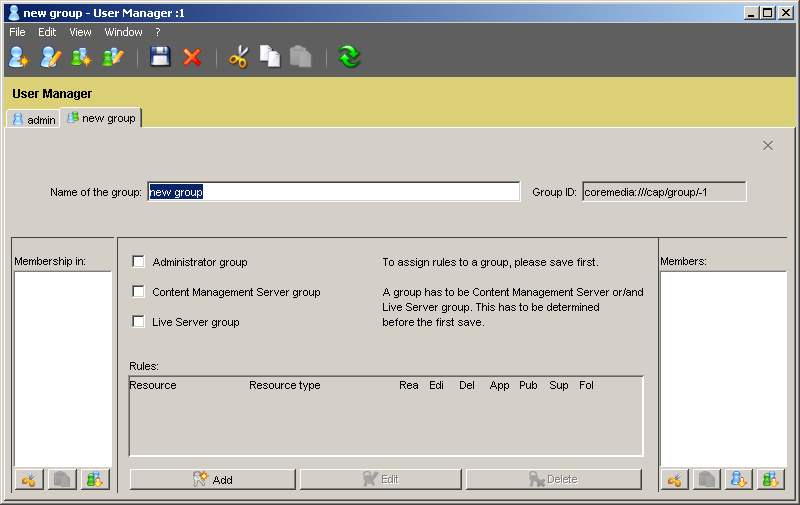
Only members of Administrator groups are entitled to create new users and groups. For Administrator groups, the Administrator group flag is set as shown in the next figure.
A new group is created by giving it a new name and allocating existing users to the group. The Group id is automatically given by the application.
Choose File|New group
or click
 on the tool bar
or press <CTRL>+<G> resp. <ALT>+<G>
Name the group.
Choose the group type.
You may choose Administrator group to provide administrator rights to the group members or Content Management Server group to create a non administrative group on the Content Management Server. Check Live Server group if you want to create a group for the Live Server (you have to create the same group on the Live Server, read Section 3.16.5, “Live Server Groups and Users” for details on Live Server user/groups).
Save the group settings.
click
 on the tool bar.
or press <CTRL>+<S> resp. <ALT>+<S>
After creating a group, you may continue with either adding members to groups, or assigning rules to groups.
In order to add members to a group:
Open the group in a tab
Choose Edit | Members and users or groups that you want to add as members to your group.
Now you may continue with assigning rules to resources:
Open the group tab
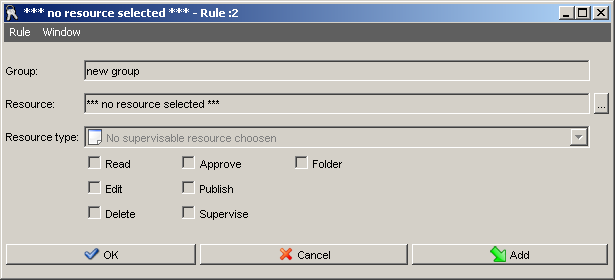
Click on the [Add] button at the bottom of the window.
To assign rules to a group
Choose a resource after that a resource type (depending on your SUPERVISE rights on this resource).
If you don't have SUPERVISE rights on that resource, you cannot choose a resource type. You can assign rights to a folder by choosing "Folder" in the field Resource Type.
The properties of a group can be characterized by the combination of multiple resources with their special rights.


