Studio User Manual / Version 2506.0
Table Of Contents
Note
The In-App Guide Portal is activated via a Blueprint plugin and might not be installed by your company. Also, you have to allow data tracking to get guides in Studio. See Section 3.8, “Usage Tracking” for details about tracking and guides. In this section, we assume that the plugin is installed.
CoreMedia integrates a Guide Portal in Studio which offers you in-app guides for specific tasks, informs you about new Studio or CoreMedia features and allows you to provide feedback to CoreMedia.
Activating the In-App Guide Portal
In-App Guides need activated data tracking due to technical limitations. You can activate both at once. See Section 3.8, “Usage Tracking” for details about data tracking.
When you log in for the first time, data tracking is not activated, and you will see a screen, where you can enable in-app guides and data tracking. Simply click Enable In-App Guides and then click [Save] . This will also activate data tracking.
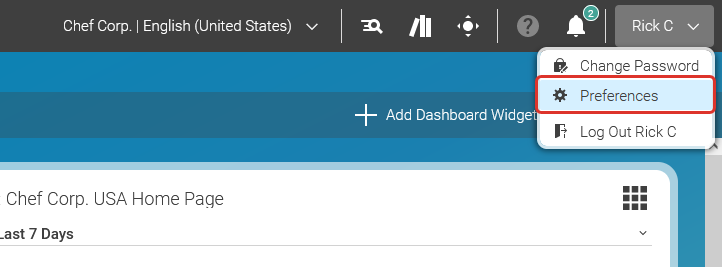
When you have skipped the in-app guide activation at your first login, and now want to activate in-app guides, open the Preferences menu.
In the Preferences menu, select the Permissions tab.
Click Enable In-App Guides. This enables the in-app guides. When not already done, this will also activate data tracking. Click Confirm to save your changes and to close the Preferences dialog afterwards.
Now, in-app guides and the In-App Guide Portal are enabled in your Studio. You can now learn about Studio components, get help with specific tasks, learn about new Studio features, and provide CoreMedia with Feedback for further improvements of Studio and the guides.
Deactivating the In-App Guide Portal
As above, open the Preferences dialog, select the Permissions tab and deactivate the Enable In-App Guides switch. The guides will also be deactivated when you deactivate data tracking.
Opening the In-App Guide Portal
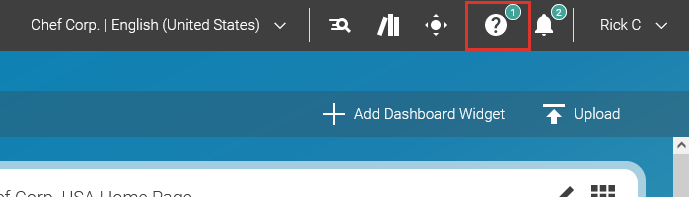
Click the question mark icon in the top-right corner of Studio.
This opens the In-App Guides Portal.
The In-App Guide Portal
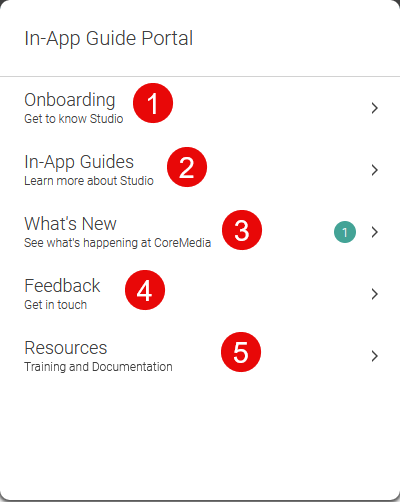
The In-App Guide Portal has five sections as shown in Figure 2.59, “The In-App Guides Portal”:
- Onboarding (1)
Here, you find guides that introduce you into Studio and that describe main parts of Studio, for example, the Library or the Preview.
- In-App Guides (2)
Here, you find guides that describe tasks you might want to achieve. For example, how to derive a site or the usage of taxonomies.
- What's New (3)
Here, you will get the latest news concerning Studio. For example, when Studio has got new features. The small number besides the What's New entry shows, as always in Studio, the number of unread messages.
- Feedback (4)
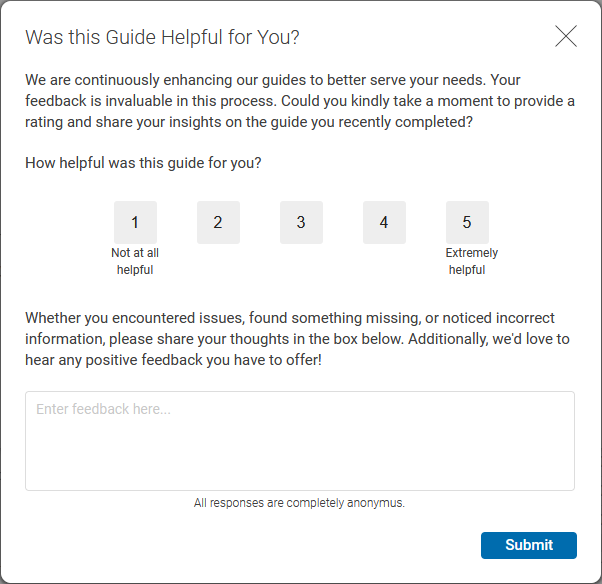
Here, you can give us feedback, so that we can improve Studio and the guides. You can recommend guides you want to have, rate the existing guides and give us feedback about Studio.
You can also give us feedback, after you have finished a specific guide.
- Resources (5)
Here, you get links to our other user related resources, such as our comprehensive documentation or the enablement center.
Using Guides
Guides will lead you through specific tasks or describe features of Studio components, such as the Library. Guides cannot control Studio on their own. So, you either have to perform an action, such as opening the library

or to click [Start] or [Next] in a guides' step. Sometimes, you have to perform an action and also click [Next] to proceed. The guide step describes exactly what to do.
You can go back to the last step by clicking [Back] .
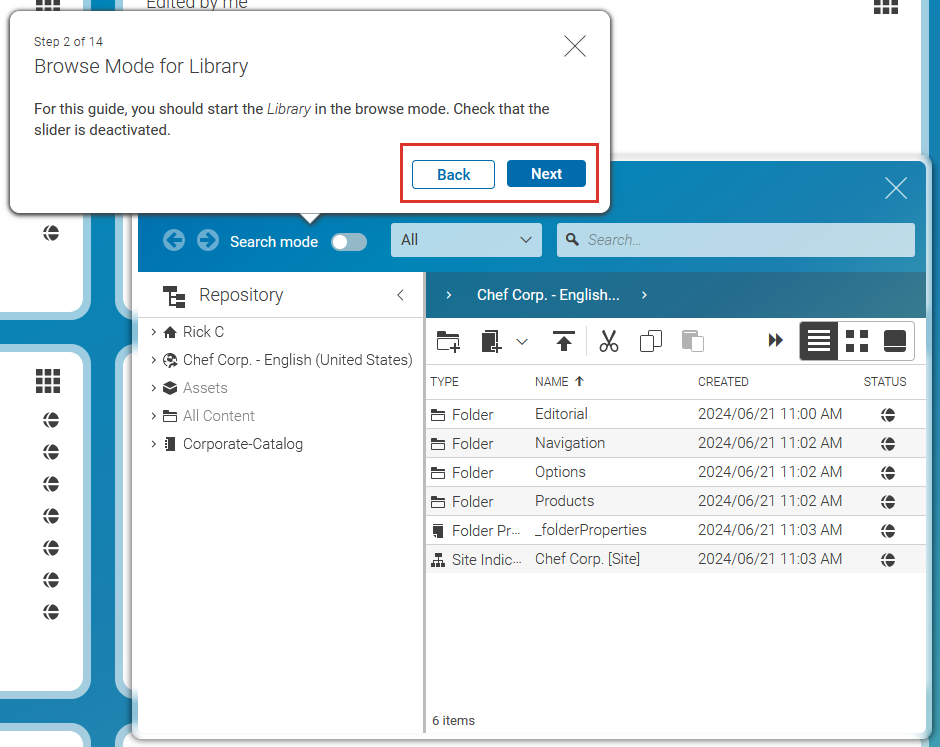
You can always leave a guide by clicking the X icon of a guides' step.

When you have reached the end of a guide, you can simply leave the guide by clicking [Finish] or give us feedback by clicking [Rate this Guide] .
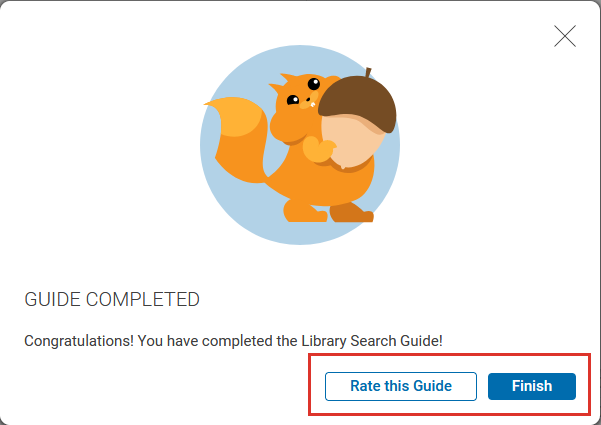
Your feedback is invaluable and drives us to continuously enhance both the guides and the studio experience.