Studio User Manual / Version 2506.0
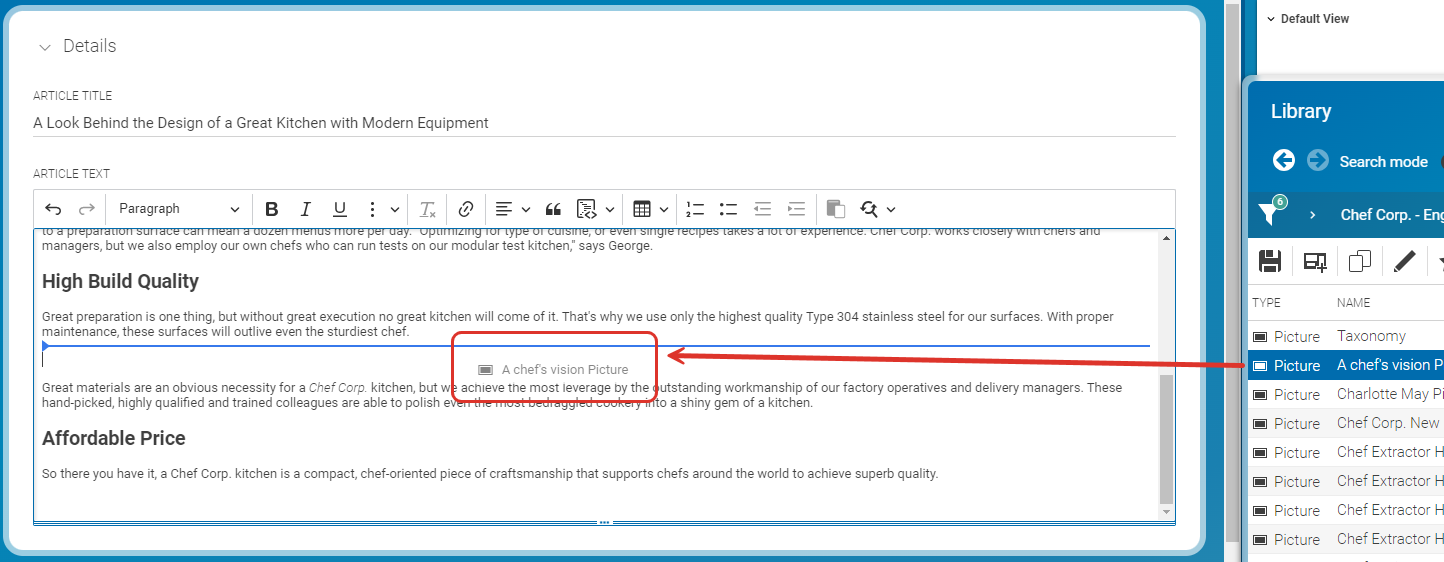
Table Of ContentsWhen CoreMedia Studio is accordingly configured, you can drag and drop images from the library or other locations into a rich text field and edit the images. In the CoreMedia Blueprint configuration of CoreMedia Studio for example, you can drag images that you have found with the Images search into the Article Text field of an Article content item.
Inserting an image
Simply drag the image (for example, from the Library) with pressed left mouse button to the position in the rich text field where you want to insert the image.
Release the mouse button.
The image appears in the text field.
Deleting image
Click the image to select it.
Press Del on your keyboard.
The image has been deleted from the rich text field.
Editing image
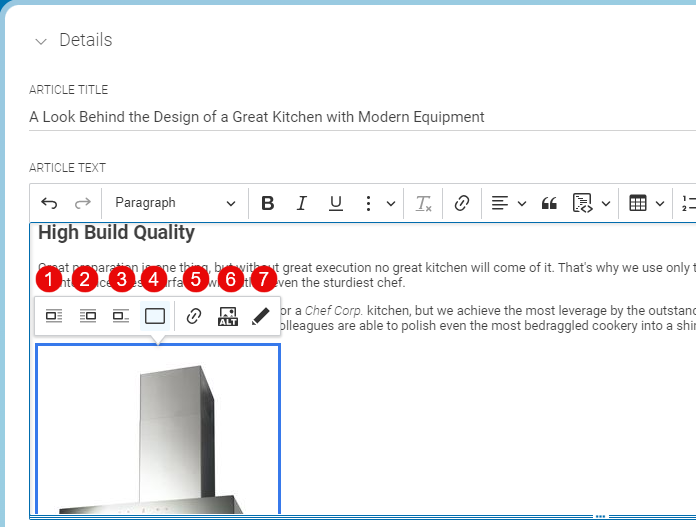
When you select an image, the contextual toolbar opens up from which you can edit the behaviour of your image.
| Icon | Name |
|---|---|
| Left-aligned | |
| Right-aligned | |
| Within text | |
| Page default | |
| Link image | |
| Change image text alternative | |
| Open in tab |
Table 4.15. Image icons
Positioning the Image
You can edit the position of the image in a rich text field. Select the image, so that the contextual toolbar opens. Select one of the options (1)-(4) to position your image.
Linking the Image
You can add a link target to an image which will be called when you click the image. Select the image and click the
icon (5). You can now add a link as described in Section 4.6.3.5, “Working With Links”.
When you want to edit the link, you have to select the image and click again the icon (5). Then the contextual toolbar of the link opens up.
Adding Alt Text to Image
By default, images have the image title as alternative text. You can overwrite this by clicking the icon (6). Simply add the text in the opening dialog and click the save icon.


