Studio User Manual / Version 2506.0
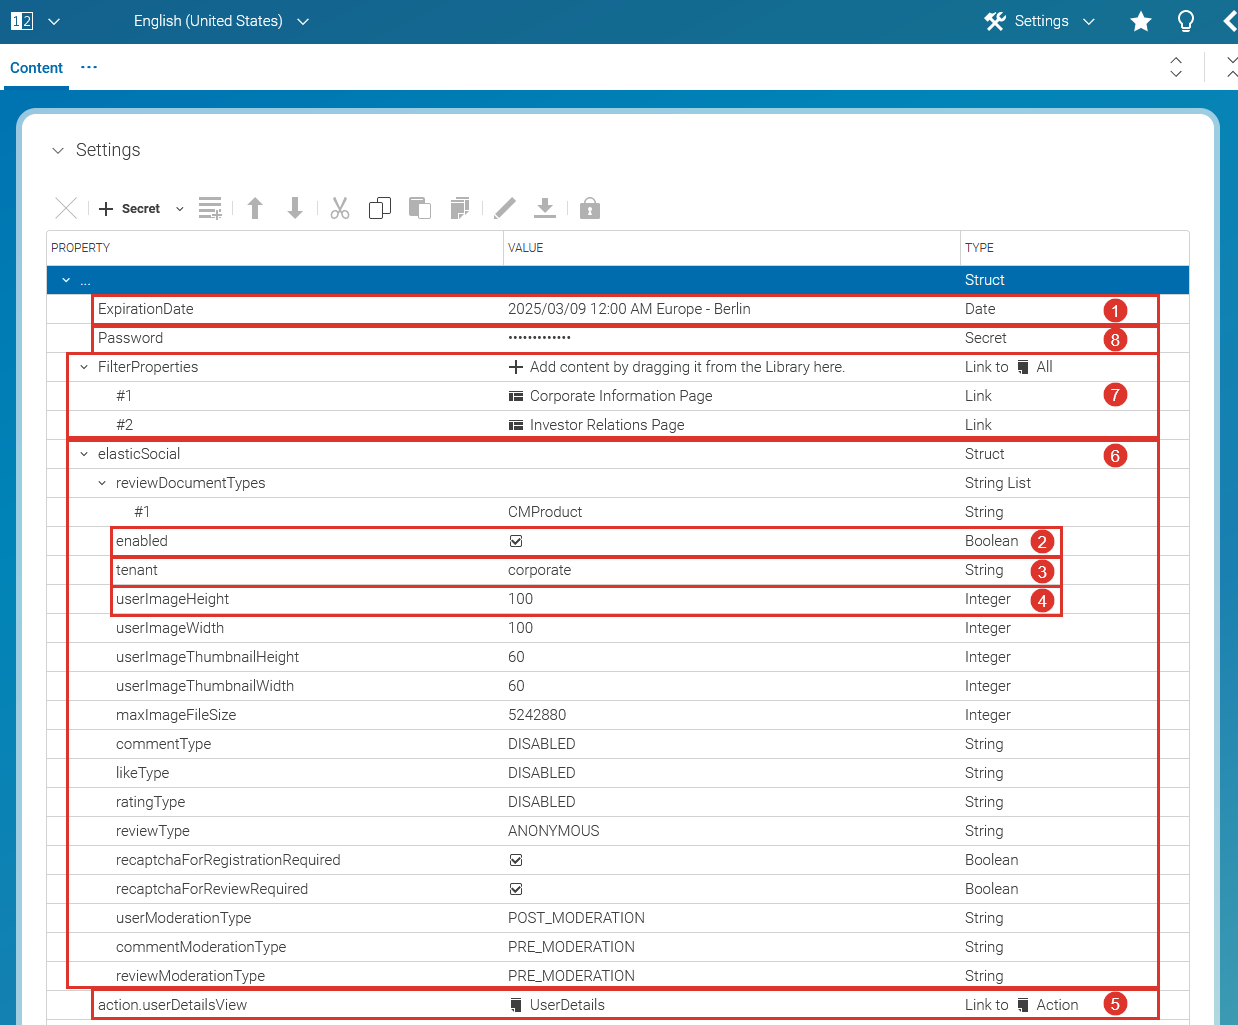
Table Of ContentsA struct property is a specific content field, where you can manage structured data. It is mostly used for some settings of CoreMedia Blueprint.
You can use it, for example, to change the moderation type of a page (see Section 3.3.15, “Configuring Elastic Social”).
You can enter numbers (Integer (4)), text (String,
(3)), Boolean values displayed as check boxes (Boolean (2)), links to other
CoreMedia content items (Link (5)), dates (Date (1)),
passwords, API keys and other secret data (Secret (8)),
structured data (Struct (6)), markup and binary content into a struct property.

Note
Creating Secret properties is only possible if an encryption service is present,
which was configured via Spring. If the option is missing, contact your system administrator,
who can find information on this topic in
Chapter 4, Encryption Service Setup in Deployment Manual.
For all types, you can create two different items:
- A single Property (1)
A single property with name and value and, in addition, link type for a
Link.- A list Property (7)
A container for several items of the specified type. It has only a name (and a link type for a
Link) and you have to add a value property for content.
| Icon | Name |
|---|---|
| Remove item | |
| Cut item | |
| Copy | |
| Paste | |
| Duplicate | |
| Move up | |
| Move down | |
| Add item | |
| Add item List property | |
|
Open linked item in tab | |
|
|
Encrypt string property value |
Table 4.17. Struct editor icons
Editing Struct entries
You can change the name of an entry, the value and for a Link the link type. In
addition, you can remove items from a list property or from a Struct.
Changing the name
In order to change the name, double-click the Name field and enter the new
name. If the new name already exists in the Struct, then it will not be changed.
Changing the value
In order to edit a string or integer value, click the Value field and start typing. For a Boolean value toggle the status by clicking the checkbox.
For a Link value, also click the Value field. The Library opens from where
you can drag items onto the drop field. If the Link already contains a linked
content, then it will be replaced by the new one. Use the Remove item icon to
remove an entry from the Link.
For a Secret value, click the Value field. A dialog opens where you can enter the
secret value to be encrypted. Even while entering, charactes are obscured to protect them from observers.
Some browsers (e.g. Microsoft Edge) allow to toggle to plain text to check your input.
After confirming the dialog, the secret value is encrypted, stored, and from then on displayed as several
bullets (•••••••••••••). When hovering over the obscured value with the mouse, you
can see that a Secret is actually binary data with a certain media type, so it can be downloaded like
any other binary property.

Note
When you click on a Secret's Value field, even if the Secret property already contains a value, the input field in the dialog starts empty, because once encryted, a Secret cannot be decrypted again in Studio. Thus, make sure that any newly generated password is memorized or copied to a safe place before encrypting it, since you will not be able to see it again in plain text, at least not in Studio.
Converting a string to a Secret
If a password or other secret data has already been added as a plain text string property,
it can conveniently been encrypted as a Secret property by selecting it and clicking the
Encrypt string property value button. The type of the property changes
from String to Secret and the value is obscured.

Note
Converting a string to a Secret is only possible if an encryption service is present, which was configured via Spring. If the option is missing, contact your system administrator, who can find information on this topic in Chapter 4, Encryption Service Setup in Deployment Manual.
Changing the link type
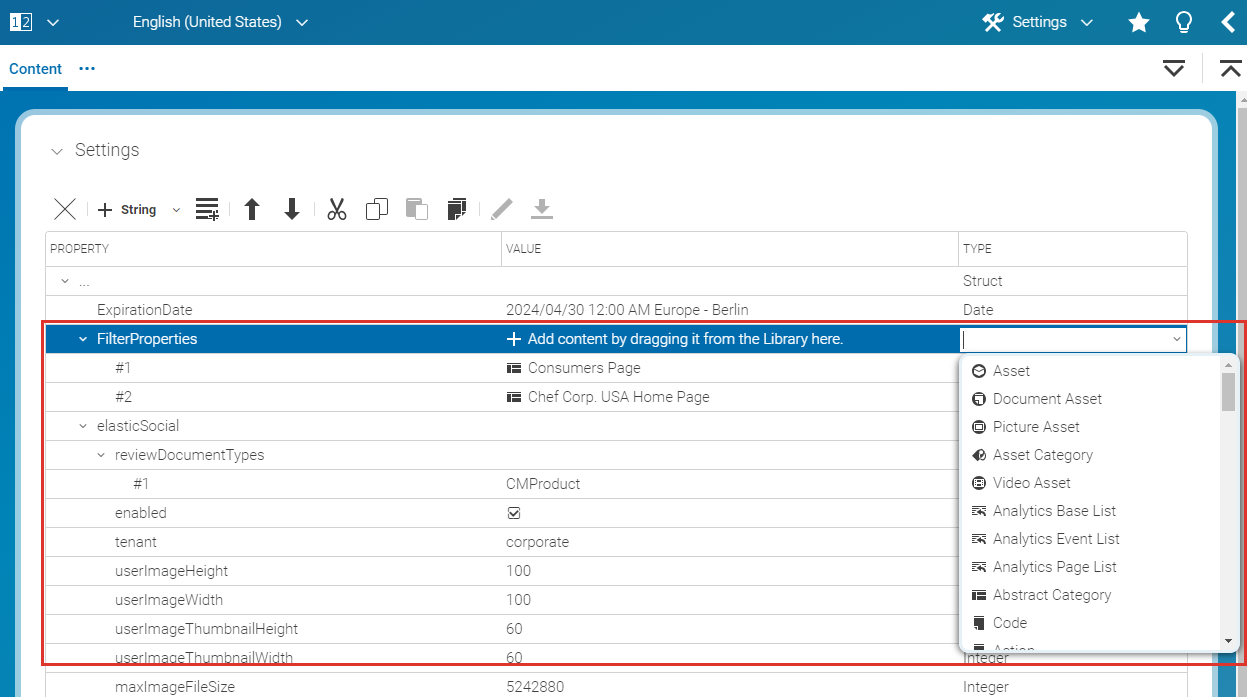
The link type of a Link or LinkList defines which content types you
can drag into the property. When you create a new Link, you can enter all content
items and folders into the property. In order to change the type, click on the dropdown list and
select a content type.
If the Link already contains a link which does not fit to the new type, then the link will be removed.
Cut, Copy and Paste
In order to copy, cut and paste entries, select an entry and use the corresponding icons from the context menu or the toolbar.
When you paste entries, mind the following rules:
When you have selected a Struct and copy an entry, it will be added as the first entry of the Struct. When you have selected an entry in a Struct, then the copied entry will be added behind the selected entry. The name of the copied entry is derived from the name of the copied entry and can be edited.
You can not paste a copied single entry (for example a String) into the corresponding list (here, StringList). Instead, you have to create a new entry in the list and copy the value separately.
Rearrange, duplicate or delete entries
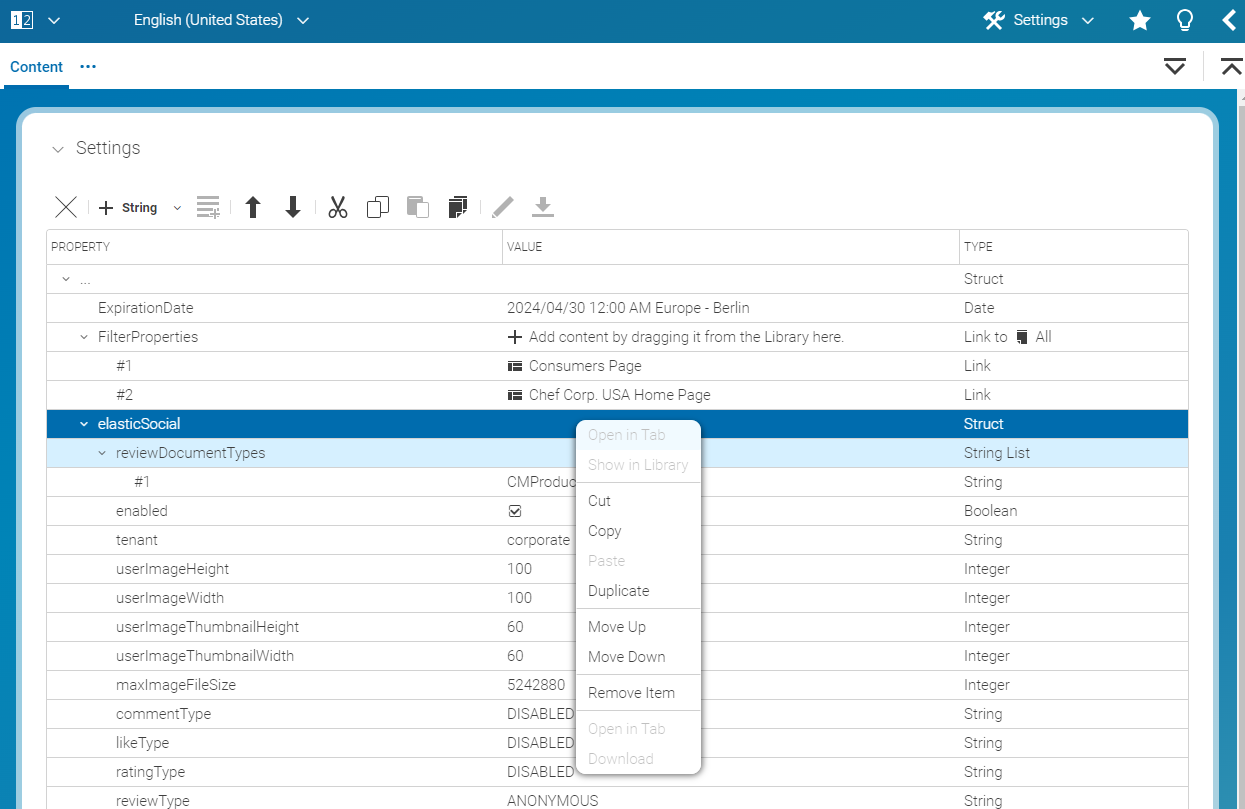
In order to remove, rearrange or duplicate entries select the entry and use the icons of the toolbar or open the context menu with a right-click and select the required option.
With the Remove item icon you remove a property from the Struct editor or a
link from a Link. With the Move up and Move
down icon you can move items up and down. The Duplicate icon
duplicates a complete property and adds it below the one that was duplicated. The
menu item is especially useful when you want to reuse a
Struct property.
Creating new entries
You can add new entries behind an existing entry or inside an existing Struct.
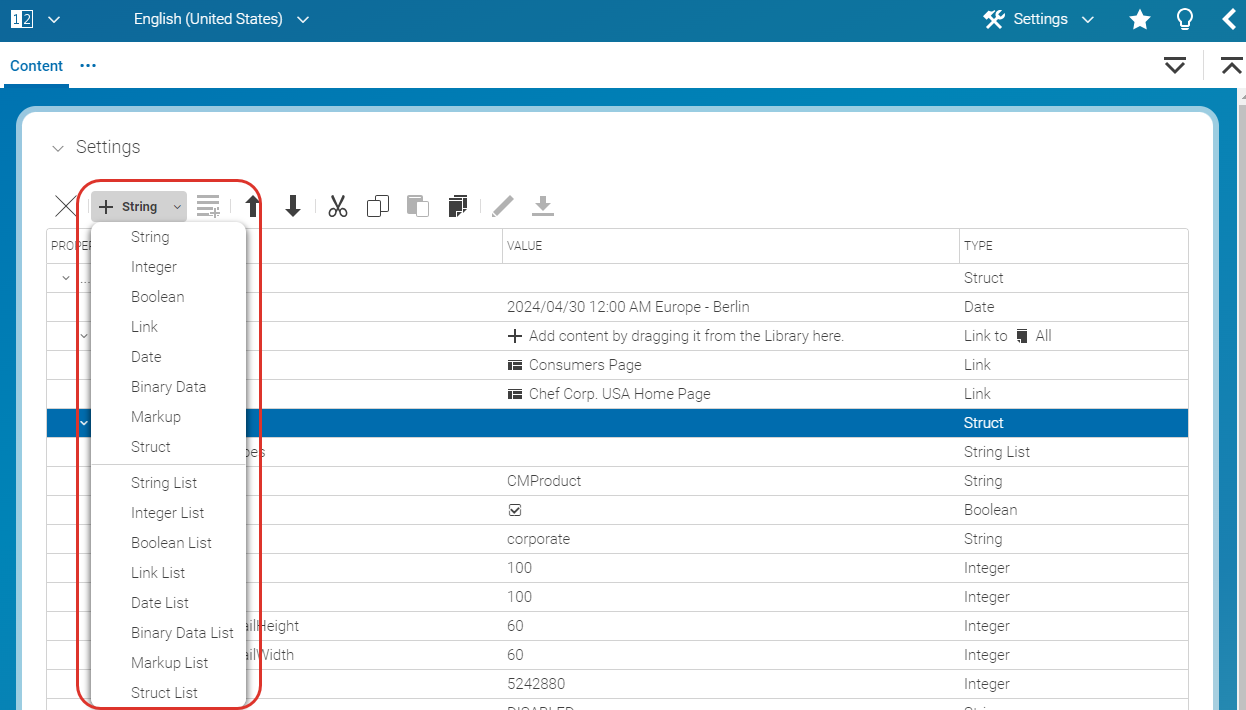
Select the entry to which or after which you want to add a new property and select the required
type from the split button. A new entry is created below the selected entry if it was not a
Struct or otherwise inside the Struct.
Example: Select a Struct and choose from the
split button. This will create a String at the first position inside the
Struct.
Creating new list entries
The different list property types are equally handled except for link properties. In order to
add entries to a List select the List and click the Add item
to List icon. This will create an entry of the required type at the first position of
the List. If you want to add entries behind a specific list element, select the
element and click again the Add item to List icon. List items
have no name but are numbered.
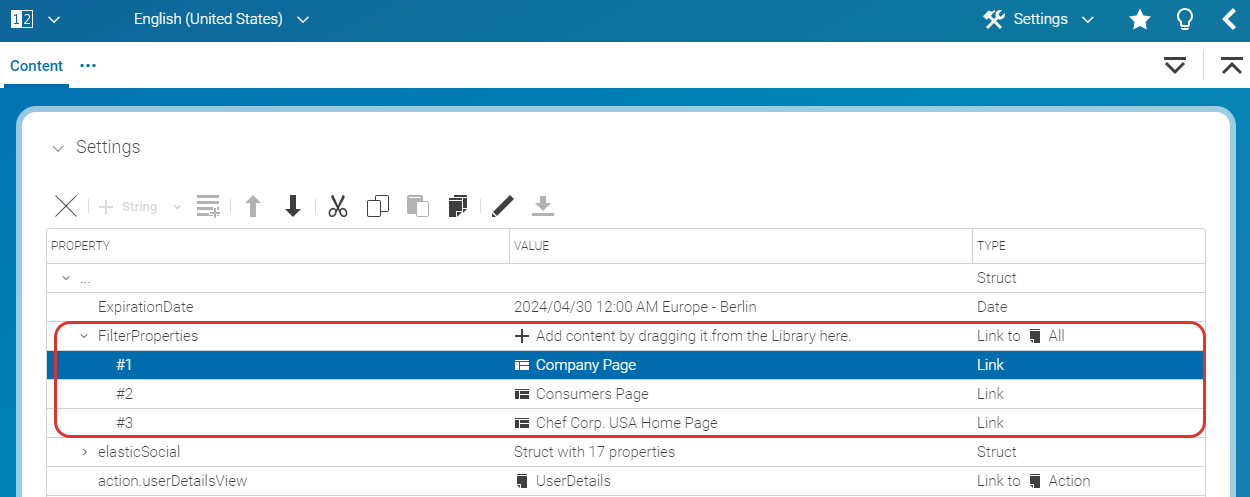
A newly created LinkList looks like a Link (except for the text in the
drop area), but you can drag more than one content item to the drop area. So, in order to create
entries in a LinkList drag one or more content items from the Library onto the drop
field of the LinkList.
Copying complete Struct entry
If you want to copy the content of a Struct property (or any other property), select the Struct property and choose from the context menu. This will add a copy below the selected Struct property.
Encrypting Struct string property values
Struct string properties can be encrypted to secure values and hide them from the human eye. In order to encrypt Struct string property values, an encryption service needs to be configured via Spring. For configuring an encryption service for this feature, consult the Chapter 4, Encryption Service Setup in Deployment Manual.
Upon Spring configuration,
the encrypt value button in the Struct editor toolbar will be enabled for string properties.
Click the button to encrypt the selected string value. Encrypting a string value will change the property type from
String to Secret. Encrypted strings are displayed as ******.
Once encrypted, the string values are not readable by humans anymore.
Services in the background on the other hand, are able to decrypt and use the string values as before.
This feature enhances the security of connection secrets, for example.
It is appropriate for encrypting Content Hub or Feedback Hub connection configuration secrets.
To change an encrypted value, simply edit the Secret property value and enter the new unencrypted value.


