


Studio User Manual / Version 2107
Table Of ContentsCoreMedia Studio comes with different crops for an image. The size, aspect ratio and number of these crops has been defined by your project team while your CoreMedia system was implemented (see Section 4.6.7, “Editing Images”). Of course, these default setting can be changed, you should ask the person in charge for the CoreMedia system for support.
You can change the position and size - but not the ration - of the crops.
| Icon | Name | Description |
|---|---|---|
| Reset all focal points and crops | All selection frames have a common center, are coupled and the size has been maximized. | |
| Reset focal point |
The center of a single selection frame will be moved to the common center. The size of the selection frame will be maximized within the limits of the common cropping area. The selection frame will be coupled with the common selection. | |
| Hide crops | All selection frames will be shown or hidden. The common cropping area will still be shown. | |
| Enlarge |
If the current crop has a different aspect ratio than the original image (which is the common case), it is inevitable that some parts of the image are cut off, no matter how you position the crop frame. By pressing this button, the image is enlarged in such a way that the current crop fits exactly and no image information is lost. If this button is pressed in the overview, the images of all crops are enlarged. |
Table 4.17. Buttons for cropping images
When images are enlarged, the missing parts are filled with white color by default. This should be sufficient in most cases. However, you can define your own color.
Defining the background color
In order to change the background color used for the empty space of an image fitted to a crop, proceed as follows:
Open the System tab of the image and there the Local Settings field.
Add a String property named background to the Struct property coloring. If the property coloring does not exist, create it.
Add the background color as four hexadecimal byte values, for example FF00FF00, to the background property. The first byte denotes the transparency (alpha channel) while the remaining three specify the red, green and blue color values, respectively

Note
A transparency value of
FFis opaque, while00is totally transparent. Please note that any transparency value different fromFFwill cause the resulting image format to be changed to PNG. This might be undesirable if the original image is a highly compressed JPEG.
Defining the common focus point
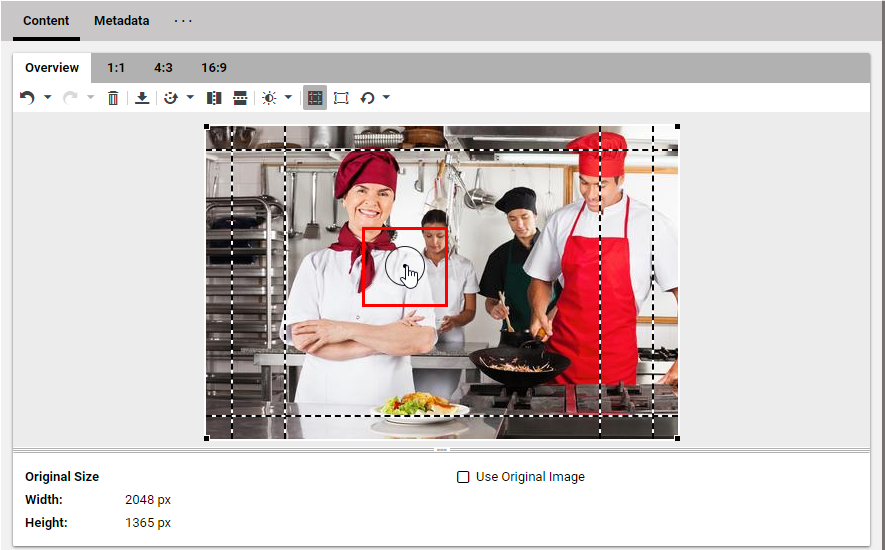
By default, all crops are centered around the center of the common selection area. However, you can move the focus point and Studio tries to center all selection frames around the focus point. The size of the selection frames does not change. Therefore, the selection frames will mostly not exactly center around the new focus point.
When you move or resize the common selection frame, then the focus point stays at its position until the common selection frame touches the focus point. When you proceed, the focus point follows the movement of the common selection frame.
In order to change the focus point simply move the focus icon to the new position as shown in Figure 4.67, “ Move focus point ”.
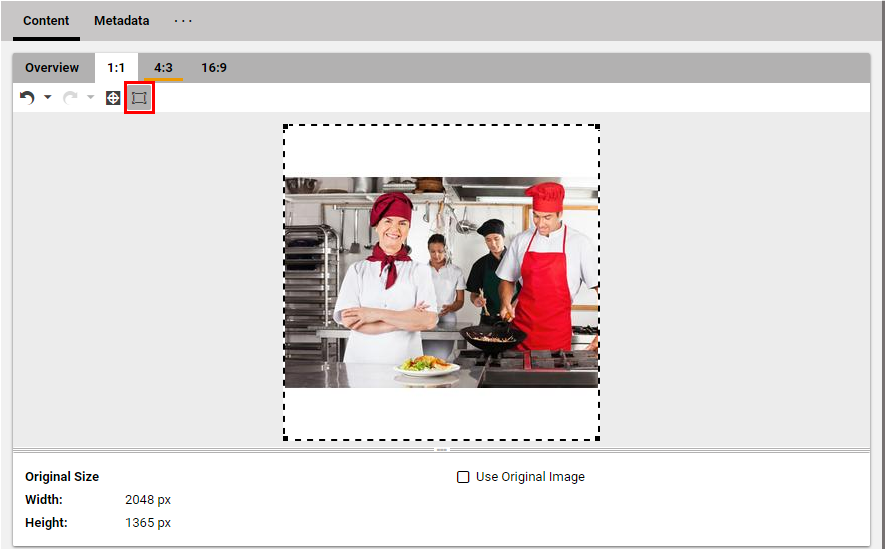
Defining the position of a crop
It makes no difference if you want to define a single crop or all crops at once. Therefore, there will be no separate description below. You can immediately see all changes in the preview.
Click the highlighted selection area and keep the button pressed.
Move the selection area to the required position.
Defining the size of a crop
Click one of the black handles and keep the button pressed.
Drag the mouse in the convenient direction to change the size.
While you change the size, the aspect ratio will be preserved. Once you fall below the minimum size, the frame turns red.
Selecting a frame
If you want to edit a frame separately, you have to select it. To do so, you have three alternatives:
Click the frame.
or
Select the respective tab.
or
Choose the respective frame in the preview.
Right click on that image in the preview.
The selection frame is now shown without the other frames. Only the square icon indicates the center of the common cropping area.
Decoupling frames
Select the frame.
Change the position of the center or resize the frame.
Coupling frames
You can either couple all frames again or couple a single frame to the common selection.
Coupling all frames
In order to couple all frames and to restore the maximum size of the common cropping area, proceed as follows:
Select the Overview tab.
Click the Reset All Focal Points and Crops button in the Reset to Initial State menu.
Coupling one frame
In order to couple one specific frame with the common selection and to adapt its size to the size of the common selection, proceed as follows:
Select the frame.
Click the [Reset focal point] button.
Hiding selection frames
In order to improve the overview, for example, you can hide all selection frames in the Overview tab.
Click the Hide Crops button.
Only the common cropping area is shown.
