


Personalization Hub Manual / Version 2310
Table Of Contents
Test contexts allow you to test your personalized web pages by viewing them with different user-context data in
a preview CAE. You create a test context as a content of type
CMUserProfile in CoreMedia Studio. Within the
CAE, test contexts are created by an instance of TestContextSource.
By convention, test contexts are located in the /System/personalization/profiles folder of the
CoreMedia repository. A content item with name 'DEFAULT' in this folder will be used as the preselected test context
for each newly created tab in CoreMedia Studio.
The default settings of a TestContextSource assume that they are of content type
CMUserProfile and contain a blob property with MIME type text/plain containing the
context-property definitions using the syntax of a Java property file. These properties are parsed into one or
more context objects that implement the PropertyProvider interface.
Setting Up a TestContextSource Instance
The TestContextSource requires an instance of CapConnection to be able to retrieve the
test contexts from CoreMedia CMS. In addition, the name of the expected
content type can be set. By default, it is assumed that test contexts are defined in content items of type
CMUserProfile.
Typically, you may want to set up a separate ContextCollector instance based on test contexts. To
this end, add the TestContextSource instance to that ContextCollector bean and switch
the collector instances before processing a request. The PreviewPersonalizationHandlerInterceptor
switches context collectors dependent on a request parameter indicating that test context sources are to be
used. See Section 3.3.2, “Working With the User's Context” for details on how the ContextCollector
works.
Adapting a TestContextSource to Project-Specific Requirements
A TestContextSource retrieves a test-context content item from the CMS and applies
TestContextExtractors to the content. The responsibility of a TestContextExtractor is
to create test contexts from the values of content properties and add them to the supplied
ContextCollection instance. By default, TestContextSource applies the
PropertiesTestContextExtractor, which creates test contexts given a plaintext blob containing
Java-style property declarations.
public interface TestContextExtractor {
  void extractTestContextsFromContent(final Content content,
                         final ContextCollection contextCollection);
}
You can set the extractors to be applied using the ContextExtractors property of the source. This
allows you to use new properties or properties with differently structured values to define your test contexts
without reimplementing the functionality of TestContextSource. For example, to use another property
in your test-context content item, follow the following steps:
Add the property to the content type definition of
CMUserProfile.Implement a new
TestContextExtractorthat knows how to create test contexts from the value of your new property.Set the list of extractors to be used by the
TestContextSourcein your CAE to contain the defaultPropertiesTestContextExtractoras well as your own extractor.
You can also change the name of the test-context content type by setting the TestContextDocType
property of TestContextSource.
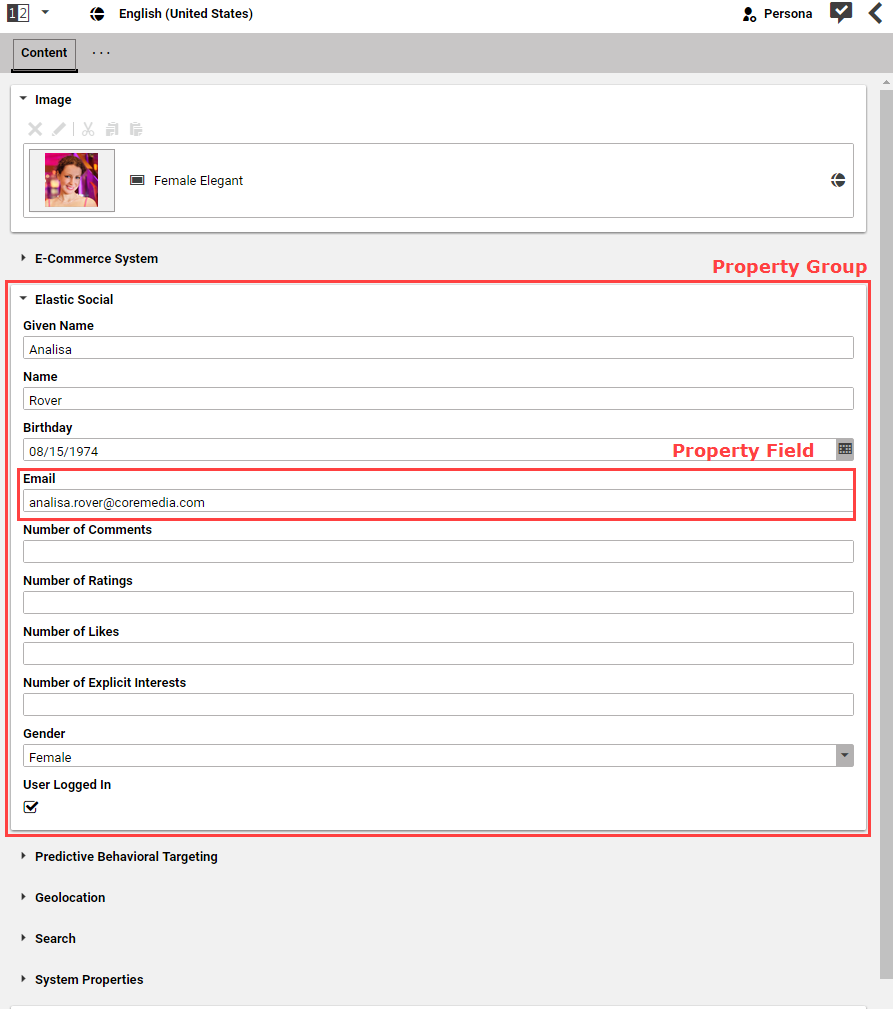
Customizing the Customer Persona Form
In order to customize the rendering of a CMUserProfile via the Customer Persona Form component, you need to
understand the underlying basic architecture: The UI component consists of property containers
(PersonaGroupContainer, for example) that hold one or more property fields
(PersonaStringProperty, for example). You can configure each of the existing implementations or add
your own. To change the appearance of property fields and containers have a look at
Section 3.2.3, “Configuring The Customer Persona Form”.
Adding your own property field
You can define your own property field in addition to the already existing ones, such as the
PersonaNumberPropertyField. Your new field needs to contain three major parts:
It needs to get the context data
It needs to access the
propertyContextandpropertyNameIt needs to bind the entered data to the context property
Get the context data
The user context data is actually a text blob which is interpreted as a properties object. The blob information
is stored in a ValueExpression accessed via the bindTo property of the content item's
backing config object (see the Studio Developer Manual for
details). This ValueExpression is "forwarded" to the child components of the
CMUserProfile content. Each child component can access and listen to changes of its given
(sub)property. Furthermore, each child component needs to implement the forwarding mechanism as well. You do
this by adding a default attribute to your component which is responsible for telling every item to get the
corresponding ValueExpression.
Access propertyContext and propertyName
If you write your own property field, you need to specify the name and the context of the property you want to
add. Therefore, you need to configure two attributes to accept the forwarded propertyContext and
propertyName. This could be done by adding the following snippet underneath your imports:
<fx:Declarations>
  <!---
    The context of the Bean-property to bind in this field.
  -->
  <fx:String id="propertyContext"/>

  <!---
    The property of the Bean to bind in this field.
  -->
  <fx:String id="propertyName"/>
</fx:Declarations>
Bind your field to the property
By configuring these attributes, you are able to access your property by setting these values to your
propertyBinding inside your property field. Examples are given in the p13n-studio
module of the CoreMedia Blueprint development workspace.
