Studio User Manual / Version 2412.0
Table Of Contents
CoreMedia Blueprint Feature
You can limit the time at which a published content should be visible to the customer. To this end, there are two properties with a slightly different meaning.
The validity, which defines the period in which a content is allowed to be shown. For example, when you have a time limited license for an image or text. Most of the content items have in the Content tab a field Validity with the Valid From and Valid To properties.
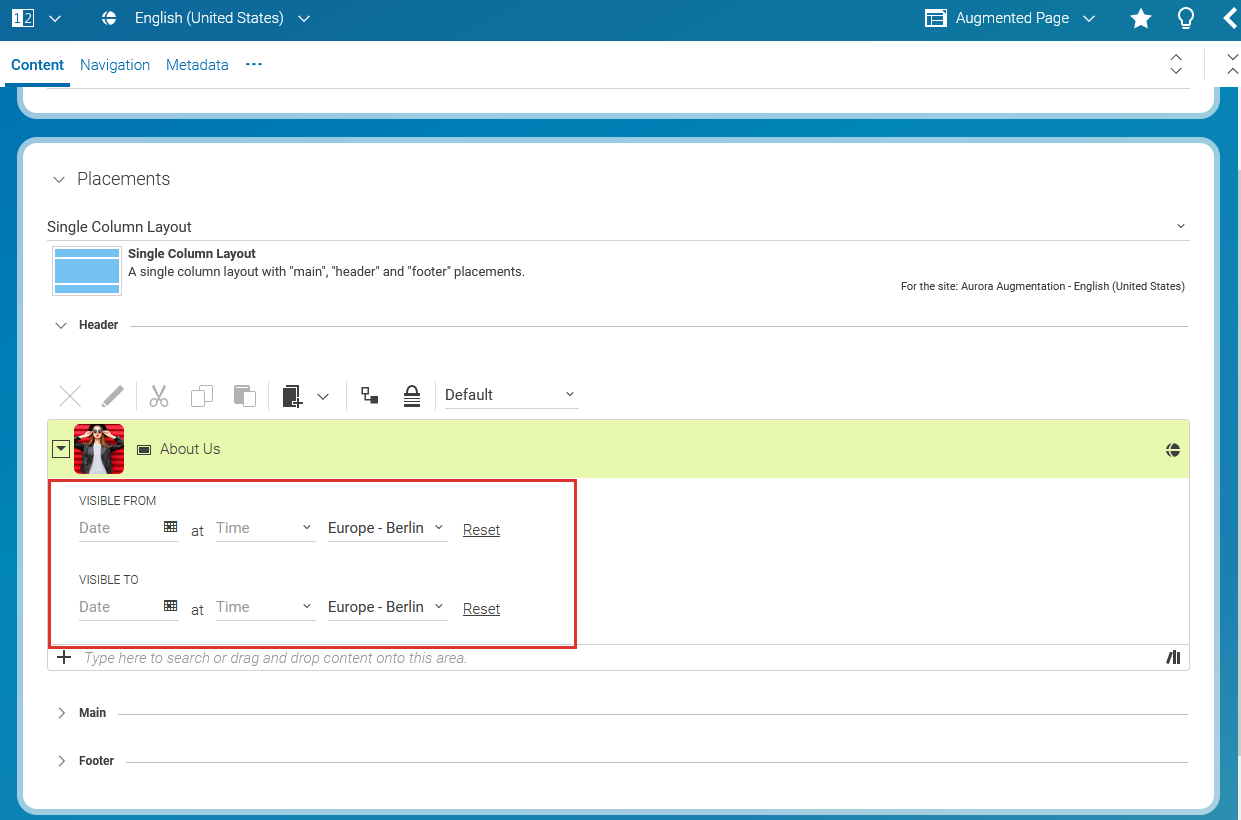
The visibility, which defines the period in which a content should be shown to the customer at a specific position of the website. For example, during a spring campaign. You can select Visible From and Visible To for content in link lists of placements. For example for pages.

Note
The validity is the leading setting. That means, when the visibility starts before or ends after the corresponding validity dates, then the start or end date of the visibility will be restrained to the validity setting.
Validity
Enter the start time from which the content item should be visible into the Valid From properties and the end time into the Valid To properties. You can check your settings in the preview and publish the content item as shown below.
When you use the content in a link list, you will see a small icon, which indicates the validity status. (1) means that the content was valid in the past, (2) means that it will be valid in the future, no icon means that the content is currently valid. Hover over the icon to get more information.
Visibility
Enter the start time from which the content item should be visible into the Visible From properties and the end time into the Visible To properties.
You can check your settings in the preview and publish the content item as shown below.
Check validity and visibility in preview
Check the time settings
You can check your content item with time dependent settings in the Preview. Proceed as follows:
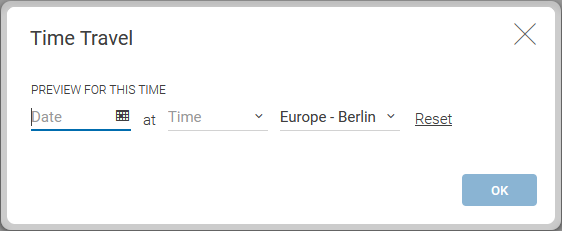
Open the content item in the Form and click the [Show preview for a specific time] icon. A dialog opens.
Enter the time, date and timezone for which you want to check your settings into the dialog. You will immediately see the result of the setting in the preview.
When you are satisfied with your result, click [Reset] and close the dialog.


