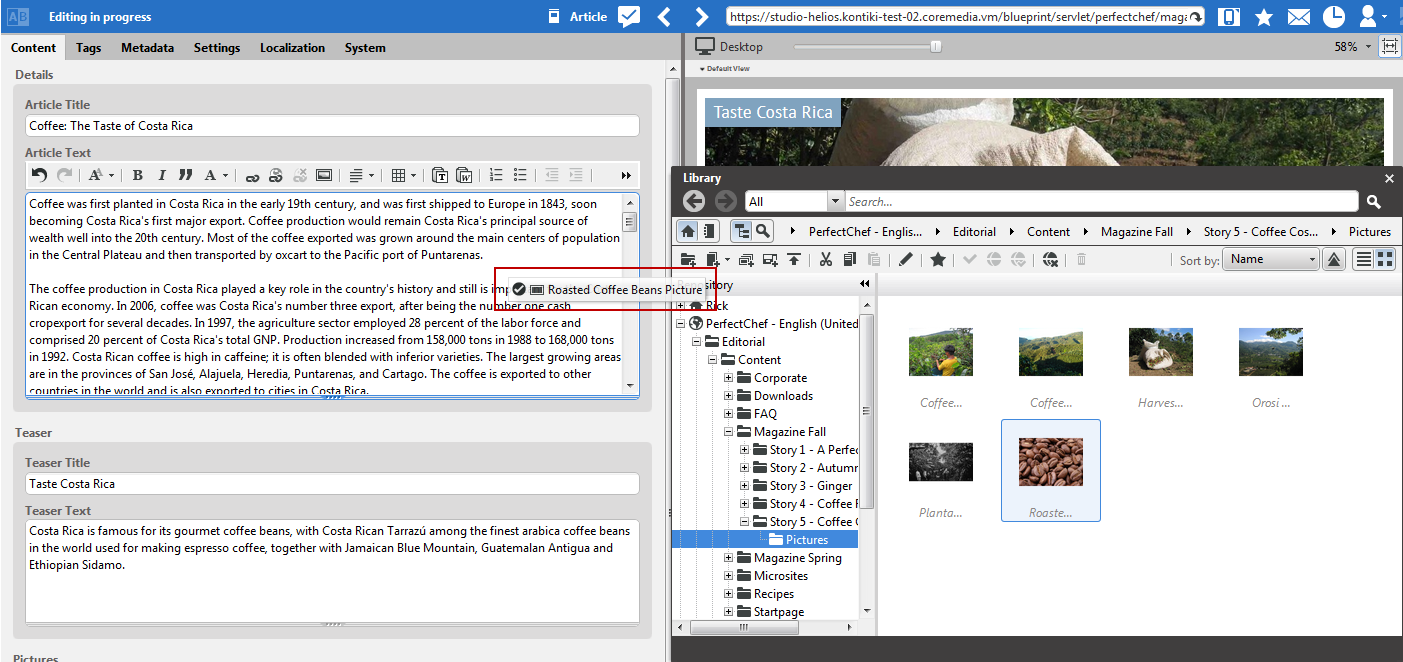
When CoreMedia Studio is accordingly configured, you can drag and drop images from the library into a formatted text field and edit the images. In the CoreMedia Blueprint configuration of CoreMedia Studio for example, you can drag images that you have found with the Images search into the Article Text field of an Article content item.
Inserting image
Position the cursor at the position where you want to insert the image.
Find the image in the Library.
Drag the image with pressed left mouse button over the formatted text field
Release the mouse button.
The image appears in the text field.
Deleting image
You can delete an image like an ordinary text character.
Editing image
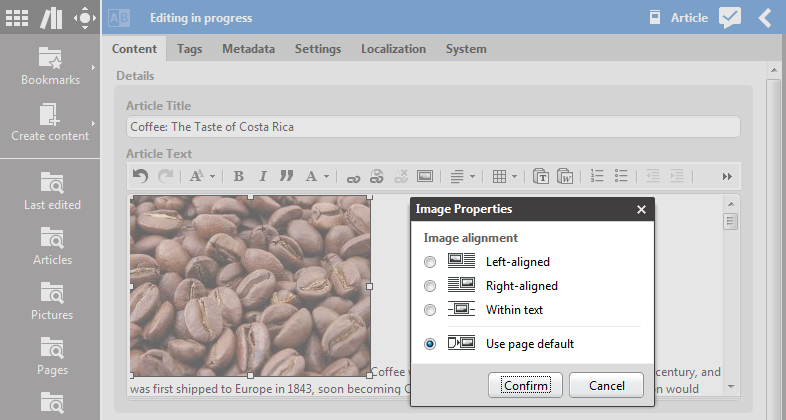
You can edit the position of the image in a formatted text field. Call the corresponding window with the Image Properties Icon. You have the following options in the window:
Left-aligned
Right-aligned
Within text
Use paged default
Position the image as follows:
Click the image in the formatted text field.
Right click the image and select from the context menu or click the Image Properties Icon. The Image Properties dialog opens up.
Select the appropriate position and click [Confirm] .
The image will be accordingly positioned in the text field. How the image is shown in the preview, depends on your system configuration.


