The Library gives you several options a to find the content items you are looking for:
Full-text search of all content items in the CMS and the e-Commerce catalog.
Full-text search of specific content types
Full-text search below a specific folder
Filtering results by status and the content item's last editor, for example.
Navigating using the tree view
Finding content in the trash
Sorting content in columns
Hiding columns
Hiding columns
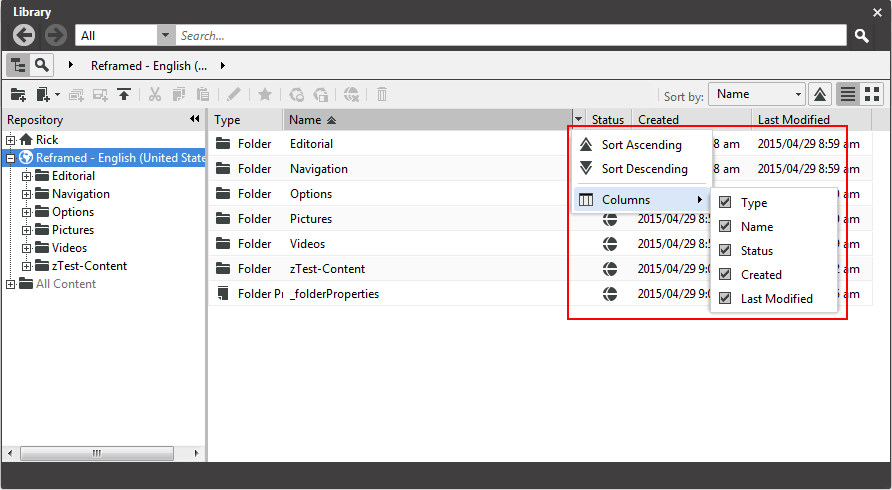
In order to get a better overview, you can hide columns from the content lists in the Library.
To do so, hover over a column head. An arrow appears at the right side of the head. Click the arrow and a menu opens up. Select and uncheck the columns you want to hide.
Sorting by column
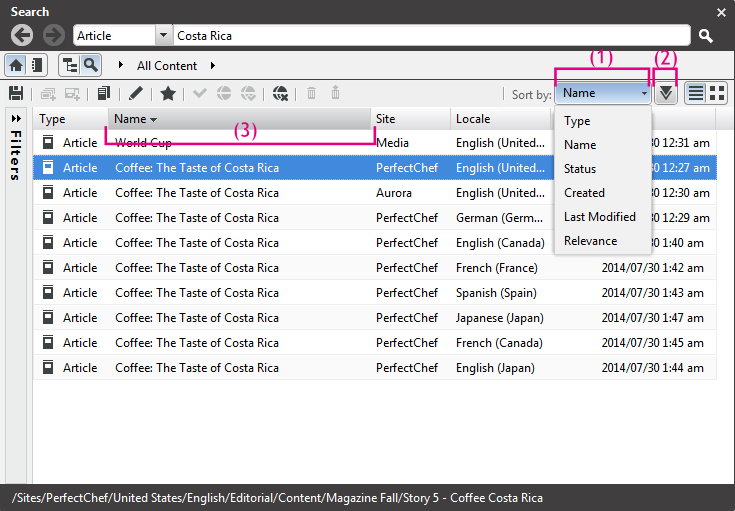
You can sort your lists in the Library or change the order by either clicking a table header (3) or by selecting a search criterion from the dropdown box (1) and clicking the icon (2). Keep in mind, that not all columns are sortable and that, by a search, the dropdown box contains criterions that have no corresponding table column (for example, "Relevance").
Full-text search
To make a full-text search, proceed as follows:
Select the CMS view or the e-Commerce catalog view in (4).
If you only want to search for specific content types, use the dropdown box (1) to select the content type.
If you want to search below a specific folder, select the folder with the breadcrumb navigation (4).
Enter your search term in the search box (2). You can also enter multiple terms: the system then searches for text items containing both terms ("AND" matching). The search engine automatically shows suitable extensions to your search term beneath the search box. The figure in brackets shows the number of content items found for this search term (3).
You can then proceed to filter the search terms by Status and Last edited by for example, as described in the next section. Filtering does not apply to content from e-Commerce.
To start the search click the magnifier icon or simply press the <Return> key.
The search terms are now displayed in the list or tile view. In the list view you will get
the type and status of a content item as additional information, for instance CMArticle
and "Published". In the thumbnail view you will get a small preview image, if applicable.
Filtering the results
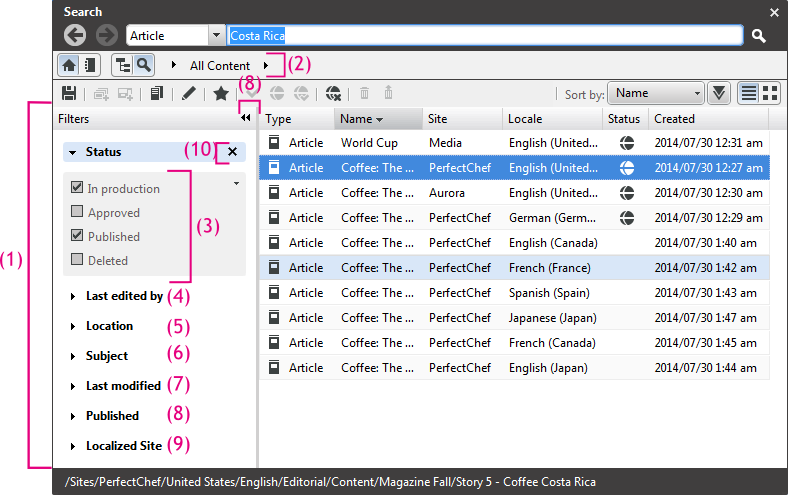
Open the filter panel with the arrows (3). In the filter panel (1) and the breadcrumb navigation (2), you can filter the displayed results by the several criteria. Moduels of CoreMedia DXP 8 might introduce additional filters, which are not described here. Keep in mind that filtering can only be applied to CMS content.
The folder (2)
The editing state (4)
The last editor (5)
Location keywords (6)
Subject keywords (7)
The last modification date (8)
The last publication date (9)
The site (10)
The translation state (11)
Select the folder in which you want to search with the breadcrumb navigation.
Mark your chosen status in the filter box. With In production, you can also choose whether the content item is currently being edited by you, by somebody else or by nobody.
With Deleted you can search content items that have been deleted. Deleted content stores its last folder location, so you can search for deleted content items below the folder where they once were located. In reverse, that means that you will not find content that was located in other folders, when you select a specific search folder in the breadcrumb navigation.
Then choose the "Last editor", if required.
Then choose the "Last modified" date, if required.
Then choose specific location or subject keywords.
Then choose the "Published" date to determine, when the content has been published.
Then choose the site in which you want to search, if required.
Then choose the translation state, if you want to search for documents that have or have not been translated in a given derived site.
You can select the derived site. Contents from the master site will be displayed in the search result. Keep in mind that the folder selected in the breadcrumb, if any, must also be chosen from the master site to see any results. Mark your chosen translation status in the status boxes, for example restricting the search to new content that has not been translated yet.
The filtered content items are now displayed. Blue highlighting is used to show whether the filter is different to the default setting. You can use the "x" icon (12) to restore the default setting.
Using the library mode to navigate
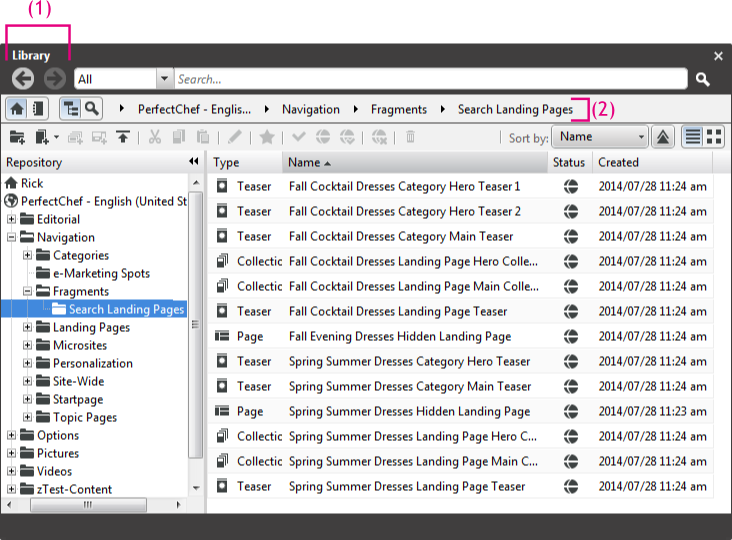
The tree panel in the library mode displays all the CMS content that matches your permissions. Navigating in the view is similar to Windows Explorer. You can use the arrows (1) to browse in the navigation history. You can also use the breadcrumb navigation to navigate through the folders. The content type selected in the search and navigation bar has no effect while navigating in library mode.
![[Note]](../common/images/note.png) | Note |
|---|---|
If a folder name is prefixed with an "+" icon, this usually indicates that the folder has subfolders. However, note that the system initially shows all folder names prefixed with an "+" icon, to save time. A check for subfolders is made only when the folder is opened. |


