Solution Overview for Business Users / Version 2506.0
Table Of ContentsCollecting Content from a Project
Before you can start to create a campaign, you have to collect the content you want to use into a project as described in Using Projects.
Keep in mind that for campaigns, a project is simply used as a container to collect all content needed for the campaign. All other features of a project have no impact on your campaign.

Note
Don't have all the content items in place at the point in time when you're creating the campaign? No problem. You can easily add content to the project at any time.
There are two ways to open the Campaign App:
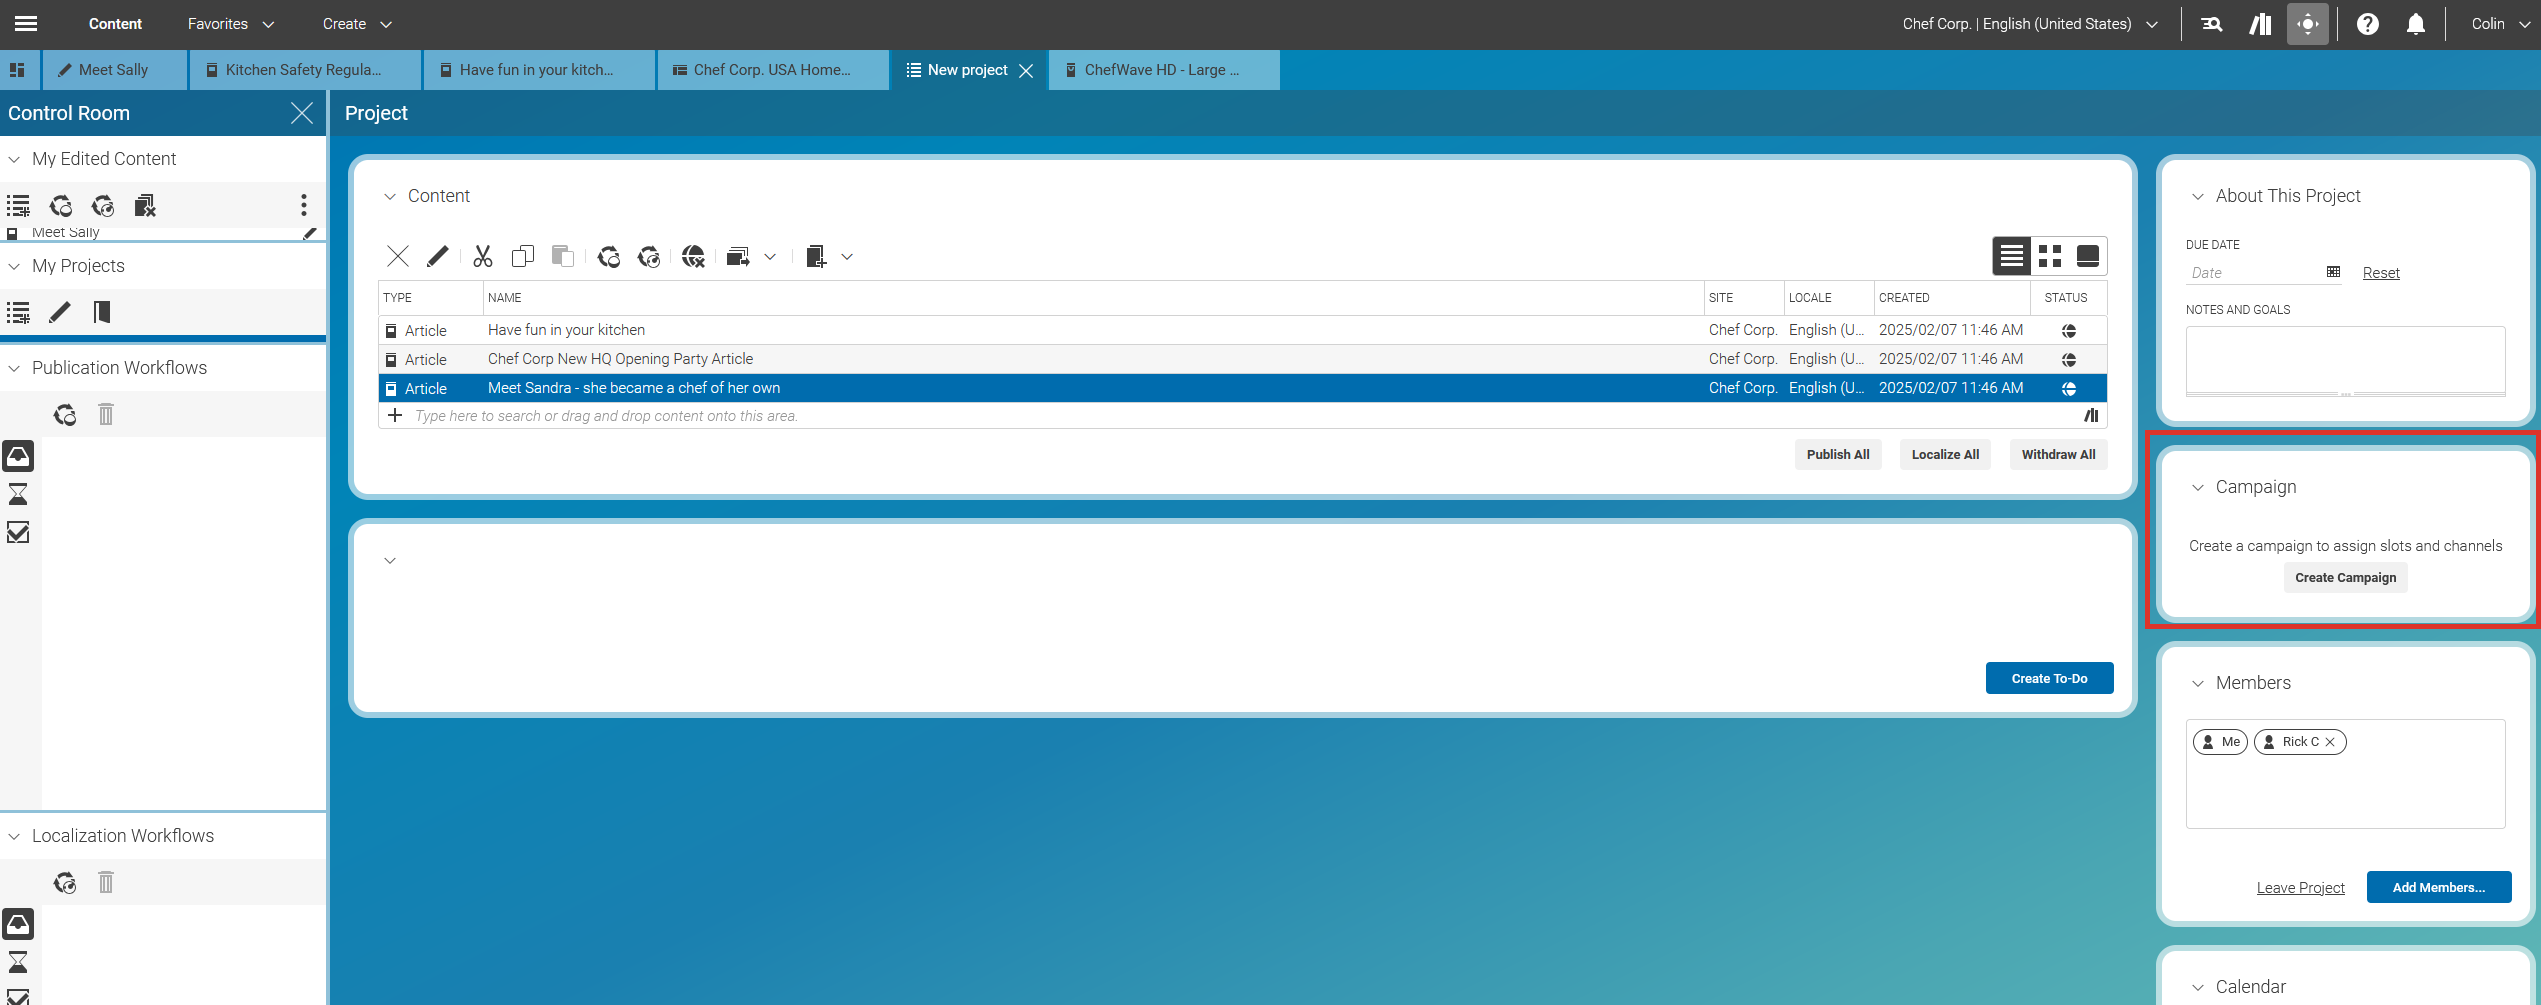
Click the Create Campaign button in the Project window:
Note
The button 'Create Campaign' will be replaced by 'Open in Campaign App' as soon as the campaign is created.
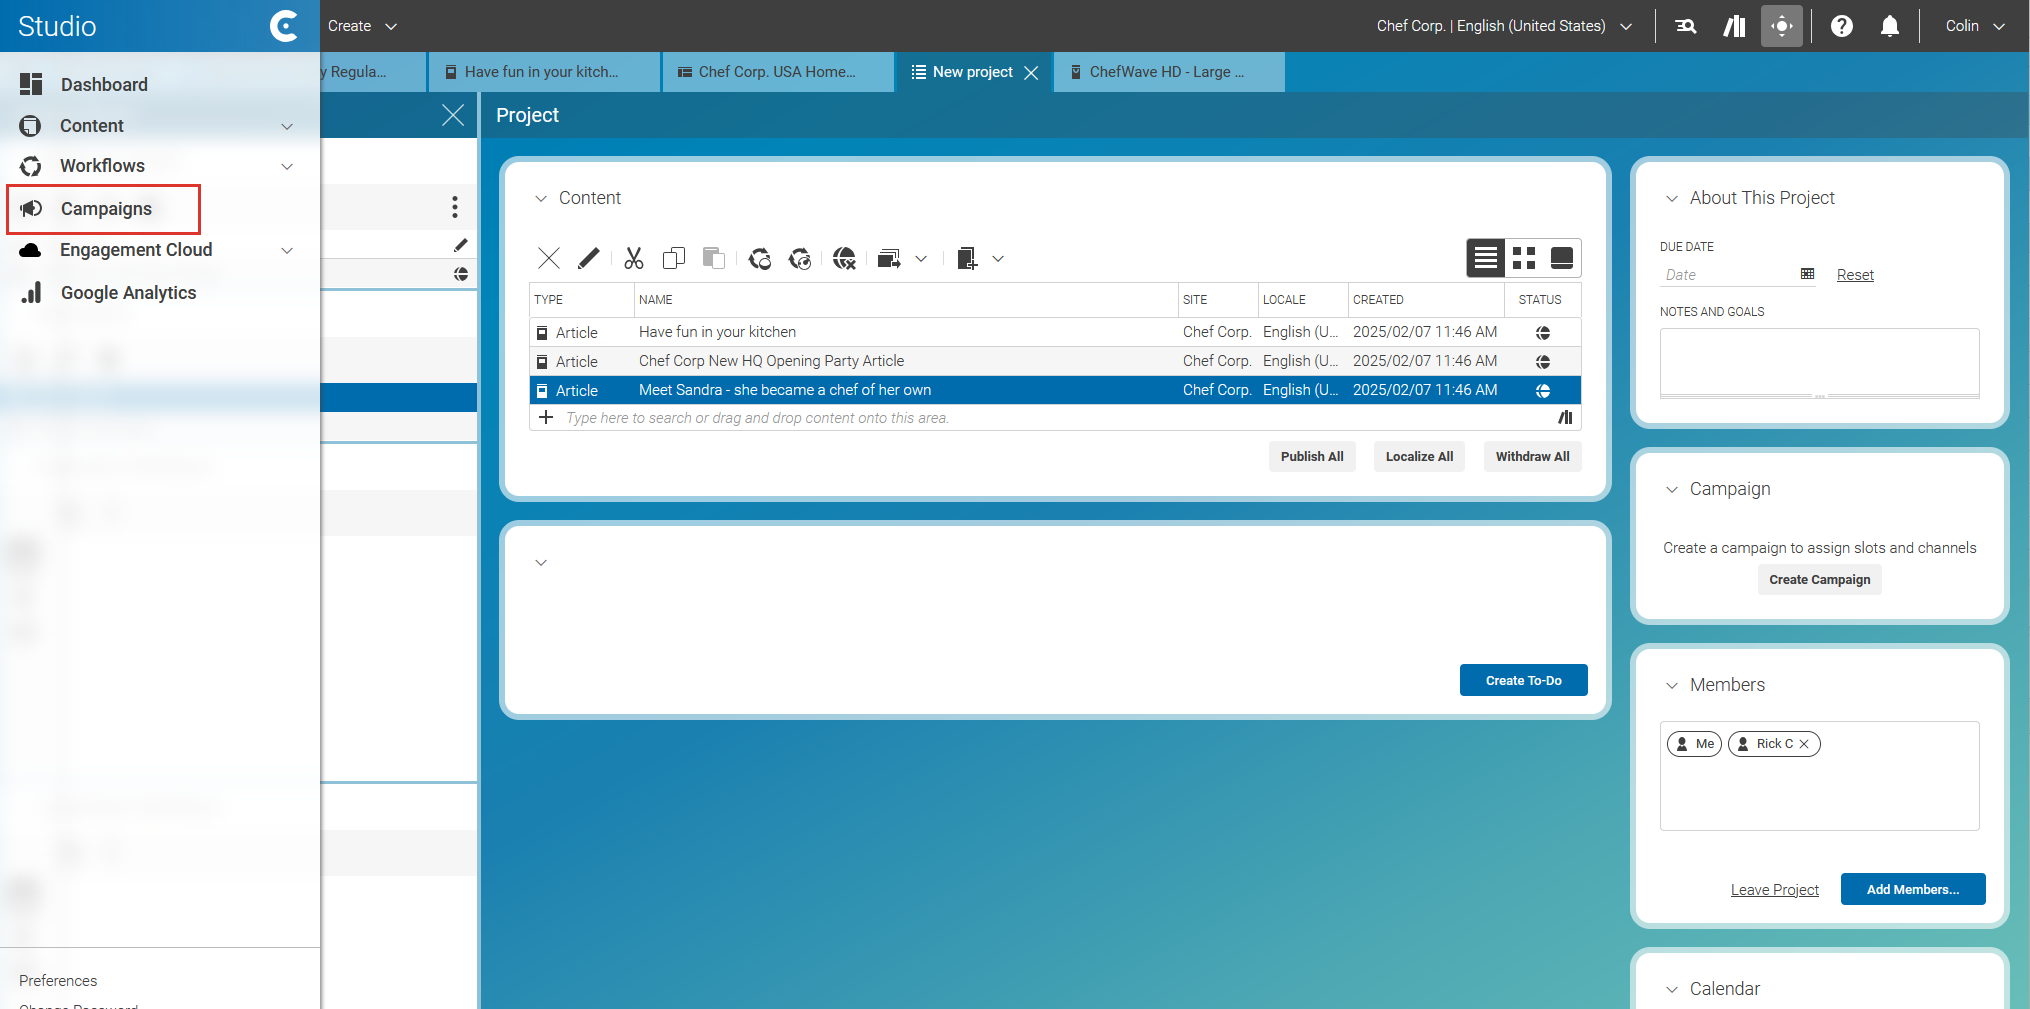
Click the Campaigns menu item in the main menu of CoreMedia Studio:
Once you have opened CoreMedia Campaigns for the first time, you can simply switch between the Content App and Campaigns App by selecting the appropriate tab in your browser.
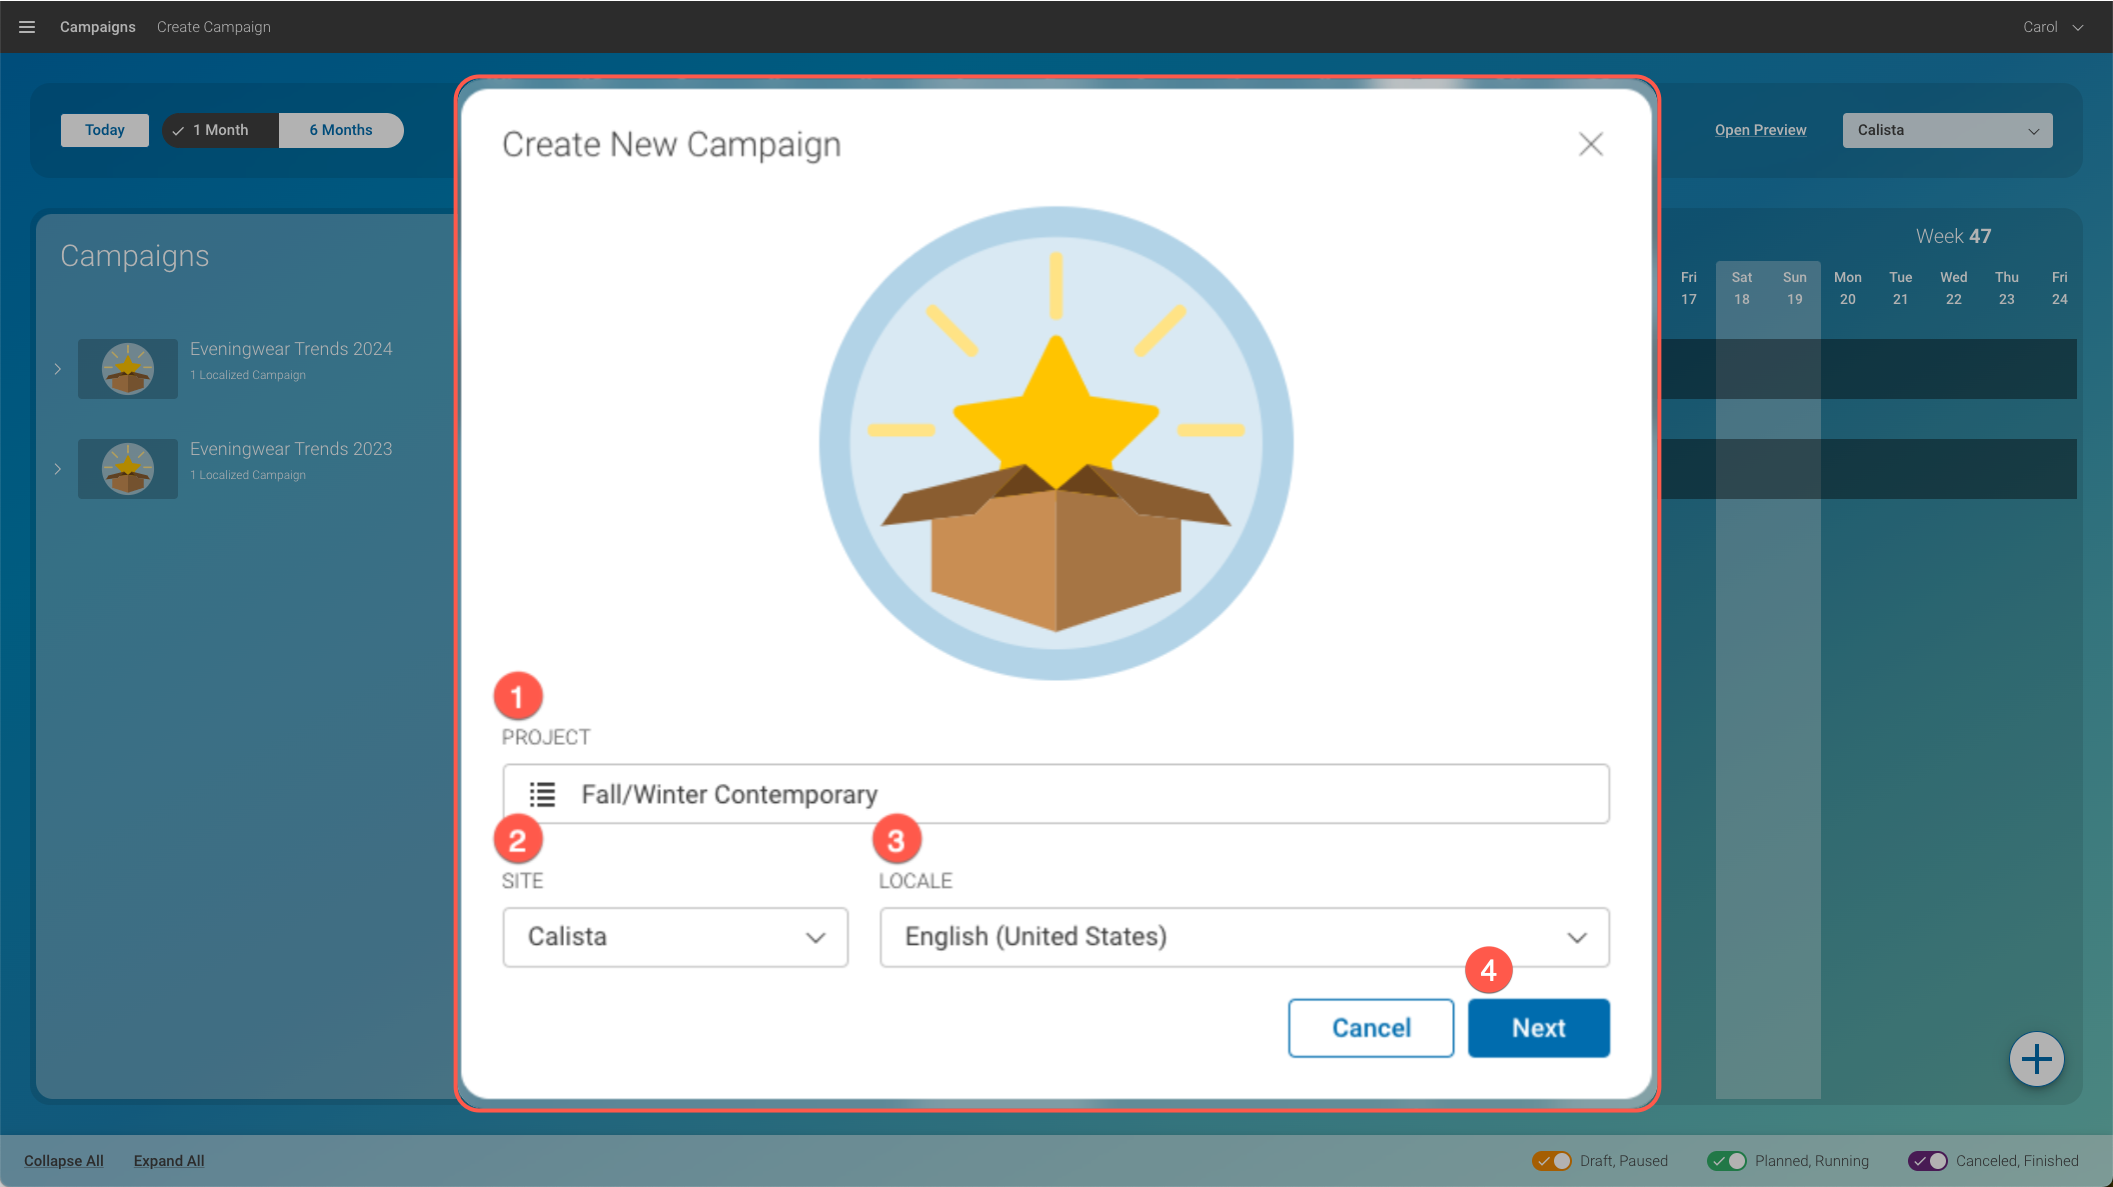
Open Create New Campaign Dialog
When you switch to Campaigns from the project, you will see the main view and the Create New Campaign dialog is already opened.
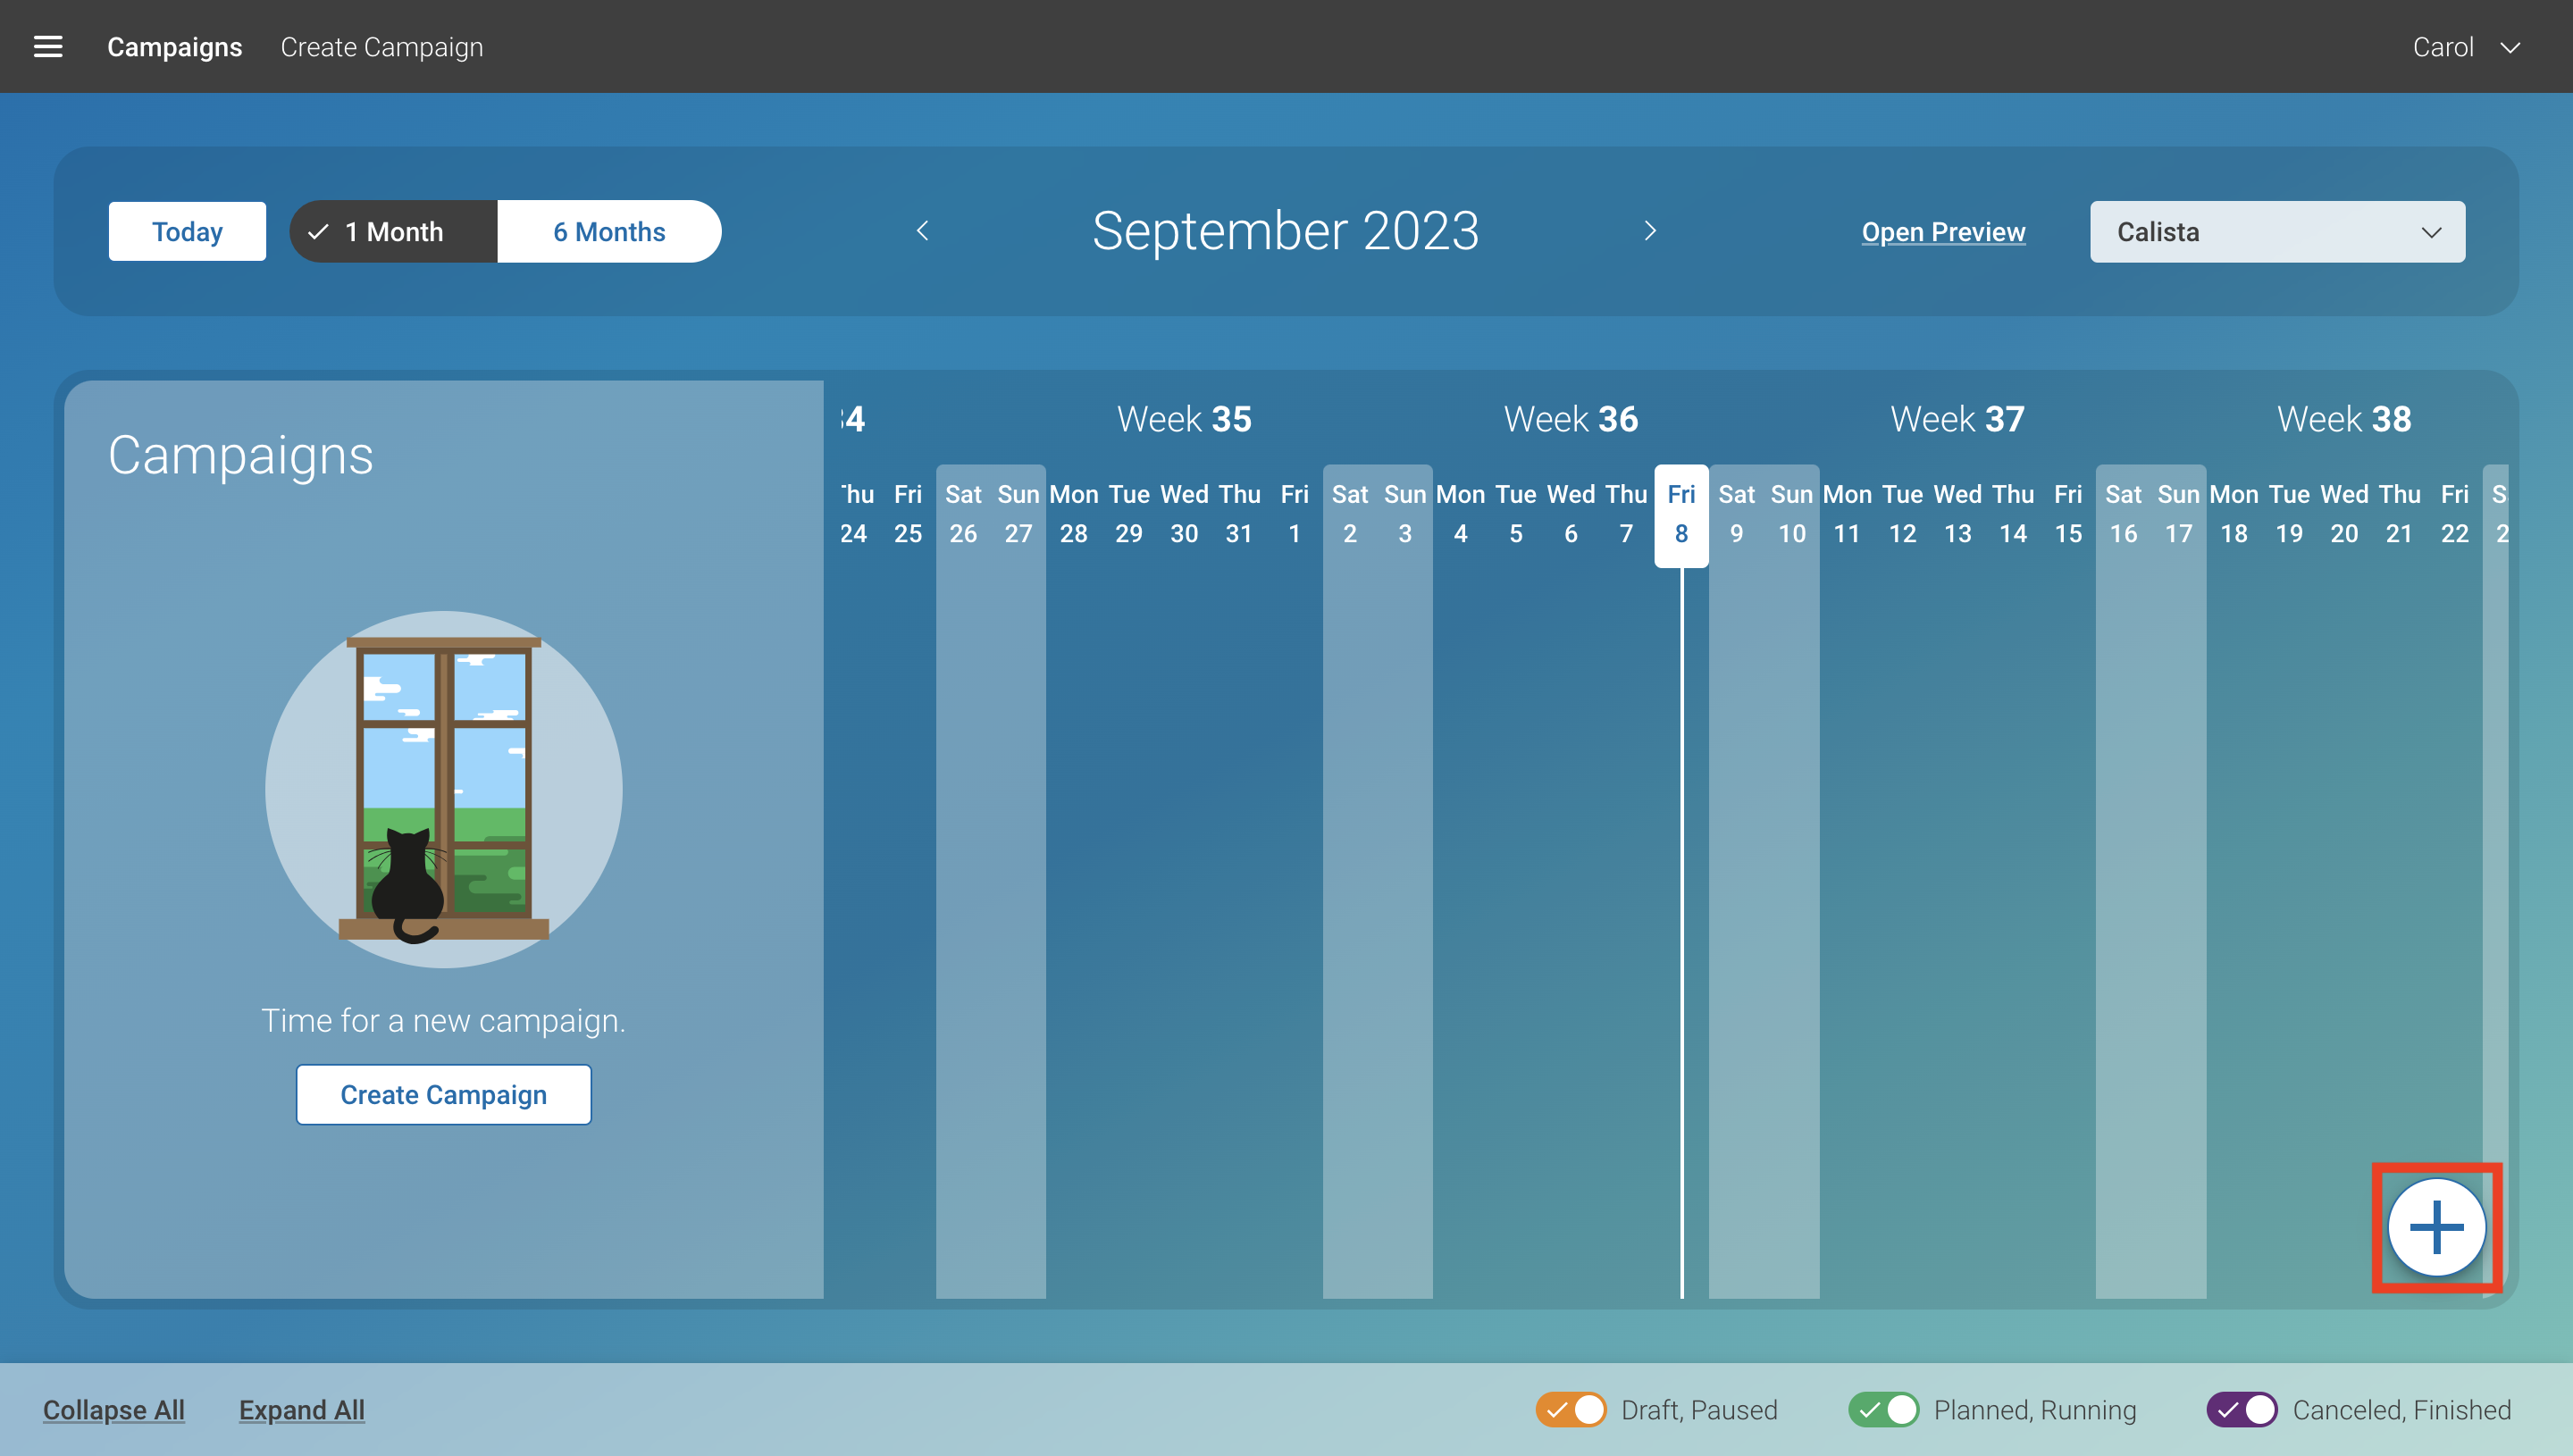
If this is not the case, you can always click the + button to open the Template Chooser.
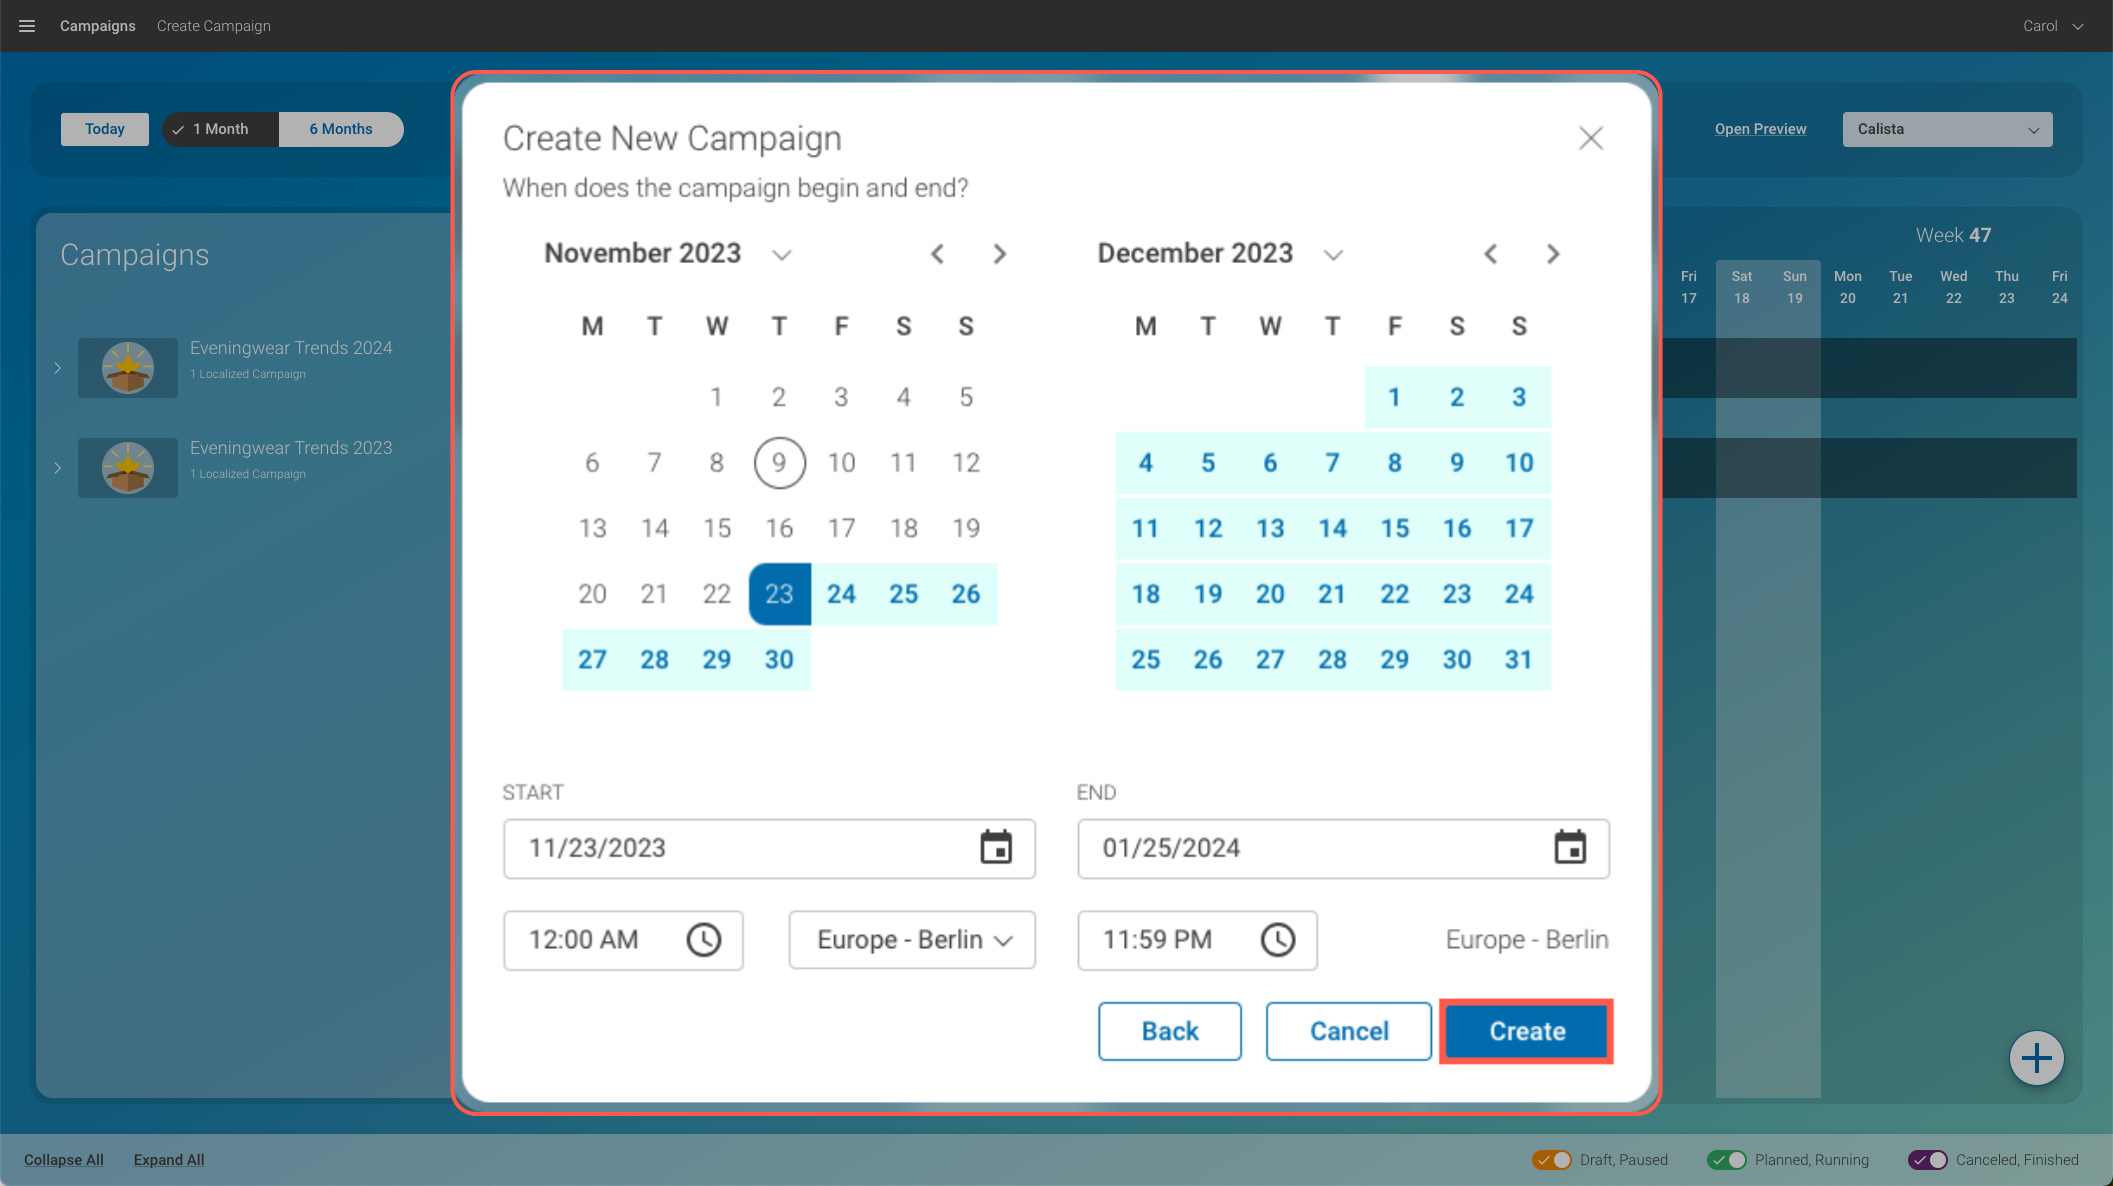
Now you can start to define the main data of your campaign.
Select the project from which you want to take your content. The field is prefilled with your current projects.
Select the site in which you want to run the campaign. The field is prefilled with your preferred site.
Select the locale for which you want to create the campaign.
Enter the start date and end date of your campaign. Click Create to create the Campaign.
Assign Content to the Campaign Slots
Now, you can define the content to be shown in the slots of the different channels.
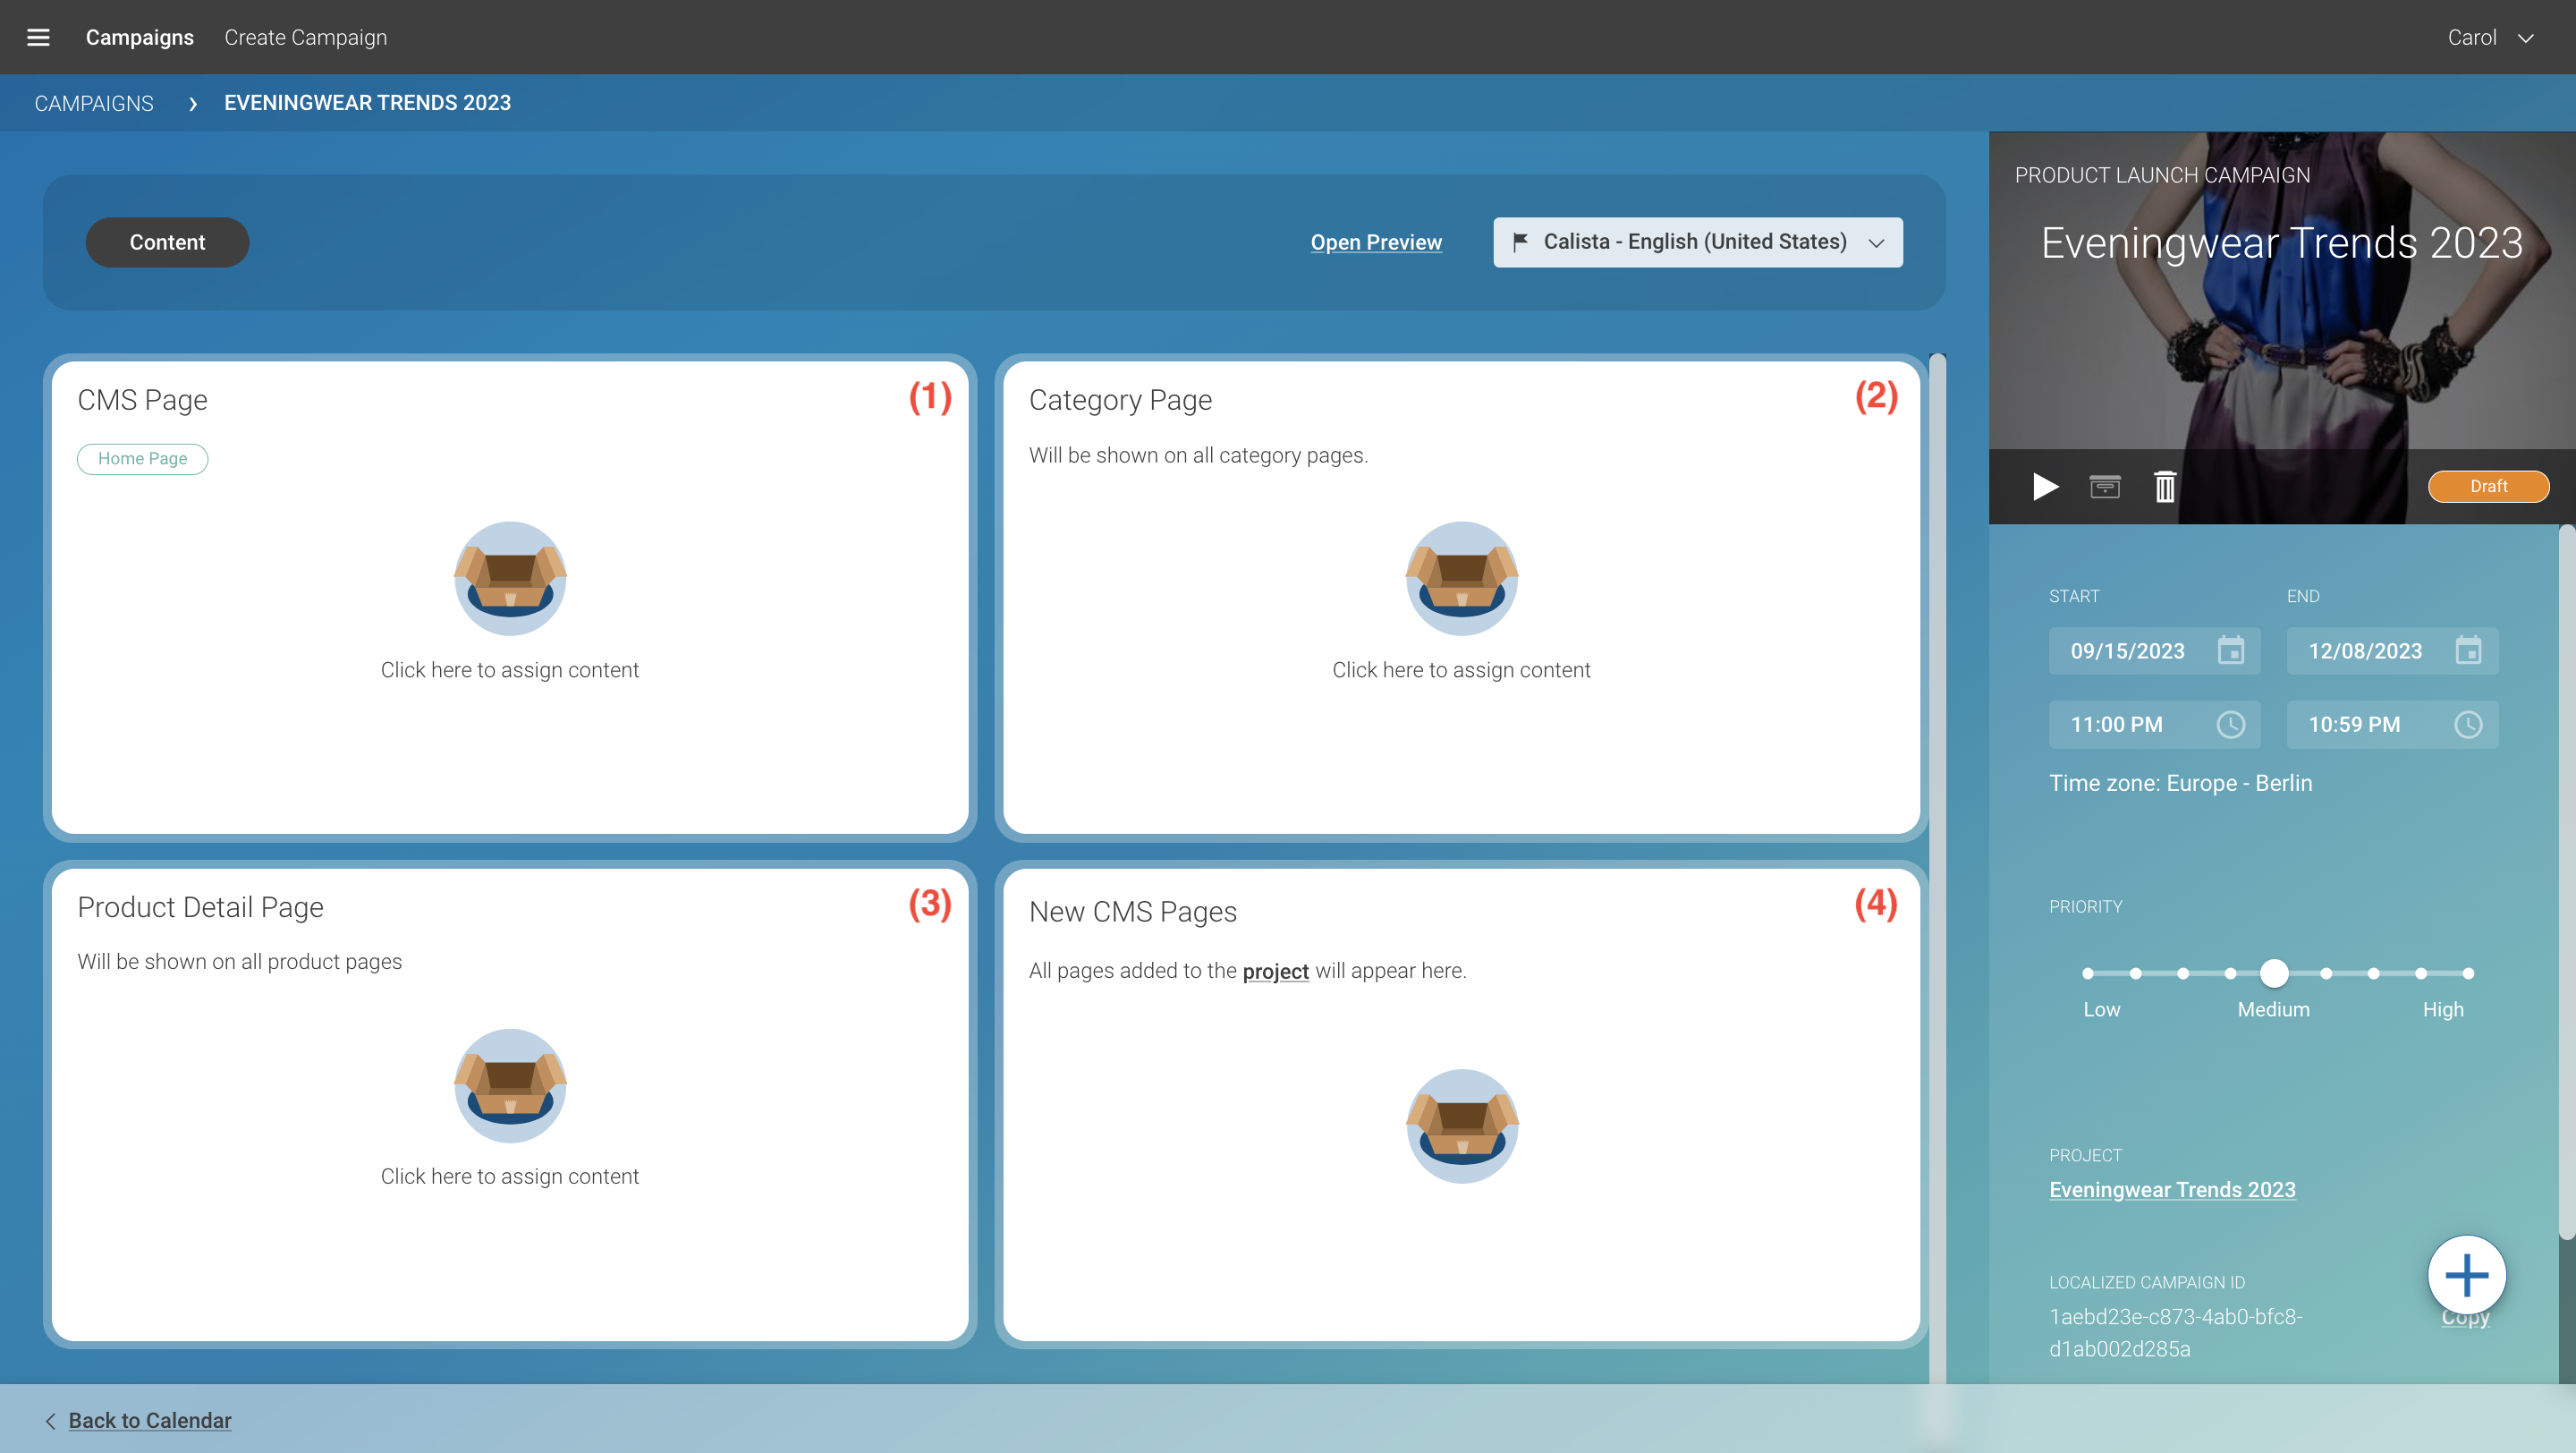
Select the channel for which you want to define the content. In this example, the template contains CMS Pages (1) and Category Pages (2). Under Product Detail Page (3) you can assign content which will be shown on all product pages. Under New CMS Pages (4), all pages that you have added to the project will be displayed. To choose a channel, click on one of the tiles.
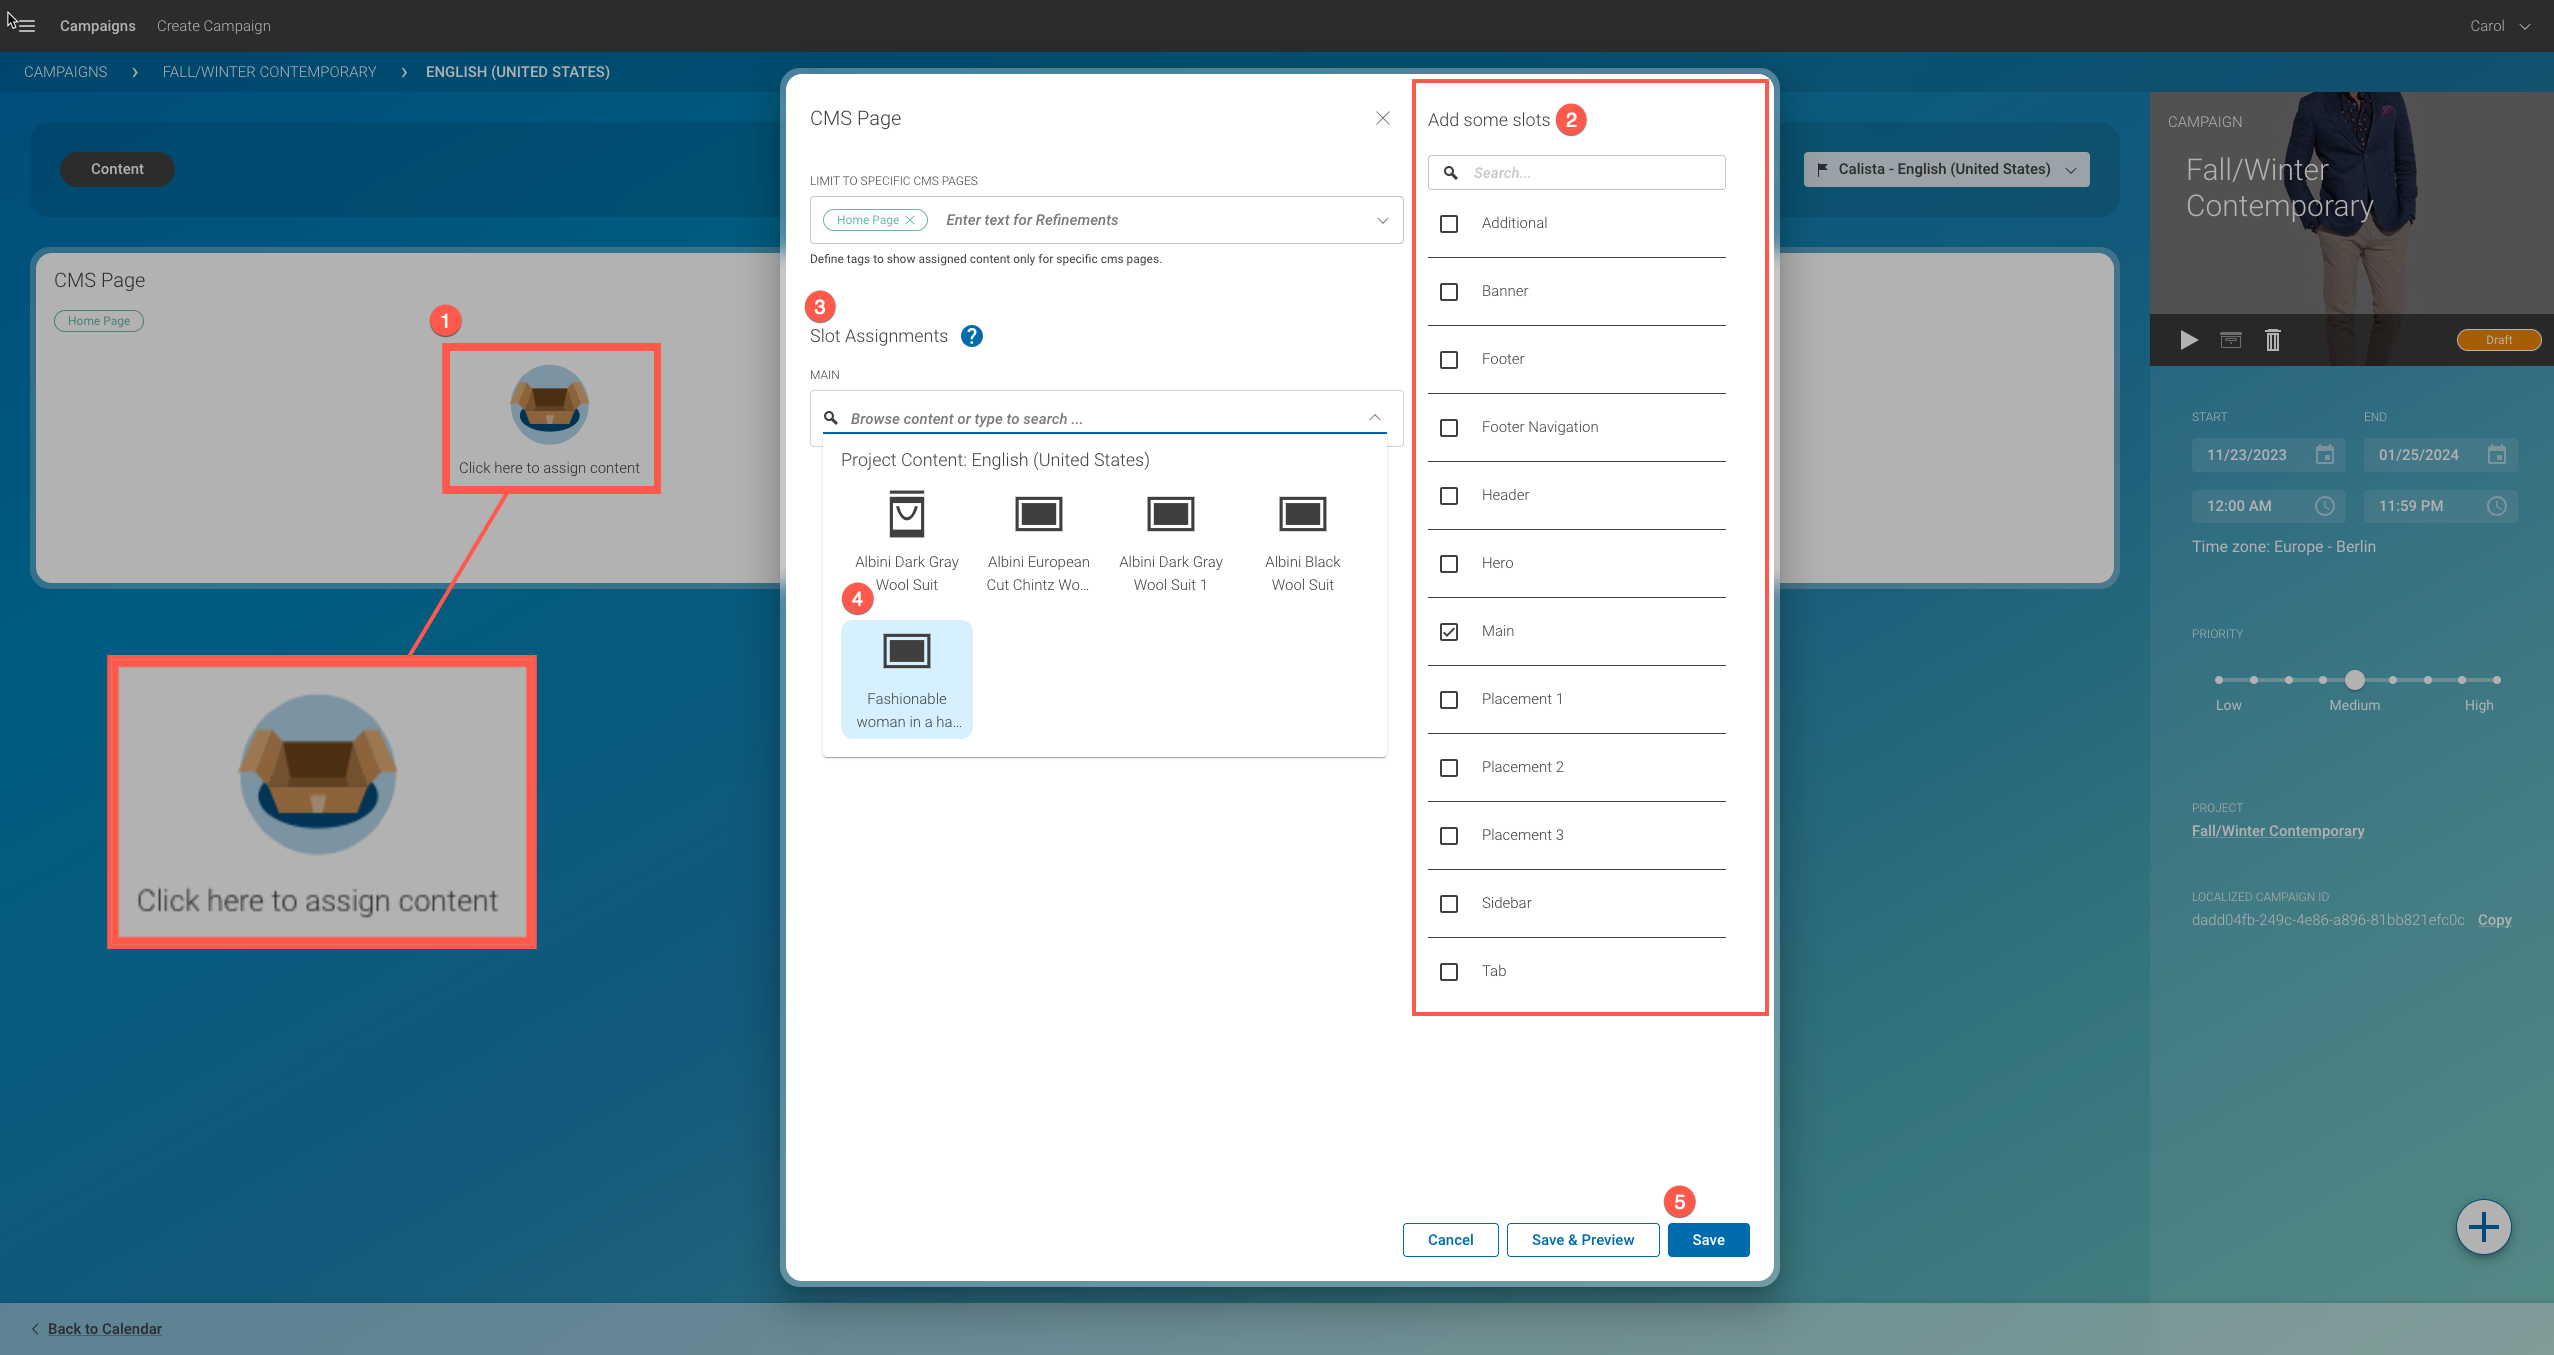
Define in more detail which content should be shown in which pages and slots:
Your CoreMedia installation might contain more than one CMS page. Click into the field LIMIT TO SPECIFIC CMS PAGES (1), and you will get a list of all CMS pages. Mark the checkbox of the pages which should show your campaign content.
Each page has several slots in which your campaign content can be shown. Click into the respective slot field (2). You will see a list of all content that you have added to the project. Select one content for each slot and click Save.
Proceed in the same way for the other channels of your campaign.
Prioritize and Start your Campaign
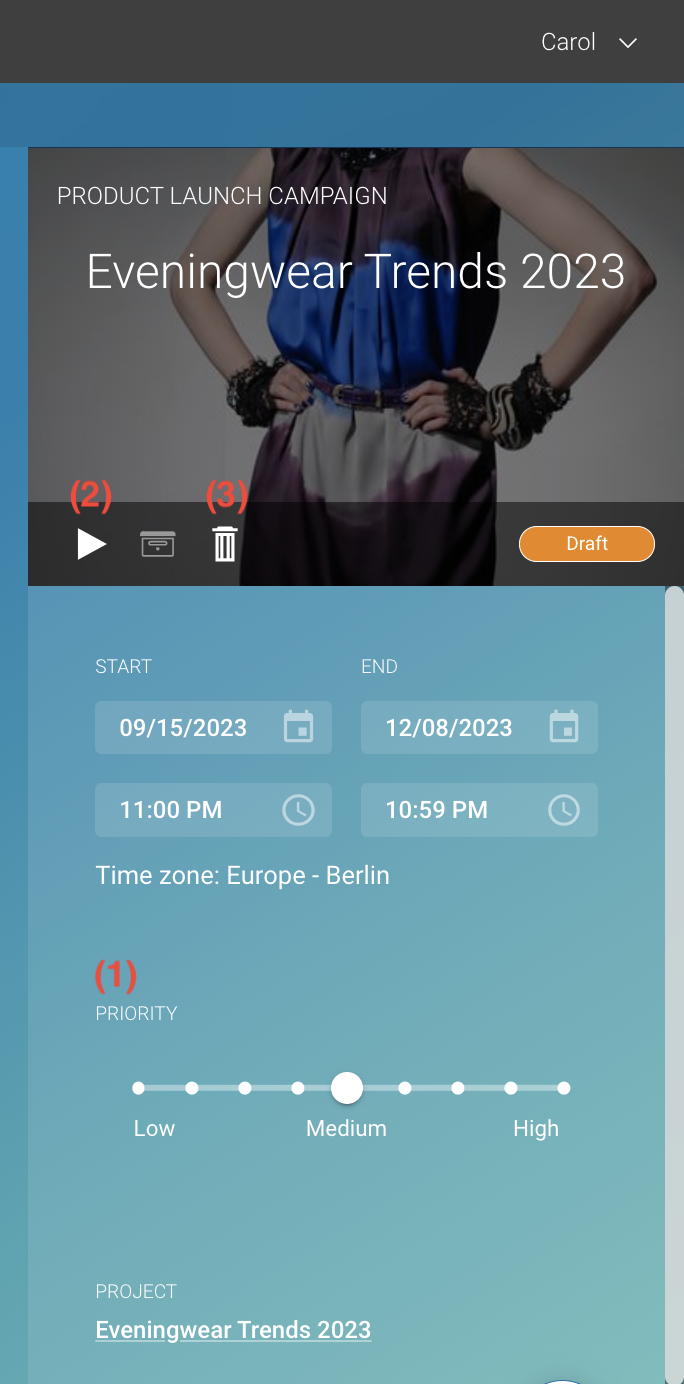
When you are done with all settings and assignments, you can prioritize and start the campaign:
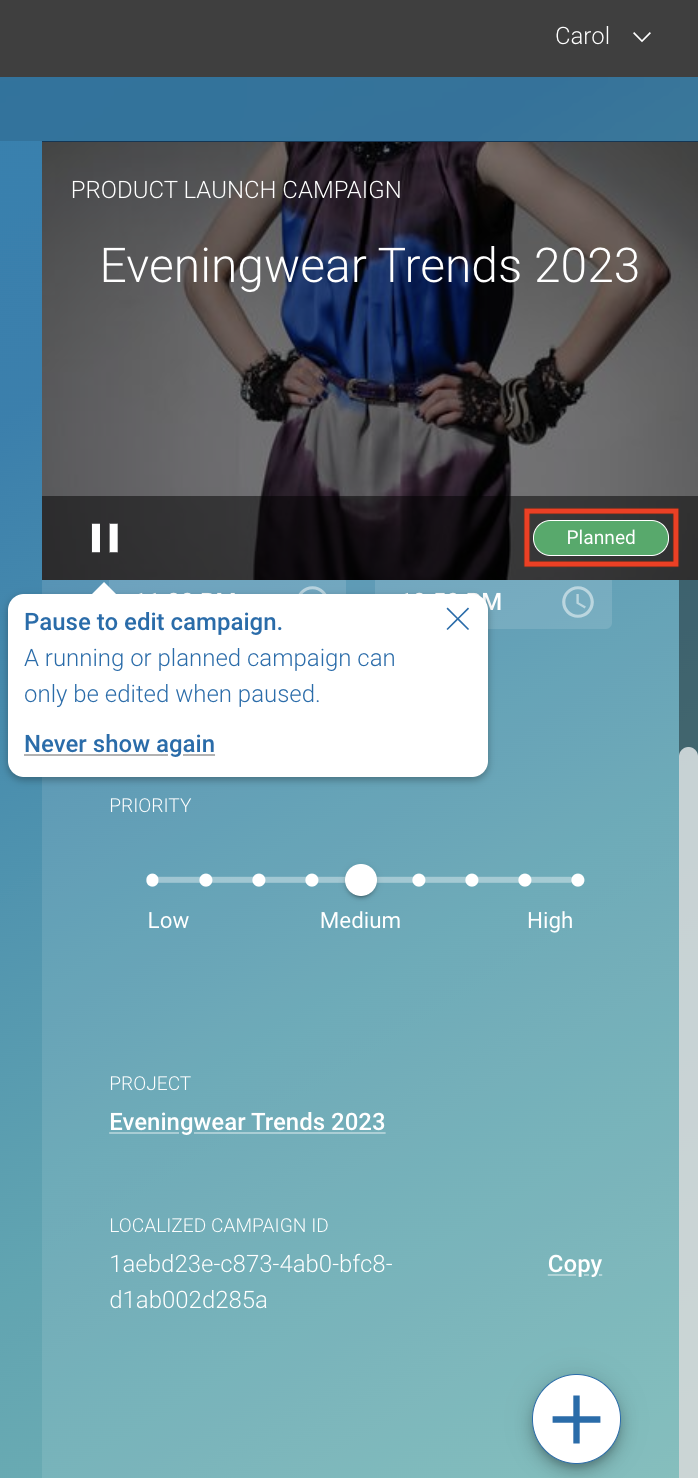
When you have more than one campaign running at the same time, they might share the same channels or slots. In this case, you can prioritize campaigns. Content of campaigns with higher prioritization will be favored in comparison to lower prioritized campaigns depending on the actual delivery implementation. Using the priority chooser (1), you can set the priority.
When everything is done, click the Start button (2) to activate your campaign.
Note
In this example, you have chosen a start date in the future. Therefore, once you click the Start button, the campaign does not immediately start. Once the date in the future is reached, the status of your campaign will switch from Planned to Running.