


Studio User Manual / Version 2310
Table Of ContentsWhile the process of starting a translation differs slightly (see Section, “Translation to Derived Sites” and Section, “Translation to Preferred Site”) the actions you may perform while translating contents are always the same. Once the translation workflow detail panel opens (Figure 4.133, “Translation workflow detail panel”), you have several options:
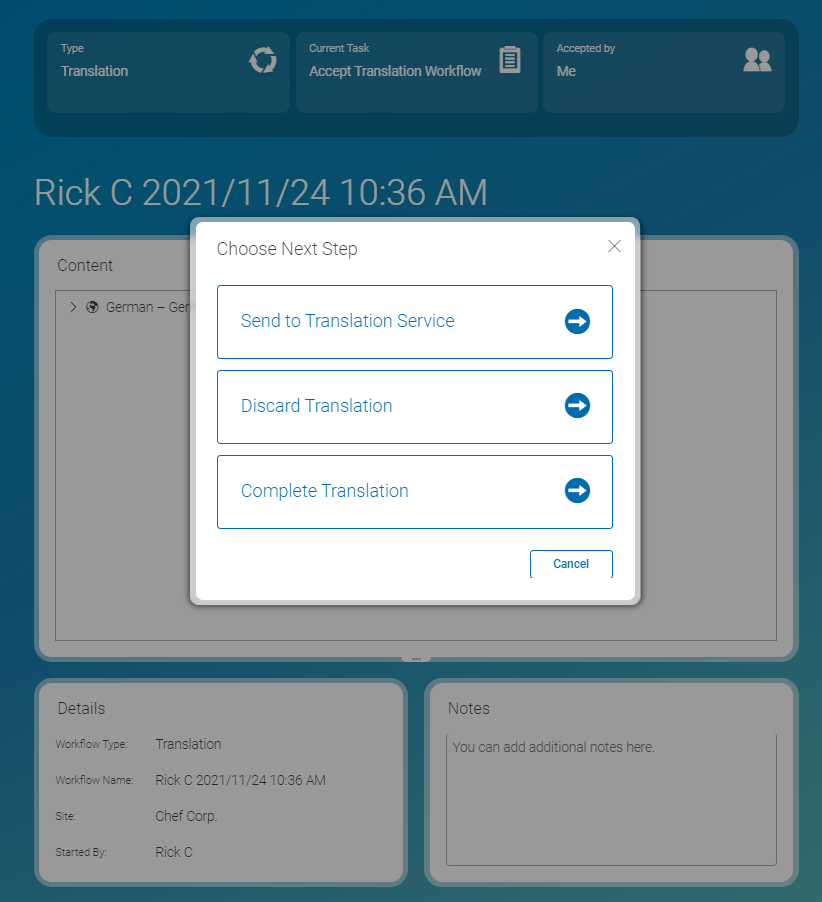
You decide that the content needs no translation (see Section “Reject Changes”)
You want to translate the content manually in Studio (see Section “Manually translate the content”)
You want to translate the content with a translation memory system using XLIFF (see Section “Translating the Content with XLIFF”)
Reject Changes
The translation of the offered content is not needed for this site. By rejecting the translation, content that has been created automatically by the translation workflow will be deleted.
Select the Discard Translation link and confirm your choice in the opening dialog with [Yes, continue] .
Manually translate the content
Double click the content that you want to translate. It opens in the master side-by-side view (see Section 4.7.3.3, “Comparing Translation”). Fields that need translation are highlighted with a green border.
Start to translate the content.
When you are done with the translation, select Complete Translation and confirm your choice in the opening dialog with [Yes, continue] .
The translation workflow is finished. The master versions of the translated contents will be set to the current version of their masters automatically.
Translating the Content with XLIFF
The XML Localisation Interchange File Format (XLIFF) is a standard format for translations with translation memory systems. With CoreMedia Content Cloud you can export and import content as XLIFF files.
Export the content as an XLIFF file by clicking the button [Download XLIFF] in the Workflow App.
The file will be stored in the download folder of your system.
Depending on your review process you might now either choose to wait and keep the translation workflow assigned to yourself or you might consider choosing Send to Translation Service and click [Apply] . In this case a new task, a review task, will be created which is offered to all responsible site managers. Thus, after the results of the translation service are available anyone might take the task and continue the workflow as stated below.
When you have finished the translation, import the XLIFF file again as described in Section “Importing an XLIFF file”.
When you have imported the XLIFF file select Finish Content Localization and click [Apply] .

Importing an XLIFF file
Importing a translated XLIFF file is quite easy. Simply proceed as follows:
Open the upload dialog from the Create Content menu (see Section 4.4.1.6, “Uploading Files”) or click the Upload files icon in the Library. The upload dialog opens.
Drag the XLIFF file into the upload dialog and press [OK] .
The imported content item opens after the import is completed. A pop-up window displays issues that may have occurred during the import.
